Azure IoT Hub allows you to route incoming messages to specific endpoints without having to write any code.
Refer to previous articles (here, here, and here, to learn how to create an Azure IoT Hub and how to add a device to that hub.
To perform automatic routing, you must
- Create an endpoint
- Create and configure a route that points to that endpoint
- Specify the criteria to invoke that route
Navigate to the Azure Portal and log in.
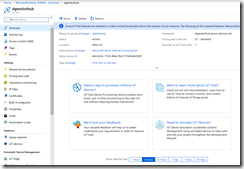
Open your IoT Hub, as shown in Fig. 1.
Click the [Message routing] button (Fig. 2) under the "Messaging" section to open the "Routing" tab, as shown in Fig. 3
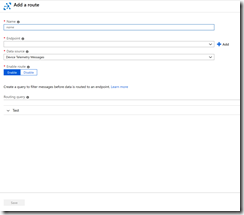
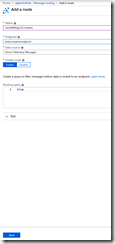
Click the [Add] button to open the "Add a route" blade, as shown in Fig. 4.
At the "Name" field, enter a name for your route. I like to use something descripting, like "SendAllMessagesToBlobContainer".
At the "Endpoint" field, you can select an existing endpoint to which to send messages. An Endpoint is a destination to send any messages that meet the specified criteria. By default, only the "Events" endpoint exists. For a new hub, you will probably want to create a new endpoint. To create a new endpoint, click the [Add] button. This displays the "Add Endpoint" dialog, as shown in Fig. 5.
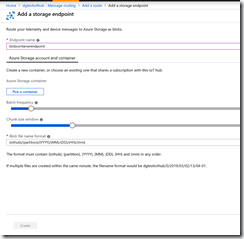
At the "Endpoint" dropdown, select the type of endpoint you want to create. Fig. 6 shows the "Add a storage endpoint" dialog that displays if you select "Blob Storage".
At the "Endpoint name", enter a descriptive name for the new endpoint.
Click the [Pick a container] button to display a list of Storage accounts, as shown in Fig. 7.
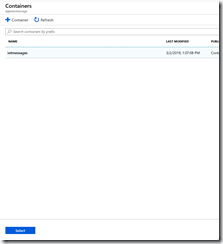
Select an existing storage account or click the [+ Storage account] button to create a new one. After you select a storage account, the "Containers" dialog displays, listing all blob containers in the selected storage account, as shown in Fig. 8.
Select an existing container or click the [+Container] button to create a new container. Messages matching the specified criteria will be stored in this blob container.
Back at the "Add a storage endpoint" dialog (Fig. 6), you have options to set the Batch frequency, Chunk size window, and Blob file name format.
Multiple blob messages are bundled together into a single blob.
The Batch frequency determines how frequently messages get bundled together. Lowering this value decreases latency; but doing so creates more files and requires more compute resources.
Chunk size window sets the maximum size of a blob. If a bundle of messages would exceed this value, the messages will be split into separate blobs.
The Blob file name format allows you to specify the name and folder structure of the blob. Each value within curly braces ({}) represents a variable. Each of the variables shown is required, but you can reorder them or remove slashes to change folders into file name parts or add more to the name, such as a file extension.
Click the [Create] button to create the endpoint and return to the "Add a route" blade, as shown in Fig. 9.
At the "Endpoint" dropdown, select the endpoint you just created.
At the "Data source" dropdown, you can select exactly what data gets routed to the endpoint. Choices are "Device Telemetry Messages"; "Device Twin Change Events"; and "Device Lifecycle Events".
The "Routing query" field allows you to specify the conditions under which messages will be routed to this endpoint.
If you leave this value as 'true', all messages will be routed to the specified endpoint.
But you can filter which messages are routed by entering something else in the "Routing query" field. Query syntax is described here.
Click the [Save] button to create this route.
In this article, you learned how to perform automatic routing for an Azure IoT Hub.
