A container allows us to virtualize applications and data and host this on top of a host virtual machine.
Containers provide the following advantages:
- It allows one VM to host multiple containers, potentially providing more efficient use of resources.
- It allows us to isolate the applications in different containers, so they will not interfere with one another.
- Containers allow us to split up an application physically, so that we can deploy, update, and scale each part of the application independently.
Docker is a tool designed to manage containers.
A container is based on an image. An image contains all the information to create a container in the same way that a class contains the information to instantiate an object and a blueprint contains the information to construct a building.
So, before you create a container, you must create an image and tell it what components will be in the container.
The steps are:
- Create the application source code and/or data in a folder and (optionally) its subfolders
- Create a Dockerfile that describes what goes into the image/container and what to do with it
- Use Docker to build the files into an Image
- Push the Image to a Registry
- Create and run a container based on that image
Setup
Before you begin, you must install Docker. A simple way to do this is to install Docker Desktop, which you can download here.
You will also need an account at an online registry, such as Docker Hub or Azure Container Service. In this article, I use Docker Hub.
Once you have everything installed and set up, we can walk through the steps listed above.
Create an Application
I created a simple node.js application, consisting of only a single file: app.js with the following code:
var http = require('http');

    var portNumber = 8081;

    http.createServer(function (req, res) {

    res.writeHead(200, {'Content-Type': 'text/html'});

    res.write('<h1>Hello World!</h1>');

    res.write('The time is ' + new Date());

    res.write("<h2>Count to 5</h2>");

    res.write('<ul>');

    for (var i = 1; i <=5 ; i++) {

      res.write('<li>' + i);

    }

    res.write('</ul>');

    res.write('<p>Done!</p>');

    res.end();

    }).listen(portNumber);

    console.log('Server running at http://localhost:' + portNumber);
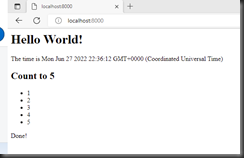
This simply outputs some HTML on port 8081. When run, it will display some text, the current date/time, and a list of numbers.
Dockerfile
In the same folder, I created a file named "Dockerfile" (with no extension)
Dockerfile supports many instructions, but I have kept this one simple, as shown below:
FROM node:current-alpine
LABEL author="David Giard"
WORKDIR /src/app
COPY . /src/app
ENTRYPOINT ["node", "app.js"]
FROM tells Docker which image to begin with. The node:current-alpine is a Linux container with the latest version of alpine node installed. You can find a list of pre-built images at https://hub.docker.com/search
LABEL is optional. We use it to add metadata to our image, as a name/value pair. Adding the author is common.
WORKDIR tells Docker to set the current working folder in the container.
COPY tells Docker to copy files from a folder on my location machine to a folder in the container. The first "." represents the current folder and the second "." represents the working directory in the container, so my command tells Docker to copy all files in the current folder (where Dockerfile is located) to the working folder.
ENTRYPOINT is a command or executable to run to start the container, along with any arguments, separated by commas.
["node", "app.js"]
You can read all about the tags in Dockerfile here.
Build an Image
We build an image from the files in the current folder with the following command:
docker image build -t image_name .
where image_name consists of three parts: the Docker registry name, the Docker repository name, and a tag (which is often used to define the version), using the following format:
registry_name/repository_name:tag
I have a registry on DockerHub named "dgiard", so I can use an image name like the one below to identify version 1.0 an image in my registry in a repository named "myapp":
dgiard/myapp:1.0
The following command creates an image named dgiard/myapp:1.0 (registry=dgiard; repository=myapp; tag=1.0)
docker image build -t dgiard/myapp:1.0 .
Push Image to Registry
After creating an image, we can push it to a registry with the following command:
docker image push image_name
Of course, we need write permission in the registry before we can push an image to it. If we are using DockerHub, we may need to log in first.
Create and run Container
Once it is in the registry, we can run it from any computer with access to the registry via the following command:
docker container run -d --name application_name –p local_port:port_in_container image_name
where:
- application_name is a name by which you want to identify this application
- local_port:port_in_container maps a port on the local computer with a port inside the container.
- image_name is the name assigned to the image when we built it.
Our sample app runs on port 8081, but we can map local port 8000 to 8081 in the container with the clause -p 8000:8081.
In our example above, the command to run a container locally becomes:
docker container run -d --name app1 -p 8000:8081 dgiard/myapp:1.0
We can test our app by opening a browser and entering the following in an address bar:
http://localhost:8000
This should run the application, as shown in Fig. 1.
Conclusion
This article showed how to create a Docker image; then, build, push, and run a container based on that image.
Here are the key Docker commands we executed for our example:
docker build -t dgiard/myapp:1.0 .
docker image push dgiard/app1:v1
docker container run -d --name app1 -p 8000:8081 dgiard/myapp:1.0
