In previous articles, I showed how to create an application using the Microsoft Bot Framework using Visual Studio. But you can also create a chatbot application directly within the browser.
Navigate to the Azure Portal and log in.
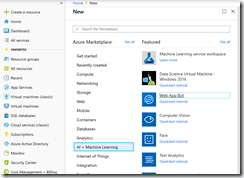
Click the [Create a resource] button (Fig. 1) and select AI + Machine Learning | Web App Bot, as shown in Fig. 2.
The "Web App Bot" blade displays, as shown in Fig. 3.
At the "Bot name" field, enter a unique name for your bot.
At the "Subscription" field, select the Azure subscription with which to associate this bot.
At the "Resource group" field, select an existing resource group to contain your bot or click the "Create new" link to create a new resource group.
At the "Location" field, select a region in which your bot should be located. Consider the location of any resources it will be consuming and users that will communicate with it.
At the "Pricing tier", select "F0" for a free bot or "S1" for a paid bot with fewer limitations.
At the "App name" field, enter a unique name for the web service exposed by your bot.
At the "Bot template" field, select either "Basic Bot" for a simple example of a bot using LUIS, Analytics, and Storage or "Echo Bot" for an even simpler bot.
If you select "Basic Bot" template, you will need to select the location of the LUIS service. Only a few regions currently support LUIS; but you should try to keep it close to your bot location.
At the "App service plan" field, select or create a new App Service plan. This defines the location and location of the servers on which your code will run. At creation, only S1 servers are available, but you can change this after the bot is created.
At the "Azure Storage" field, select or create an Azure Storage account in which to save bot configuration and state information.
If desired, turn on application insights and select a location for this service.
An App ID and password are required for a Microsoft Bot. By default, these values are automatically generated for your. If desired, you may explicitly set these values.
A completed blade is shown in Fig. 4.
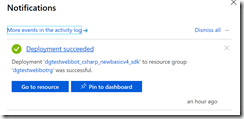
After a few minutes, a notification indicates the bot is created. Click the [Go to resource] button (Fig. 5) or use the left menu to search for the bot by name.
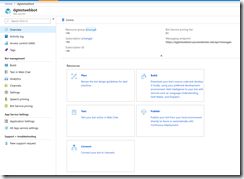
By default, the bot's "Overview" blade displays, as shown in Fig. 6.
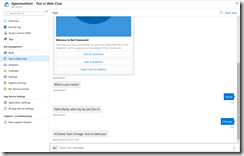
To test your bot, click the "Test in Web Chat" blade and type "Hello" in the textbox labeled "Type your message here" to begin a conversation. A sample conversation for the Basic Bot is shown in Fig 7.
From the "Build" blade (Fig. 8), you can click the "Open online code editor" to edit your code directly in the browser; or click the [Download bot source code] to generate and download a ZIP file of a C# solution containing your code.
In this article, I showed how to build a bot app in the portal in your browser.
Fig. 8


