Microsoft Visual Studio makes it very simple to create a new bot with the Microsoft Bot Framework.
Launch Visual Studio 2017 (You can download a free version here)
From the menu, select File | New | Project.
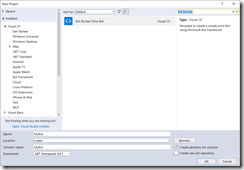
The "New Project" dialog displays, as shown in Fig. 1.
Create a new "Bot Builder Echo Bot" project. From this dialog, you find this template by either expanding Visual C# | Bot Framework in the navigation tree on the left; or by entering "Bot Builder" in the search box at the top right.
Enter a name and location for your project and click the [OK] button.
When the project loads, select Build | Rebuild Solution from the menu to compile the solution and validate all references.
This simple bot receives a message and echoes back the same message, along with the length of that message. The relevant code is in the MessageReceivedAsync method of the RootDialog class, which is shown in Listing 1.
private async Task MessageReceivedAsync(IDialogContext context, IAwaitable<object> result)
{
  var activity = await result as Activity;

  // Calculate something for us to return
  int length = (activity.Text ?? string.Empty).Length;

  // Return our reply to the user
  await context.PostAsync($"You sent {activity.Text} which was {length} characters");

  context.Wait(MessageReceivedAsync);
}
Listing 1
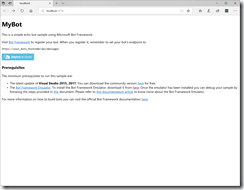
After the solution is rebuilt, select Debug | Start Debugging from the menu to launch the bot. This will host a web service and a web page on your local machine. The web page will display in your browser, as shown in Fig. 2.
Note the URL of this page, which will look something like
http://localhost:nnnn/
where nnnn is the port number on which this web application is running.
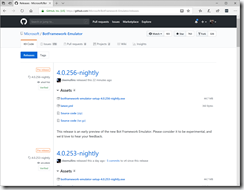
You can call the bot's web service from many sources; but the easiest way to test it is with the Bot Framework emulator. You can find detailed information on this emulator here. You can download the latest version of the emulator from here, as shown in Fig. 3.
Download and run the most recent EXE file from this site to install the emulator on your local PC.
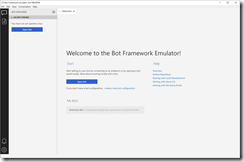
Launch the emulator to view the form shown in Fig. 4.
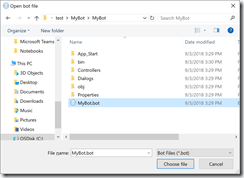
Click the [Open Bot] button on the "Welcome" tab of the emulator. A JSON file containing configuration about your bot was created for you and saved in the Visual Studio project folder. Its root name will be the same as the project, but it will have a ".bot" extension. Select this file and click the [Choose file] button, as shown in Fig. 5.
The format of this file looks like the sample in Listing 1.
{
  "name": "MyBot",
  "secretKey": "",
  "services": [
    {
      "appId": "",
      "id": "http://localhost:3978/api/messages",
      "type": "endpoint",
      "appPassword": "",
      "endpoint": "http://localhost:3978/api/messages",
      "name": "MyBot"
    }
  ]
}
Listing 2
NOTE: When you return to the emulator, you can click the [Open Bot] button or click a shortcut link below the button to re-load the configuration.
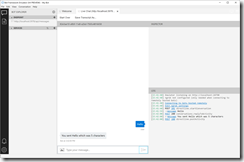
After you save (or open) a configuration file, a "Live Chat" tab displays in the emulator, as shown in Fig. 6
To test the bot, type a message into the "Type your message" textbox and press [ENTER]. Your message will display. A short time later, a response will display with your message, followed by the number of characters.
You can find this code in the SimpleBotDemo project of the Bot-Framework-Demos on my GitHub page.
In future articles, I will show you how to enhance your bot, deploy it to a public site, such as Azure, and call it from a variety of clients. But this is the simplest way to create, run, and test a bot.
