Live Mesh offers a folder synchronization feature that allows you to designate a folder on your computer and replicate all changes to files in that folder to a matching folder on one or more other computers. These other computers could be
computers that you own (so that you can synchronize documents or project files between a home and a work PC);
your friend's computer (allowing multiple users to update the same documents and keep make sure everyone has the latest changes);
or a virtual computer in the cloud (so that your documents are backed up and accessible anywhere you have an Internet connection).
Here's how it works. To get started, go to http://mesh.com and sign in with your Windows Live ID. (If you don't yet have a Live ID, you can get one at https://signup.live.com). Read the license agreement and click "I Agree" to proceed.
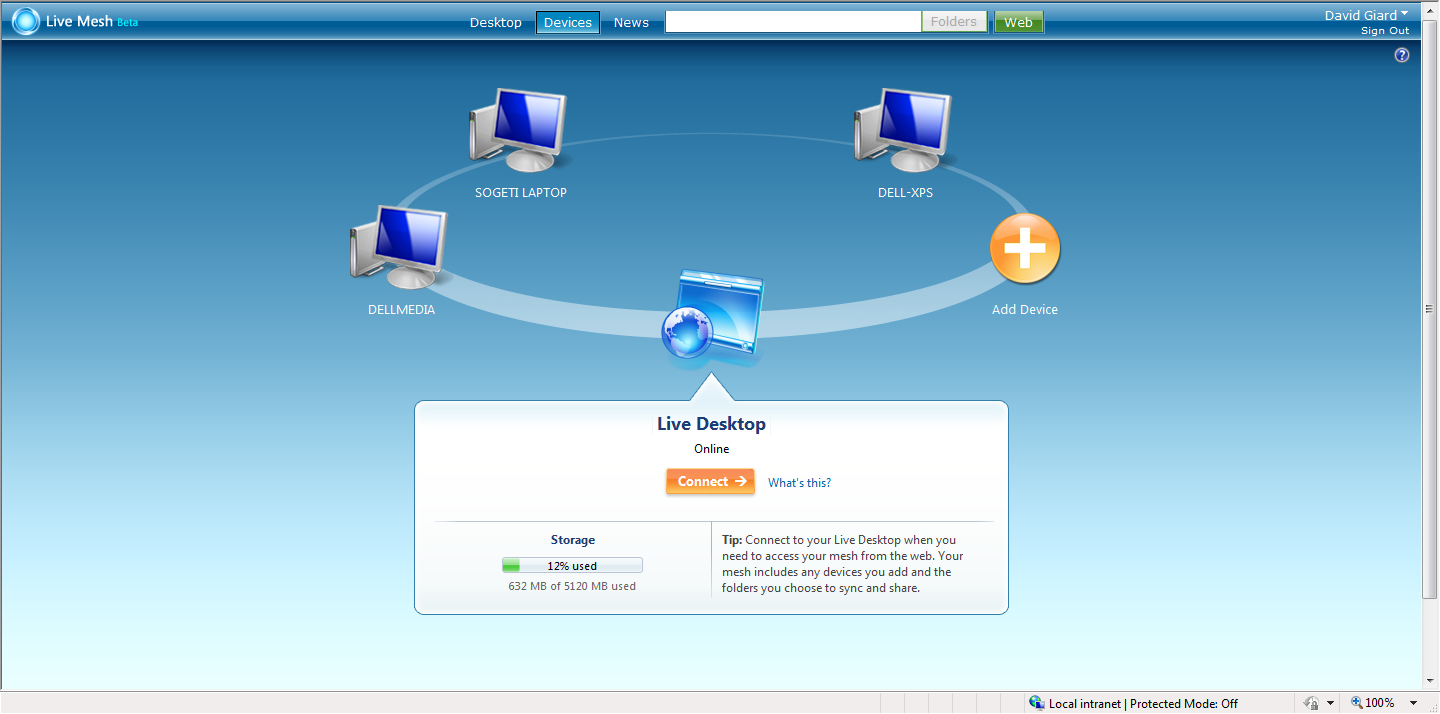
The first page displayed is the Mesh Devices page which shows all the devices on which you wish to manage through Live Mesh. The Devices page allows you to add computers and other devices to your Mesh so that you can view and manage them.
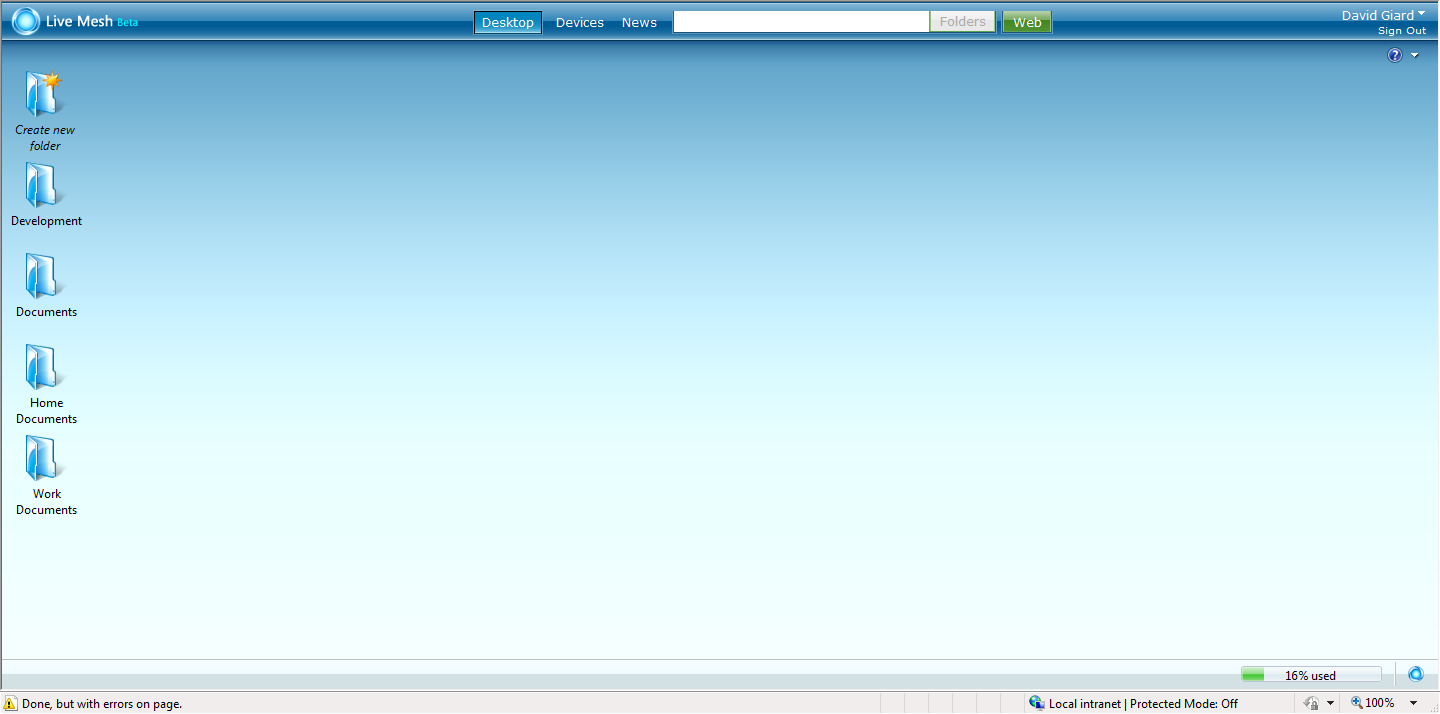
You will see an icon representing each computer currently included in your mesh. One of these icons is the "Live Desktop". This is a virtual device that exists "in the cloud", meaning it is available from anywhere as long as you have Internet access. If the bottom arrow is not pointing to the Live Desktop, click the Live Desktop icon once to rotate it to the bottom. Then click Connect to view this device. You will see a screen that looks similar to the desktop of a computer running Windows XP, Vista or 7.
Although this Live Desktop computer has no start menu, it does have by default a couple empty folders - "Home Documents" and "Work Documents". These folders exist to hold documents that you can synchronize from your own physical computer.
To be able to synchronize documents on your physical computer, you must add your computer to your mesh.
To do so, you must be sitting at your computer. From the Devices page, click the "Add Device" icon. The icon will rotate to the bottom. From the dropdown at the bottom of the screen, select whether your computer is running a 32-bit or 64-bit version of Windows. Even though Windows 7 is not listed in this dropdown, I am running it on 64-bit Windows 7 and it seems to work fine. Click "Install" to begin installing the Mesh tools to your local computer and to add your computer to the mesh.
You will be prompted to give your computer a descriptive name and it will appear hereafter on the Devices page with that name. Step through the Installation wizard to install the Mesh client software on your computer.
Once the Mesh tools are installed on your computer, you can begin synchronizing folders.
You should see two shortcuts on your desktop for "Home Documents" and "Work Documents". Click these shortcuts to create these folders and have them synchronize to the folders of the same name on the Live Desktop. Any files that you drag into either of these folders will be automatically synchronized the folder of the same name on your Live Desktop. Any subsequent updates to files in those folders will show up in the file on your live desktop.
But you are not limited to only synchronizing these two folders. You can synchronize any folder on your computer.
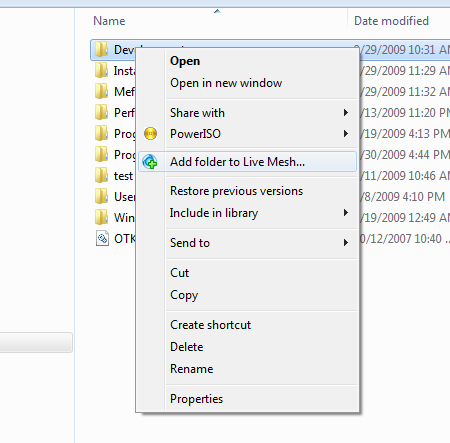
To synchronize a folder, you need to add it to your mesh. Right-click the folder in Windows Explorer and select "Add folder to Live Mesh...".
The "Add Folder" dialog displays.
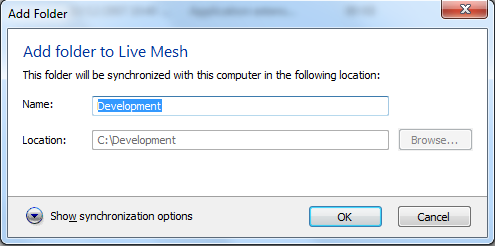
Here you can give the folder a more descriptive name if you like. Click "Show Synchronization Options" in the dialog. The dialog will expand to list every device in your mesh.
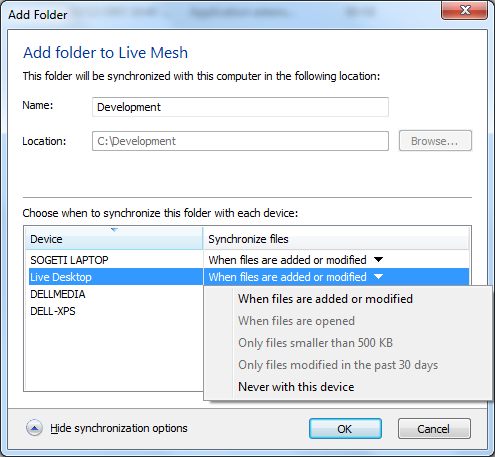
You can specify the devices that should synchronize with this folder and how synchronization occurs. By default, the folder is synchronized between your local computer and the Live Desktop and that synchronization occurs whenever a file is added, deleted or modified on either device. You can click the arrow next to a device to change the options. For example, you may wish to skip large files because those take a long time to synchronize and may use up your disk space quota.
It may also be useful to synchronize a folder with another physical computer. To do so, you must first add that other computer to you Mesh account (see above); then it will appear in the Synchronization Options dialog and you can specify exactly how you want to share the selected folder with the selected device.
When you are finished, the folder will turn blue to indicate it is synchronized using Live Mesh.
Live Mesh is a simple way to backup files, make data accessible from multiple locations, and collaborate with other users.
