A container allows us to virtualize applications and data and host this on top of a host virtual machine.
Containers are similar to Virtual Machines in that they virtualize some of your application. The difference is that a Virtual Machine abstracts away the hardware and networking, while a container abstracts away more. Because a container sits on top of a Virtual Machine, it also abstracts away the operating system, which is handled by the VM. Just as one physical machine can host multiple Virtual Machines, one Virtual Machine can host multiple containers.
Containers provide the following advantages:
- They allow one VM to host multiple containers, potentially providing more efficient use of resources.
- They allow us to isolate the applications in different containers, so they will not interfere with one another.
- Containers allow us to split up an application physically, so that we can deploy, update, and scale each part of the application independently.
A container is based on an image. An image contains all the information to create a container in the same way that a class contains the information to instantiate an object and a blueprint contains the information to construct a building.
Docker is a tool designed to manage containers.
A simple way to install Docker locally is to install Docker Desktop, which you can download here for Windows, Mac, or Linux.
To share images with other users, other computers, or remote platforms (e.g., cloud providers), you need to publish them to a repository. Docker Hub allows you to create repositories. You can create a free account on Docker Hub and create one or more repositories within that account. A repository contains images and containers that you can share. Often all the images in a given repository are related; for example, you may publish images with different versions of the same software and store them all in one repository.
Docker provides some repositories and images that you can use for free. You can use these to learn how to use Docker. For example, you can open a command prompt and type the following:
docker run –d –p 3000:80 docker/getting-started
This will create and run a container hosted in the “getting-started” repository of the “docker” registry. This is a sample container that contains a web application that runs on port 80. Let’s walk through the parts of the above command.
docker run tells Docker to download the container and run it.
docker/getting-started tells Docker where to find the container. In this case it is in the “docker” registry and in the “getting-started” repository.
-d tells Docker to run this container in “detached” mode. This means that Docker will run it asynchronously and immediately return you to the command prompt. Alternatively, you can run the container in “interactive” mode using the –it switch. This will change your command prompt and place you inside the container, rather than your host machine.
-p 3000:80 is used for port mapping. The web application inside the container runs on port 80. We need to tell Docker which port to expose on the local machine to access that port. In this example, we are mapping the local machine’s port 3000 to port 80 in the container.
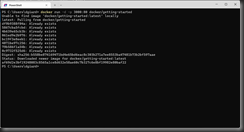
The output after running the above command is shown in Fig. 1.
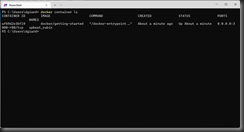
After you run the command, you can view all running containers using the command docker container ls, as shown in Fig. 2.
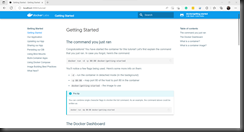
After successfully executing the docker run command, we can view the container’s web application in a browser on our local machine by navigating to http://localhost:3000. This should render the container’s web app, as shown below.
In this article, I explained the fundamentals of images, containers, and Docker; and showed some basic Docker commands.
In the next article, I will show you how to create your own image and publish it to a repository.


