Often I want to set up a simple web server to render pages that consist only of client-side code, such as HTML, CSS, and JavaScript. In the past, I've created such pages using Visual Studio, but VS contains more functionality than I need in this case and that functionality can slow me down.
I found a lightweight web server solution in node.js, which is quick to install, quick to start up, and (relatively) simple to use. As a bonus, it will run on multiple operating systems.
Here are the steps I use to create a web server.
- Install node
- Create and open a folder for your pages
- npm Init to create the package.json file that node requires
- Create a "views" folder for your pages and add any pages to it
- Install express and ejs
- Create a main script
- Create HTML pages
- Start the web server
- Try it out
1. Install node
You can download node from https://nodejs.org/en/download/. Select your operating system and run the installer. It is a small download and a quick install.
2. Create and open a folder for your pages.
In Windows, I use the command prompt for this. I create my projects in either the c:\development folder (if I plan to keep them) or the c:\test folder (if they are scratch projects for learning)
So, for a scratch project, I would use the following commands to create a folder named "nodetest1":
cd c:\test
md nodetest1
cd nodetest1
3. npm Init to create the package.json file that node requires
Node requires a file named package.json with important information about the project. A quick way to create this is with the command "npm Init". It will prompt you for information required by package.json, even providing default values for some of these settings. Press ENTER at a prompt to accept the default in parentheses or override the default by typing in a new setting. Below is an example of me walking through this command, accepting mostly defaults
npm init
This utility will walk you through creating a package.json file.
It only covers the most common items, and tries to guess sensible defaults.
See `npm help json` for definitive documentation on these fields
and exactly what they do.
Use `npm install
save it as a dependency in the package.json file. See the session below for reference.
Press ^C at any time to quit.
name: (nodetest1)
version: (1.0.0)
description: best app evar
entry point: (index.js)
test command:
git repository:
keywords:
author: David
license: (ISC)
About to write to C:\test\nodetesting\nodetest1\package.json:
{
"name": "nodetest1",
"version": "1.0.0",
"description": "best app evar",
"main": "index.js",
"scripts": {
"test": "echo \"Error: no test specified\" && exit 1"
},
"author": "David",
"license": "ISC"
}
Is this ok? (yes)
As you can see the file you create is echoed to the screen before you confirm its creation.
4. Create a "views" folder for your pages and add any pages to it
The "md" command works for this in the command prompt
md views
5. Install express and ejs
Express and ejs are packages required for a simple web server. You can use the npm install command to install them. Add the "--save" switch to this command to update the dependencies in your package.json file. The following 2 commands install express and ejs packages, respectively.
npm install --save express
npm install --save ejs
Check out the package.json and verify that these packages now appear in the dependencies section, as shown in the example below:
"dependencies": {
"ejs": "^2.4.1",
"express": "^4.13.4"
}
6. Create a main script.
Below is the simplest script I could create that serves up any page in the "views" folder and sets a default page. In the example above, I named it "index.js". You can name it whatever you want, but you should set the "main" attribute in package.json to the name of your file. I have commented each line to explain what it does.
// This script uses the express library
var express = require('express');
var app = express();
// Tell node where to find the view pages
app.set('views', __dirname + '/views');
// Tell node to use the ejs library to handle the view
app.set('view engine', 'ejs');
app.use(express.static('views'));
app.engine('html', require('ejs').renderFile);
// Set a default page (Optional, but goood to have)
app.get('/', function (req, res) {
res.render('index.html')
});
// Start the web server
var server = app.listen(3000, function () {
console.log("Express is running on port 3000");
});
In package.json, you specified a main JavaScript file. (In the example above, I used the default "index.js". Open package.json to see what you set.) This is the script that will run when you run node.
7. Create HTML pages
In the view folder, create some HTML pages. The script above specified "index.html", so we will need to create this one. Create any other page you like and name them with the ".htm" or ".html" extension. Here are 2 simple examples:
Index.html
<html>
<body>
<h1>Welcome!h1>
<div>
This is the INDEX page
div>
body>
html>
about.html
<html>
<body>
<h1>About Ush1>
<div>
We think therefore we are!
div>
body>
html>
8. Start the web server
To start your web server, simply type "node" followed by the name of your main script. This will launch node and tell you the server is running on port 3000.
9. Try it out
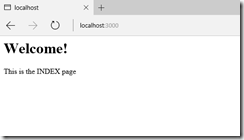
Open a browser and type "http://localhost:3000/" in the address bar. You should see the default page (index.html) displayed. Here is the sample page rendered:
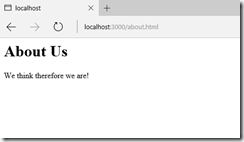
Type "http://localhost:3000/about.html" to see the "about" sample page described above. If you used my example, you will see the following:

At the command prompt, press CTRL+C at any time to stop the server, making these pages unavailable.
You can view this sample code at https://github.com/DavidGiard/simplenodewebserver.
