A caption file can enhance a video file by displaying any dialog as text at the bottom of the video. This is helpful for people who are hard of hearing, for people who do not understand the language spoken in the video and for those who want to play a video at low volume or muted.
Azure Media Services allows you to quickly create a caption file for your saved videos. The steps are:
- Create Azure Media Service
- Upload File
- Encode Asset
- Analyze Video
- Download VTT file
- Upload VTT file
- Share video
I described in detail how to perform steps 1-3 in this article.
Analyze Video
After you have encoded your video, you can use the "Analyze" function to generate the following files:
- A caption file in the TTML format.
- A caption file in the SAMI format
- A caption file in the WebVTT format
I have no statistics to back this up, but I see WebVTT used more than the other 2, so I typically stick with this.
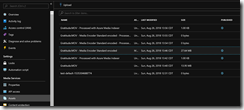
To run the "Analyze" function, open your Azure Media Service in the Azure Portal and open the "Assets" tag as shown in Fig. 1.
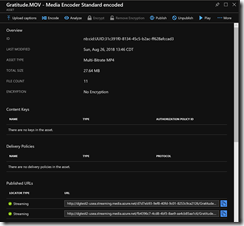
Click the Asset corresponding to the asset corresponding to the encoded video to open its blade, as shown in Fig. 2.
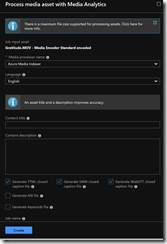
Click the [Analyze] button (Fig. 3) to open the "Media Analytics" blade, as shown in Fig. 4.
Check the checkboxes next to the Closed Caption file formats (and other files) you wish to crate; then click the [Create] button at the bottom to begin creating these files.
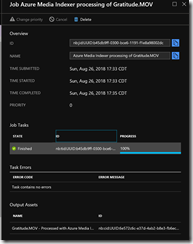
This creates and schedules a new job for this Azure Media Service. You can click the "Media Analytics job added" link (Fig. 5) at the top of the blade or you can open the "Jobs" blade for this Media Service and click the most recent job added. Either method will display the blade for this Job, as shown in Fig. 6.
Jobs run asynchronously in Azure Media Service, so you can continue to work or stay on the Job blade to monitor its status. The status changes from "Scheduled" to "Queued" to "Processing" to "Finished". While processing, the blade will display the percent complete.
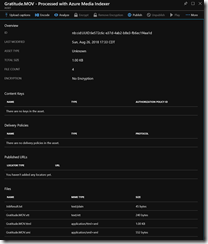
When the job is finished, you will see a new asset in the "Assets" blade for the indexed video, as shown in Fig. 7.
Click this asset to open the blade for the Analytics files created by this job, as shown in Fig. 8.
To make these files available for download, you must publish them. To do so, click the [Publish] button (Fig. 9), which opens the "Publish the asset" blade, as shown in Fig. 10.
After you have published these files, you can download any or all of them. They are listed at the bottom of the Analytics files blade (Fig. 8)
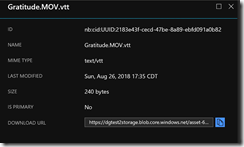
Click the file with the ".vtt" extension to open a blade for this file, as shown in Fig. 11.
The important information is the DOWNLOAD URL field. You can copy this value to your clipboard by clicking the icon to the right of this field.
### Download VTT file
Use CURL to download this file. If CURL is not installed on your computer, you can install it from https://curl.haxx.se/download.html.
Open a command prompt and type
curl -o "fffff.vtt" "http://xxxxxxxxxxxxxxx"
where http://xxxxxxxxxxxxxxx is the DOWNLOAD URL copied from the blade; and fffff.vtt is the name of the local file you want to create when you download this file.
Verify that a new file was created.
Upload VTT file
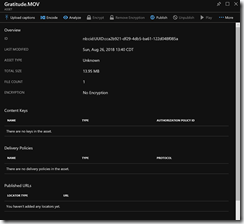
Now upload this VTT file to the video asset. Open the Azure Media Services "Assets" blade and select the Asset for the originally uploaded video to open the blade for this video asset, as shown in Fig. 12.
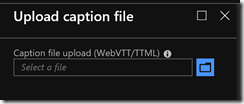
Click the [Upload captions] button (Fig. 13) to open the "Upload caption file" blade, as shown in Fig. 14.
Click the [Select File] icon (Fig. 15) and select the VTT file you downloaded with CURL.
Share video
Now, you can share the video, using a Media Player.
A simple one to use is the Azure Media Player, available at https://ampdemo.azureedge.net/
Information on using this player with Azure Media Services is in this article. /2018/08/21/UploadingEncodingAndSharingAVideoWithAzureMediaServices.aspx.
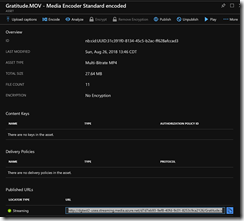
You will need the URL of the video to play, which you can by selecting the Encoded Videos asset from the "Assets" blade to open the properties for this asset, as shown in Fig. 16.
Copy the Streaming URL at the bottom of this blade under the "Published URLs" section. (NOTE: If nothing is in this section, you need to publish this asset.)
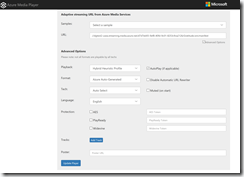
In Azure Media Player, copy this URL into the URL field, omitting the "http:", as shown in Fig. 17.
The copied text should look something like this:
//dgtest2-usea.streaming.media.azure.net/d7d7eb93-9ef8-40fd-9c01-8253c9ca2126/Gratitude.ism/manifest
It will end with the name of your video asset, followed by ".ism/manifest".
Click the [Update Player] button and verify that your video plays properly.
If it plays properly, check the "Advanced Options" checkbox to display more options and scroll to the bottom, as shown in Fig. 18.
Click the [Add Track] button to display new track information, as shown in Fig. 19.
At the "Kind" dropdown, select "Captions"
At the "Track Label" field, enter "English" or the name of the language in which the video is recorded. This text will display in the "Closed Captioning" control.
At the "Language" dropdown, select "English" or the language in which the video is recorded.
At the WebVTT URL, enter the URL of the uploaded VTT file. This will be identical to the video URL. The name of the VTT file will replace the name of the video asset, followed by ".ism/manifest".
It should look similar to this:
//dgtest2-usea.streaming.media.azure.net/d7d7eb93-9ef8-40fd-9c01-8253c9ca2126/Gratitude.vtt
Fig. 20 shows these fields completed for my video.
Click the [Update Player] button.
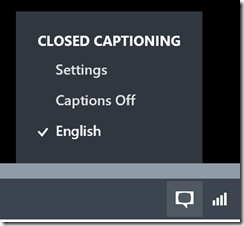
Now, when you play the video, you should see a "CLOSED CAPTIONING" icon at the bottom right. Click this to reveal the CLOSED CAPTIONING setting and select the caption language you just added (English in the case of the video in Fig. 21)
With the captions enabled, you should see text below your video whenever anyone is speaking, as shown in Fig. 22.
In this article, I showed you how to create closed captioning and share a video that includes this captioning.
