In the last article, I showed how to create a new Azure Mobile Service in the portal. In this article, I will show you how to use the wizard to create an application, consisting of a new table, an HTTP endpoint to access that table, and a sample client application to access the data through that endpoint.
Log onto the Azure Portal and select the MOBILE SERVICES icon in the left menu. Figure 1 shows the Mobile Service we created last time.
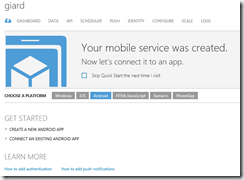
Click the arrow next to the service name to display details about the service (Figure 2).
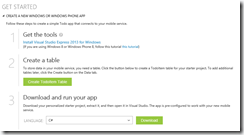
Notice the choices you have next to "CHOOSE A PLATFORM". The Platforms listed are the various client platforms explicitly supported by Mobile Services. Remember that Mobile Services exposes data via standard interfaces such as HTTP and JSON which can be used by a wide variety of platforms and languages. For this demo, click the "Windows" button; then expand the "CREATE A NEW WINDOWS APP" link. This will reveal the 3 steps to get you started building an application around Azure Mobile Services (Figure 3).
Get the tools (Figure 4) allows you to download a free version of Visual Studio. If you already have any version of Visual Studio 2013 installed, you can skip this step.
The "Create a table" step (Figure 5) allows you to create a sample SQL Server table. Click the green button to create a new table named "TodoItem" in your database with columns to keep track if the tasks you need to do today and whether you have completed each task.
The “Download and run your app” step (Figure 6) will generate client code that will connect to your application.
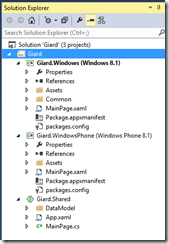
Select a language (C# or JavaScript) and click the Download button to download a ZIP file containing a Universal App that includes a Windows 8.1 project, a Windows Phone 8.1 project, and a Shared Code project. Depending on your language selection, these projects will either contain a user interface written in XAML and C# code-behind or an HTML5 front-end with a WinJS code-behind. Figure 7 shows the results of C#/XAML project generated by Azure Mobile Services.
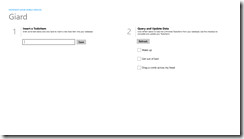
Compile and run this app to see it in action. Figure 8 shows a screen shot of the Windows 8 app. You can enter a new task in the textbox and click Save to send data to the mobile service telling it to insert a row in the todoitem table. A list on the right displays all tasks that are not yet completed. Click the checkbox next to an item to send data to the mobile service telling it to update the todoitem table, setting the Complete column to FALSE.
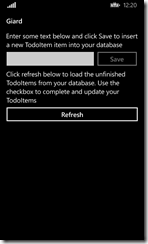
Figure 9 shows the Windows Phone project running.
You can see that the apps look similar because they have the same functionality. The differences are related to the size, layout, and other considerations of the specific platform on which they run. Play with each app and you will see that they function about the same, thanks to the large percentage of shared code.
In this article, we saw how to run the Azure Mobile Services wizard to generate a sample table and client application.
