In a previous article, I showed how to create a sample .NET client application to connect to your Azure Mobile Service. In this article, I will show you how to add authentication to this sample application.
Azure Mobile Services supports a number of different methods of authentication. A couple of them you would expect from a Microsoft platform - User can be authenticated against Active Directory or they can be directed to log in with a Microsoft account (formerly known as a "Live" account.) You would expect Mobile Services to support these authentication methods because they are created and/or maintained by Microsoft. However, Mobile Services is designed to accept authentication tokens that adhere to the OAuth standard and it is built to support Facebook, Twitter, and Google authentication - all of which conform to oAuth.
In order to use an Authentication Provider, you must enable support for that provider. You can enable support for one provider and instruct all clients to use that provider; or you can enable support for multiple oAuth providers and clients will be able to offer a choice to users, allowing them to log in with their favourite service.
Setting up each of these oAuth providers is pretty similar, so the best way to show you how is to walk through an example. I'll enable Twitter authentication but the process is not much different for other providers.
Creating An App on Twitter
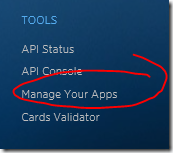
In order to allow users to log into your app via Twitter, you need to create an app in Twitter. You can do so by navigating to http://dev.twitter.com and signing in with your Twitter credentials (you may need to create a Twitter account first. If so, you may be the last person on Earth to do so.) At the bottom of the page is a "Tools" section. Click the "Manage Your Apps" link in this section, as shown in Figure 1.
On the "Twitter Apps" page, click the [Create New App] button (Figure 2).
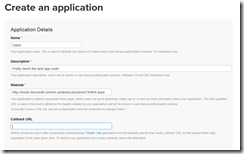
The "Create an application" page (Figure 3) displays. The first 3 fields are required.
At the "Name" field, enter a name for your application. I usually use the same name I gave my Azure Mobile Service.
At the "Description" field, enter a brief description of your app.
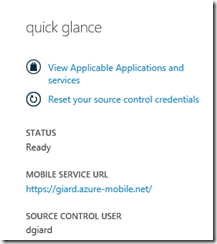
At the "Website" field, enter your Mobile Service URL. You can find this URL in the Azure portal on the DASHBOARD tab of your Mobile Service (Figure 4)
Figure 4
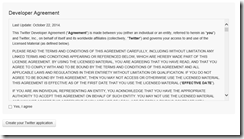
Scroll down the "Create an Application" page (Figure 5), read the Developer agreement completely (in this case, you are likely the first person ever to do this), check the "Yes I agree" checkbox, and click the [Create your Twitter application] button to create the app.
Figure 5
A page displays for your newly-created app with a tab menu across the top as shown in Figure 6.
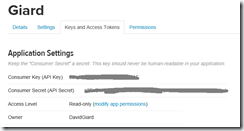
Click the "Keys and Access Tokens" tab to display the Application Settings as shown in Figure 7.
You will need the Consumer Key (API Key) and the Consumer Secret (API Secret) so keep this web page open and open a new browser or browser tab and navigate to the Azure Portal.
In the Azure Portal, select your mobile service and click the IDENTITY menu option as shown in Figure 8.
On the IDENTITY page, scroll down to the "twitter settings" section. From the Twitter "Application Settings" page, copy the API Key and the API Secret and paste these values into the corresponding fields on the Azure Mobile Services IDENTITY page, as shown in Figure 9.
Click the SAVE icon (Figure 10) at the bottom of the page to save these changes.
Figure 10
Your Mobile Service now supports Twitter authentication.
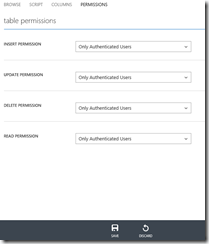
Force clients to login before accessing your service by setting permissions on the service actions. This is done at the Mobile Service table's PERMISSIONS page. (To access the PERMISSIONS page, select your Mobile Service in the Azure Portal; click the DATA tab; select the table you want to secure; and click the PERMISSIONS tab.)
Change the permission of each action to "Only Authenticated Users" by selecting "Only Authenticated Users" from the dropdown next to each action, as shown in Figure 11. Click the SAVE icon to commit these changes.
Now any client app that calls your service has no choice but to force users to log in with Twitter in order to use your app.
CLIENT APP
Open the client app that we created in an earlier article and open MainPage.cs in the Shared project.
Add the following code to the class.
1: MobileServiceUser user = null;
2: private async System.Threading.Tasks.Task AuthenticateAsync()
3: {
4: while (user == null)
5: {
6: user = await App.MobileService
7: .LoginAsync(MobileServiceAuthenticationProvider.Twitter);
8: }
9:
Listing 1
Then call this method by adding the following line at the top of the OnNavigatedTo method
1: await AuthenticateAsync();
Listing 2
When the user navigates to the MainPage, she will be redirected to the Twitter login page where she must successfully login before proceeding. The MobileService will remember the user and pass this information in a token with each request to the REST service. If you configure another authentication provider, such as Google or Microsoft, you can direct the user to that provider's login page by changing the MobileServiceAuthenticationProvider enum, which is passed as a parameter to the MobileService.LoginAsync method.
In this article, we saw how to configure single sign-on for our Azure Mobile Service.
