Azure Mobile Services provides a simple way to expose server-side data to clients. In previous articles, we exposed data via a REST service and we created a client application that called that service to retrieve or update data.
But what if we want our service to push data down from the server to a client device without that device making a call each time? For example, you may want to tell send a message telling your app to change the text displayed on its tile, displaying the total number of orders entered in your e-commerce app; or you may want a "toast" popup notification to display on the app's device whenever someone scores in the Top 10 on a game you wrote.
We can use Push Notifications to do these things.
Each mobile vendor has its own service to manage Push Notifications and each service exposes an API to manage those notifications. Apple offers a Push Notification service to send data to registered iPhones and iPads; Google offers a Push Notification service to send data to registered Android phones and tablets; and Microsoft offers two Push Notification services - one to send data to registered Windows Pones and another to send data to registered Windows 8 or 8.1 devices.
Each of these services has an API and we can call each one explicitly for every device that will receive a notification. But this requires passing the address of each device, which is tedious and error-prone. Plus, it requires our server-side application to maintain a list of every device to which we want to push messages.
We can simplify the process by configuring Push Notifications through Azure Mobile Services. Azure Mobile Services Push Notifications automatically works with Azure Notification hubs to manage these messages.
In this article, we will focus on sending a Toast Notification to Windows 8.1 clients, but the process is similar for all Push Notifications.
The steps for setting up Push Notifications to a Windows 8.1 client using Azure Mobile Services are:
1. Create an Azure Mobile Service
2. Create a Windows 8.1 Client App and modify it as follows
a. Associate app with store
b. Get Package SID and Client ID from Live Services. Copy these to Mobile Service.
c. Register notifications channel in OnLaunched (App.xaml.cs)
d. Enable Toast notifications (Package.appxmanifest)
3. Update the Mobile Service service to send Push Notifications.
Let's walk through an example.
1. Create an Azure Mobile Service
For our example, we'll use the Azure Mobile Service we created in a previous article.
2. Create a Windows 8.1 Client App and modify it as follows
For this example, we'll use the Windows 8.1 project in the Universal App generated for us in a previous article.
2a. Associate app with store
You will need a Windows Store account to complete this step. You can register at http://dev.windows.com/. It cost $19 to register for both the Windows Store and the Windows Phone Store and there is no annual renewal fee.
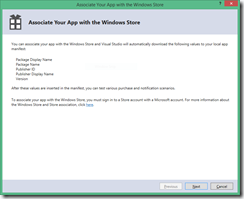
Register your app with the store by opening the Visual Studio Solution; right-clicking on the Windows 8.1 project; and selecting Store | Associate App with the Store from the context menu.
The "Associate App with the Windows Store" dialog (Figure 1) displays. Click the [Next] button.
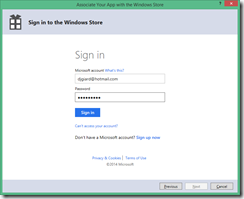
If prompted, sign into the Windows Store (Figure 2)
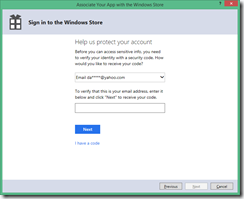
You may be prompted for your email address (Figure 3). If so, enter it and click [Next]; then check your email account for a Security Code that was sent from the Microsoft Account Team.
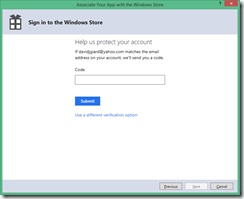
Copy this code and paste it into Sign-In Wizard (Figure 4) and click the [Submit] button.
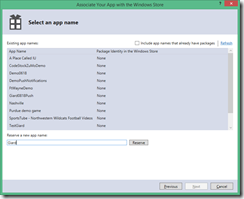
The "Select an app name" dialog (Figure 5) displays.
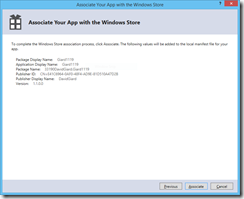
Enter a name for your app and click the [Reserve] button; then, click the [Next] button to display the final step in the wizard (Figure 6). Click the [Associate] button.
2b. Get Package SID and Client ID from Live Services. Copy these to Mobile Service.
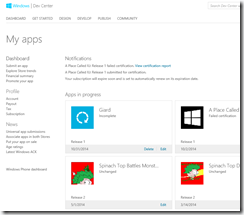
Connect to the store portal (http://dev.windows.com for Windows Store apps and http://dev.windowsphone.com for Windows Phone apps) and click Dashboard. You should see your app listed with "In Progress" below its listing. Figure 7 shows the listing for an app in the Windows Store dashboard
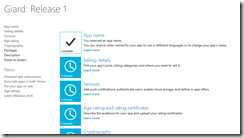
Click the [Edit] link below your app to display the Submissions Details page (Figure 8).
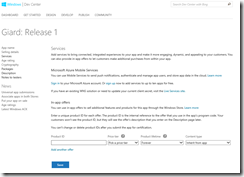
So far, you have only completed Step 1 (Reserve App Name) of the app submission process. Click step 2 (Services) to display the app's Services page (Figure 9)
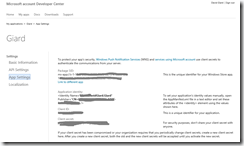
Click the Live Services site link in the second paragraph to navigate to the Live Services page (Figure 10). You may be prompted to sign in again.
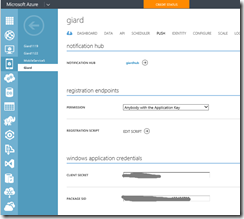
Note the Package SID and Client ID on the Live Services page. Copy each of these in turn and paste them into the appropriate fields of the "Windows Store" section of the "Push" page in the Azure Mobile Services page of the Azure portal. This is demonstrated in Figure 11.
Click the [Save] icon to save these values to your Mobile Service.
Your service is now capable of sending notifications to Windows store client apps.
2c. Register notifications channel in OnLaunched (App.xaml.cs)
Return to your .NET client application and open App.xaml.cs from the Shared project. Add the following 2 lines (Listing 1) to the top of this file:
1: using Windows.Networking.PushNotifications;
2: using Windows.UI.Popups;
Listing 1
Add the InitNotificationsAsync method to the bottom of the class (Listing 2)
1: private async void InitNotificationsAsync()
2: {
3: // Request a push notification channel.
4: var channel = await PushNotificationChannelManager
5: .CreatePushNotificationChannelForApplicationAsync();
6:
7: // Register for notifications using the new channel
8: System.Exception exception = null;
9: try
10: {
11: await MobileService.GetPush().RegisterNativeAsync(channel.Uri);
12: }
13: catch (System.Exception ex)
14: {
15: exception = ex;
16: }
17: if (exception != null)
18: {
19: var dialog = new MessageDialog(exception.Message, "Registering Channel URI");
20: dialog.Commands.Add(new UICommand("OK"));
21: await dialog.ShowAsync();
22: }
23: }
Listing 2
Your client application is now listening for push notifications.
2d. Enable Toast notifications (Package.appxmanifest)
In this example, the service will send a Toast notification, which will tell the client to popup a "Toast" message. A Toast message appears at the top-right of the Windows 8 screen and may contain 1 or more lines of text and an image.
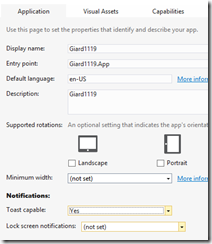
To enable your application to accept Toast notifications, open the Package.appxmanifest file and select the "Application" tab. Under the Notifications section, select the "Toast capable" dropdown and set it to "Yes". (Figure 11)
Your client application is now listening for push notifications and capable of creating a Toast popup when it receives a notification.
3. Update the Mobile Service service to send Push Notifications.
The final step is to actually send Push Notifications from your Mobile Service. In this example, we will use the node.js mobile service we created in this article (link) and we'll send a Toast Notification to all Windows Store clients whenever a user enters a new ToDoItem.
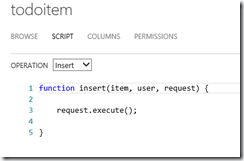
In the Azure portal, open your Mobile Service and navigate to the todoitem table's SCRIPT page (Figure 12).
Select INSERT from the dropdown and replace the script with the code in Listing 3.
1: request.execute({
2: success: function() {
3: // If the insert succeeds, send a notification.
4: push.wns.send(null, payload, 'wns/toast', {
5: success: function(pushResponse) {
6: console.log("Sent push:", pushResponse);
7: request.respond();
8: },
9: error: function (pushResponse) {
10: console.log("Error Sending push:", pushResponse);
11: request.respond(500, { error: pushResponse });
12: }
13: });
14: }
15: });
16:
17: }
Listing 3
Test It Out
Your app is now ready to accept Push Notifications and your Mobile Service is configured to send them each time a new "ToDoItem" is inserted.
To see it in action, launch the application and insert a new ToDo item. Within a few seconds, you should see a "Toast" popup in the top right of your screen, indicating that you entered this item. If other users were also using this same app, they would see the same message.
In this article, we discussed Azure Mobile Services Push Notifications and walked through an example of adding them to a JavaScript Push Notification service and a Windows 8.1 application.
