This is Part 3 in a series of articles about integrating VSTS, Azure Web Apps, ASP.NET applications, and Visual Studio.
In previous articles, I showed you how to create a VSTS Team Account and Team Project linked to Azure and how to create an ASP.NET Web application and link this to your VSTS team project in order to store the project code in the Team Version Control Repository.
In this article, I will show you how to automatically deploy code from your VSTS Team Project repository to an Azure Web App every time you push code changes to that repository.
This configuration is done in the Azure portal.
Log into your Azure account and navigate to the portal by clicking the PORTAL link at the top right, as shown in Fig. 1.
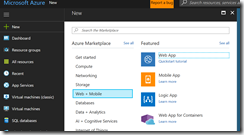
From the Azure portal, select
New | Web + Mobile | Web App
as shown in Fig. 2.
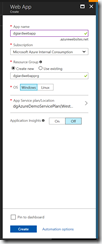
The Create Web App blade displays, as shown in Fig. 3.
At the App Name field, enter a name for your app. This must be unique among Azure App Services. Although you can assign a custom domain to this later, the default URL will be
http://xxxx.azurewebsites.net
where xxxx is the name you assigned to this Web App.
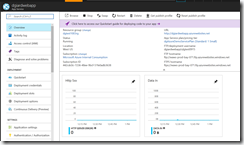
If you navigate to this URL (or click the hyperlink in the Overview tab), you will see a default Azure We App page.
At the Resource Group field, select "Create New" and enter a name for your resource group.
At the "OS" field, select the operating system on which you want to deploy your Web App.
Click the [Create] button to create your Web App. This usually takes less than a minute. A message displays when the App is created with a [Go to Resource] button to quickly open your Web App. (Note: You can also find your Web App by selecting "All Resources" in the left sidebar.)
The Web App Management blade displays, as shown in Fig. 4.
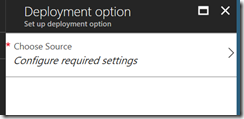
Select "Deployment Option" on the left menu of this blade to display the Deployment Option blade, as shown in Fig. 5.
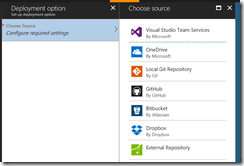
Click "Choose Source" to display a list of Source repository types, as shown in Fig. 6.
Select "Visual Studio Team Services".
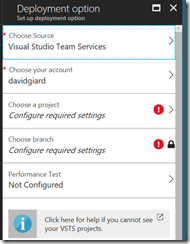
You will return to the "Deployment Option" blade, but options specific to VSTS will now display, as shown in Fig. 7.
Select your VSTS Account and Project from the dropdown. (Note: Your account and project will only appear if you have linked your VSTS project to Azure, as described here.)
Click the [OK] button to configure this automation.
It should take less than a minute to complete.
Any code currently in the project's repository will be deployed to Azure. You can see this by once again navigating to the Web App's URL (http://xxxx.azurewebsites.net).
Future code code pushed to the Team repository will also be deployed automatically to Azure.
In this article, you learned how to set up automatic deployment to an Azure Web App each time code is pushed to a VSTS project code repository.
