In previous articles, I showed how to create Azure Function Apps and Azure Functions directly in the Azure Portal. You can also create Function Apps and Functions in Visual Studio and then deploy them to Azure. I prefer to do this, because it makes it easier to get my code into source control.
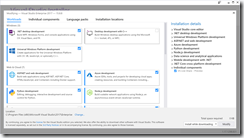
Before working with and creating Azure artifacts in Visual Studio, you must install the Azure tools. To install these tools, launch Visual Studio installer and check "Azure Development, as shown in Fig. 1.
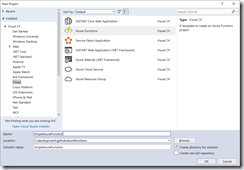
Once the Azure tools are installed, launch Visual Studio and select File | New | Project from the menu, as shown in Fig. 2.
In the "New Project" dialog, expand Visual C# | Cloud in the left tree and select "Azure Functions" from the list of templates; then enter a project name and location, as shown in Fig. 3.
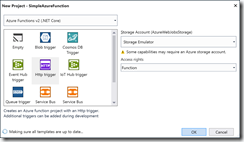
The next dialog (Fig. 4) presents a list of options for your Azure Function.
In the top dropdown, select "Azure Functions v2".
Select "Http Trigger" to create a function that will be triggered by an HTTP GET or POST to a web service URL.
At the "Storage Account" dropdown, select "Storage Emulator". This works well for running and testing your function locally. You can change this to an Azure Storage Account when you deploy the Function to Azure.
At the "Access rights" dropdown, select "Function".
Click the [OK] button to create an Azure Function App with a single Azure Function.
A function is generated with the following code:
[FunctionName("Function1")] public static async TaskRun( [HttpTrigger(AuthorizationLevel.Function, "get", "post", Route = null)] HttpRequest req, ILogger log) { log.LogInformation("C# HTTP trigger function processed a request."); string name = req.Query["name"]; string requestBody = await new StreamReader(req.Body).ReadToEndAsync(); dynamic data = JsonConvert.DeserializeObject(requestBody); name = name ?? data?.name; return name != null ? (ActionResult)new OkObjectResult($"Hello, {name}") : new BadRequestObjectResult("Please pass a name on the query string or in the request body"); }
Listing 1
The method is decorated with the "FunctionName" attribute, which provides the name of the function.
[FunctionName("Function1")]
Notice that the first parameter is decorated with
[HttpTrigger(AuthorizationLevel.Function, "get", "post", Route = null)]
This tells the system that the Function is triggered by an HTTP request and that it will request either a GET or POST verb.
We also pass in an ILogger, so that we can output debugging information.
Let's walk through the code in this function
Log some information, so we can confirm the function was properly triggered.
log.LogInformation("C# HTTP trigger function processed a request.");
If a "name" parameter is passed in the querystring, capture the value of this parameter.
string name = req.Query["name"];
If this is a POST request, there may be information sent in the request body. Retrieve this information and convert it to a JSON object:
string requestBody = await new StreamReader(req.Body).ReadToEndAsync();
dynamic data = JsonConvert.DeserializeObject(requestBody);
If the "name" parameter was passed in the querystring, use that; if not, look for it in the JSON object from the request body.
name = name ?? data?.name;
If a "name" parameter was found, return an HTTP Response Code 200 (OK) with a body containing the text "Hello, " followed by the value of the name.
If no "name" parameter was passed, return an HTTP Response Code 400 (Bad Request) with a message into the body indicating a name is required.
return name != null
    ? (ActionResult)new OkObjectResult($"Hello, {name}")
    : new BadRequestObjectResult("Please pass a name on the query string or in the request body");
Publish App
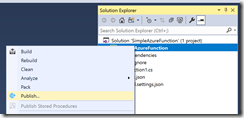
One quick way to publish a Function App to Azure is directly from Visual Studio. To do this, right-click the project in the Solution Explorer and select "Publish" from the context menu, as shown in Fig. 5.
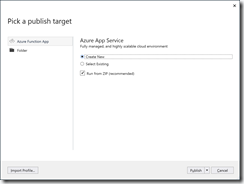
The "Pick a publish target" dialog displays, as shown in Fig. 6.
Check the "Run from ZIP" checkbox.
Select either the "Create New" or "Select Existing" radio button, depending whether you wish to deploy to an existing or a newly-created Azure Function; then click the [Publish] button.
The follow-up dialog if you select "Create New" is shown in Fig. 7a and for "Select existing" in Fig. 7b.
Click the [OK] or [Create] button at the bottom of the follow-up dialog to deploy the Function.
This article showed how to create an Azure Function App in Visual Studio, making it easier to test locally and integrate your code with source control.
