Creating an ASP.NET Web Project and Storing code in a VSTS Git Repository
October 04, 2017 10:00 Comments [0]This is Part 2 in a series of articles about integrating VSTS, Azure Web Apps, ASP.NET applications, and Visual Studio.
In my last post, I showed you how to create a new Team Account and Team project linked to Azure.
In this article, I will show how to open this new project in Visual Studio, start working with it, and check your code into VSTS Git repository.
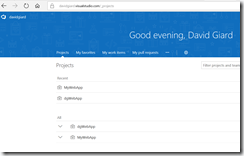
To view your account and project in VSTS, open a new browser tab and navigate to https://xxxx.visualstudio.com/_admin
where xxxx is the name of the account you just created. You can see my account displayed in Fig. 1.
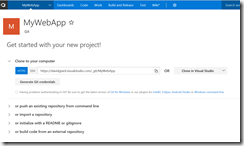
Click on the name of your project to display details about it, as shown in Fig. 2.
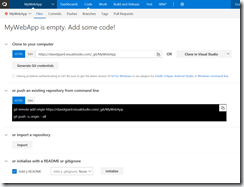
Click the Code link at the top menu. If you have already checked in code, you will see that code in your Version Control Repository. New projects will look like my project, shown in Fig. 3.
Click the [Clone in Visual Studio button]. This launch Visual Studio (You will probably be prompted to switch apps)
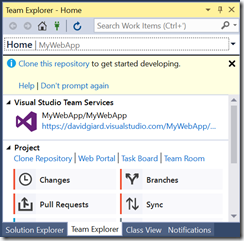
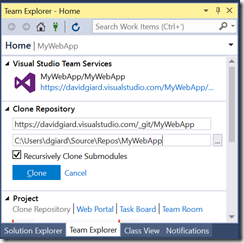
In Visual Studio, you should see the Team Explorer, as shown in Fig. 4. If you don't see it, you can find it by selecting View | Team Explorer from the menu.
Click "Clone this repository" to display the Clone Repository dialog, as shown in Fig. 5.
You have the opportunity to change where this new local repository will be saved on your hard drive. Whether you change it or not, you should note the location.
Click the [Clone] button. This will initialize a local GIT repository that points to your VSTS Team project.
You can now create a new Web App project in Visual Studio.
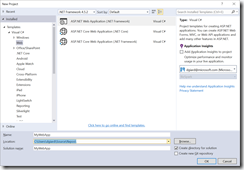
Select File | New | Project from the menu. The "New Project" dialog displays, as shown in Fig. 6.
Under the "Templates" tree on the left, expand Visual C#; then select "Web". Select "ASP.NET Web Application" or "ASP.NET Core Web Application" as your template.
The location of your project is determined by the combination of the "Location" textbox and the "Solution name" textbox (assuming you have not unchecked "Create new directory for solution"). Verify that this points to the location of the local Git repository that was created above.
Uncheck the "Create new Git repository" checkbox.
Make any other desired changes and click the [OK] button to create a new button.
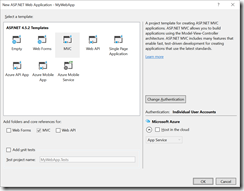
At the New ASP.NET Application dialog (Fig. 7), click [OK] to create the project.
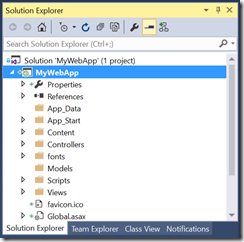
A new project will be created in the repository directory similar to the one shown in the Solution Explorer (View | Solution Explorer) in Fig. 8.
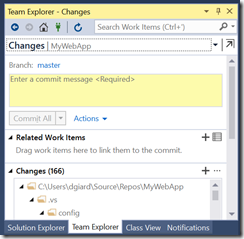
You can check this initial code into your version control repository from the Visual Studio Team Explorer (View | Team Explorer). Click the [Changes] button in the Team Explorer to display the Changes panel, as shown in Fig. 9.
Enter a comment, such as “Initial commit” and click the [Commit All] button. This will commit your changes to the local Git Repository.
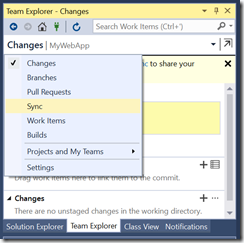
To push your changes up to the VSTS repository, you will need to access the Team Explorer Sync panel. You can navigate to this panel by clicking to dropdown near the top of the Changes panel and selecting “Sync” from the menu displayed, as shown in Fig. 10.
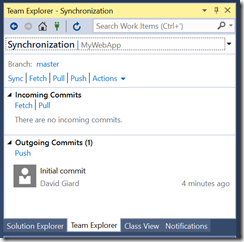
The Sync panel displays, as shown in Fig. 11.
Click the “Sync” link. You should see a message indicating that the local and remote repositories are syncing, meaning that the local repository is merging any changes from the remote repository and your local commits are being pushed up to the remote repository in VSTS. The following message displays when this sync is complete:
Successfully synchronized incoming and outgoing commits.
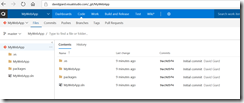
If you return to the project code page in VSTS and refresh the web page, you should see all your code checked in. Fig. 12 shows my project after I checked in my initial commit.
In this article, I showed you how to create a new ASP.NET project in Visual Studio and store the code in an existing Visual Studio Team Systems Git repository.
