Azure CosmosDB is a flexible, fast, reliable, scalable, geographically distributed NoSQL database.
You can create a CosmosDB account and database in the Azure poral.
Navigate to the Azure portal and login.
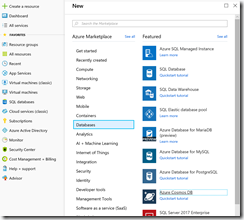
Click the [Create a resource] button, as shown in Fig. 1.
From the menu, select Database | Azure CosmosDB, as shown in Fig. 2.
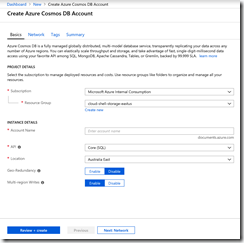
The "Create Azure CosmosDB Account" blade displays, as shown in Fig. 3.
At the Subscription dropdown, select your Azure subscription. Most of you will have only one subscription.
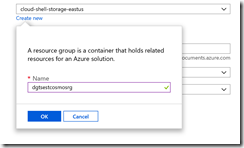
At the Resource Group dropdown, select an existing resource group or click "Create new" to display the New Resource Group dialog, as shown in Fig. 4.
In the New Resource Group dialog, enter a unique name for your resource group and click the [OK] button.
At the "API" dropdown, select the API you want to use to access the databases in this account, as shown in Fig. 5. Options are
- Core (SQL)
- MongoDB
- Cassandra
- Azure Table
- Gremlin (graph)
If you are migrating data from another database, you may want to choose the API that resembles your old database in order to minimize changes to the client code accessing the database. If this is a new database, you may wish to choose the API with which you and your team are most familiar.
At the "Location" dropdown, select a region in which to store your data. It is a good idea to keep your data near your users and/or near any services that will interact with your data.
The "Geo-Redundancy" and "Multi-region writes" options allow you to globally distribute your data. There is an extra charge for enabling these features.
You can enable Geo-Redundancy by clicking the [Enable] button next to "Geo-Redundancy". This creates a copy of your data in another nearby region and keeps that data in sync.
Click the [Enable] button next to "Multi-region writes" if you wish to allow data to be written in multiple regions. This will improve the performance when writing data to the database.
Notice the tabs at the top of the page (Fig. 5). The "Basics" tab displays first, but the "Network", "Tags", and "Summary" tabs are also available.
The "Network" tab (Fig. 7) allows you to add your CosmosDB account to a specific Virtual Network and Subnet. This is not required.
The "Tags" tab (Fig. 8) allows you to assign metadata to this CosmosDB account, which may help when grouping together related accounts on a report. This is not required.
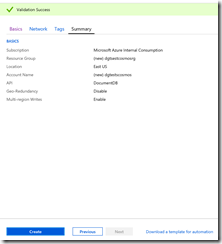
The "Summary" tab (Fig. 9) displays all the options you have chosen and validates that you completed the required responses and that all responses are consistent. You can navigate to this tab by clicking the "Summary" tab link at the top or by clicking the [Review + create] button on any other tab.
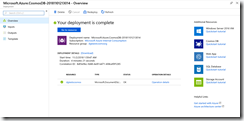
Click the [Create] button to begin creating your CosmosDB account. This will take a few minutes. A message displays as shown in Fig. 10 when the account is created and deployed.
As you can see, there are a number of links to documentation and tutorials.
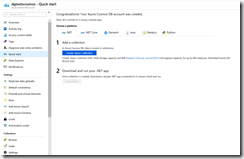
Click the [Go to resource] button to open the CosmosDB account. By default, the "Quick start" blade displays, as shown in Fig. 11.
In this article, I showed how to create a new Azure CosmosDB account. In the next article, I will show how to add a database with containers to that account.

