Azure Data Factory (ADF) is an example of an Extract, Transform, and Load (ETL) tool, meaning that it is designed to extract data from a source system, optionally transform its format, and load it into a different destination system.
The source and destination data can reside in different locations, in different data stores, and can support different data structures.
For example, you can extract data from an Azure SQL database and load it into an Azure Blob storage container.
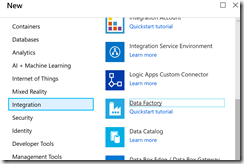
To create a new Azure Data Factory, log into the Azure Portal, click the [Create a resource] button (Fig. 1) and select Integration | Data Factory from the menu, as shown in Fig. 2.
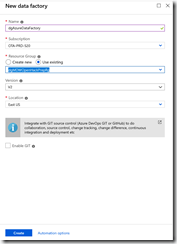
The "New data factory" blade displays, as shown in Fig. 3.
At the "Name" field, enter a unique name for this Data Factory.
At the Subscription dropdown, select the subscription with which you want to associate this Data Factory. Most of you will only have one subscription, making this an easy choice.
At the "Resource Group" field, select an existing Resource Group or create a new Resource Group which will contain your Data Factory.
At the "Version" dropdown, select "V2".
At the "Location" dropdown, select the Azure region in which you want your Data Factory to reside. Consider the location of the data with which it will interact and try to keep the Data Factory close to this data, in order to reduce latency.
Check the "Enable GIT" checkbox, if you want to integrate your ETL code with a source control system.
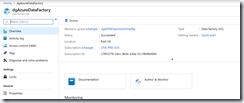
After the Data Factory is created, you can search for it by name or within the Resource Group containing it. Fig. 4 shows the "Overview" blade of a Data Factory.
To begin using the Data Factory, click the [Author & Monitor] button in the middle of the blade.
The "Azure Data Factory Getting Started" page displays in a new browser tab, as shown in Fig. 5.
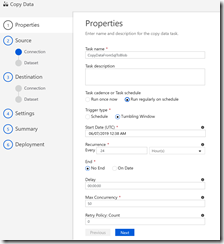
Click the [Copy Data] button (Fig. 6) to display, the "Copy Data" wizard, as shown in Fig. 7.
This wizard steps you through the process of creating a Pipeline and its associated artifacts. A Pipeline performs an ETL on a single source and destination and may be run on demand or on a schedule.
At the "Task name" field, enter a descriptive name to identify this pipeline later.
Optionally, you can add a description to your task.
You have the option to run the task on a regular or semi-regular schedule (Fig. 8); but you can set this later, so I prefer to select "Run once now" until I know it is working properly.
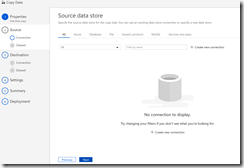
Click the [Next] button to advance to the "Source data store" page, as shown in Fig. 9.
Click the [+ Create new connection] button to display to the "New Linked Service" dialog, as shown in Fig. 10.
This dialog lists all the supported data stores.
At the top of the dialog is a search box and a set of links, which allow you to filter the list of data stores, as shown in Fig. 11.
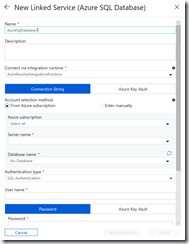
Fig. 12 shows the next dialog if you select Azure SQL Database as your data source.
In this dialog, you can enter information specific to the database from which you are extracting data. When complete, click the [Test connection] button to verify your entries are correct; then click the [Finish] button to close the dialog.
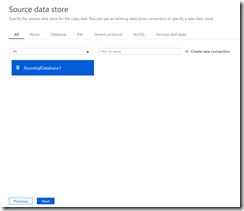
After successfully creating a new connection, the connection appears in the "Source data store" page, as shown in Fig. 13.
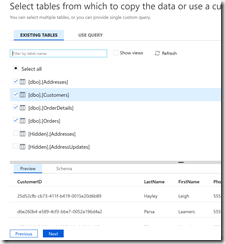
Click the [Next] button to advance to the next page in the wizard, which asks questions to specific to the type of data in your data source. Fig. 14 shows the page for Azure SQL databases, which allows you to select which tables to extract.
Click the [Next] button to advance to the "Destination data store", as shown in Fig. 15.
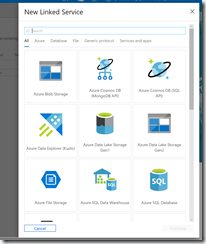
Click the [+ Create new connection] button to display the "New Linked Service" dialog, as shown in Fig. 16.
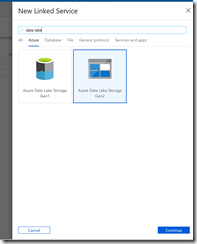
As with the source data connection, you can filter this list via the search box and top links, as shown in Fig. 17. Here we are selecting Azure Data Lake Storage Gen2 as our destination data store.
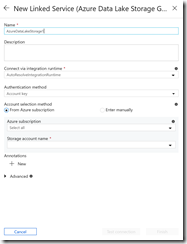
After selecting a service, click the [Continue] button to display a dialog requesting information about the data service you selected. Fig. 18 shows the page for Azure Data Lake. When complete, click the [Test connection] button to verify your entries are correct; then click the [Finish] button to close the dialog.
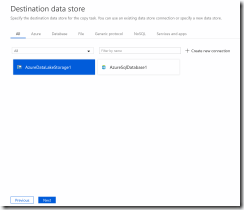
After successfully creating a new connection, the connection appears in the "Destination data store" page, as shown in Fig. 19.
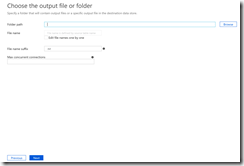
Click the [Next] button to advance to the next page in the wizard, which asks questions to specific to the type of data in your data destination. Fig. 20 shows the page for Azure Data Lake, which allows you to select the destination folder and file name.
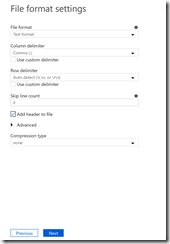
Click the [Next] button to advance to the "File format settings" page, as shown in Fig. 21.
At the "File format" dropdown, select a format in which to structure your output file. The prompts change depending on the format you select. Fig. 21 shows the prompts for a Text format file.
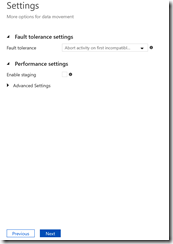
Complete the page and click the [Next] button to advance to the "Settings" page, as shown in Fig. 22.
The important question here is "Fault tolerance". When an error occurs, do you want to abort the entire activity, skipping the remaining records or do you want to log the error, skip the bad record, and continue with the remaining records.
Click the [Next] button to advance to the "Summary" page as shown in Fig. 23.
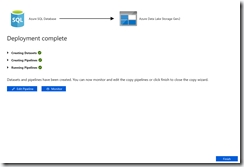
This page lists the selections you have made to this point. You may edit a section if you want to change any settings. When satisfied with your changes, click the [Next] button to kick off the activity and advance to the "Deployment complete" page, as shown in Fig. 24.
You will see progress of the major steps in this activity as they run. You can click the [Monitor] button to see a more detailed real-time progress report or you can click the [Finish] button to close the wizard.
In this article, you learned about the Azure Data Factory and how to create a new data factory with an activity to copy data from a source to a destination.

