Overview
An Azure Monitor Alert is an Action taken when a system meets a predetermined condition. These are useful to notify us when a system has a problem or a potential problem. You can read more here.
We can create Alerts in Azure Monitor, as described here.
An Alert Action Group defines notifications that the Alert sends or actions triggered by the Alert.
Azure creates a number of Action Groups automatically, but you can create more if desired. Creating custom Action Groups is useful if you want to notify specific people, roles, or groups that are not identified in the built-in Action Groups. Once created, you can use the custom Action Group for more than one Alert.
This article describes how to create a custom Action Group.
Creating an Action Group
To begin, log into the Azure Portal and navigate to the "Azure Monitor", as shown in Fig. 1.

Fig. 1
In the left menu, select the [Alerts] button (Fig. 2) to display the "Alerts" blade, as shown in Fig. 3

Fig. 2

Fig. 3
Click the [Create action group] button (Fig. 4) to display the "Create action group" dialog, as shown in Fig. 5.

Fig. 4
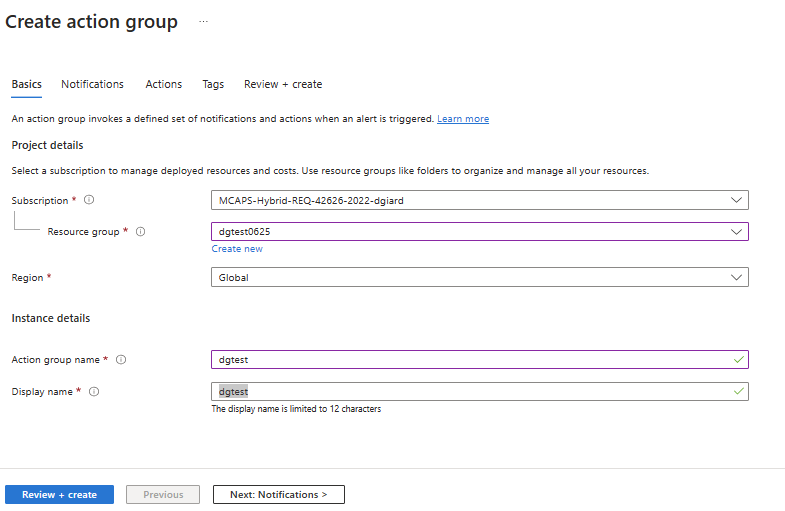
Fig. 5
The "Create action group" dialog has multiple tabs: "Basics", "Notifications", "Actions", "Tags", and "Review + create". The "Basics" tab displays initially.
At the "Subscription" dropdown, select the Subscription into which you want to create this Action Group. Many of you will have only one Subscription.
At the "Resource group" dropdown, select a resource group into which you want to organize this Action Group or click the "Create new" link to create a new resource group.
At the "Region" dropdown, select the region in which you want to save this Action Group.
At the "Action group name" field, enter a unique name for this Action Group.
At the "Display name" field, enter a name that will describe and easily identify this Action Group.
Select the "Notifications" tab, as shown in Fig.6.
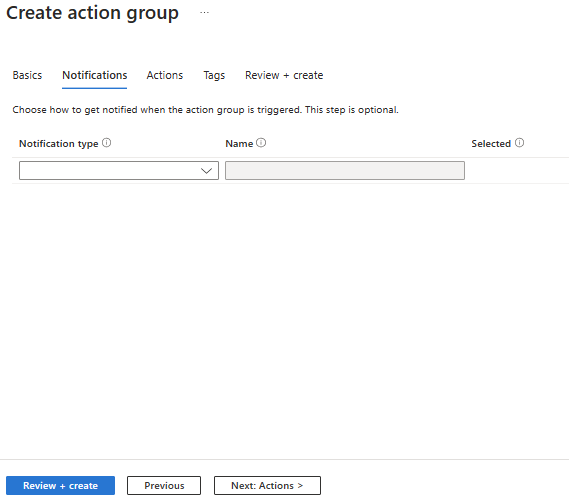
Fig. 6
A the "Notification type" dropdown, (Fig. 7)select:
- "Email Azure Resource Manager Role", if you want to send an email message to one of the predefined Azure roles when the Alert fires
- "Email/SMS message/Push/Voice" if you want to send a message to a specific mailbox, phone number, or mobile app
If you selected "Email Azure Resource Manager Role" (Fig. 8), select the specific "Aure Resource Manager Role" you want to message, as shown in Fig. 9.

Fig. 7

Fig. 8
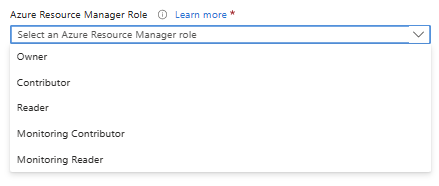
Fig. 9
If you selected "Email/SMS message/Push/Voice", the "Email/SMS message/Push/Voice" dialog displays, as shown in Fig. 10.
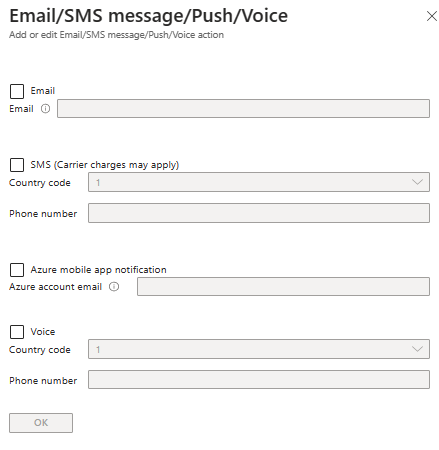
Fig. 10
Here you can choose whether to send an email, SMS message, Mobile Push Notification, or Voice call. You must complete the details for any checkboxes you select. Fig. 11 shows the required field filled in for an Email notification,
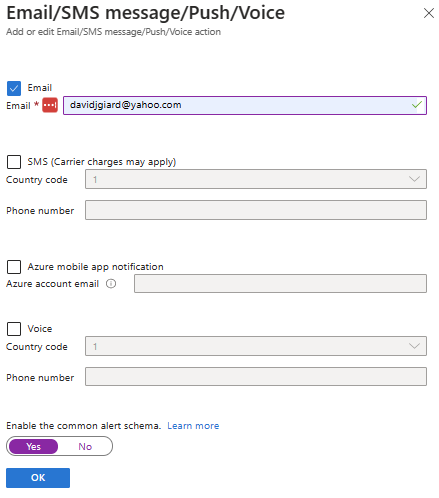
Fig. 11
By default, the message will contain human readable text. If you wish to send JSON, toggle the "Enable he common alert schema" button to [Yes]. This is useful if your recipient has an automated process to parse and handle the message.
Click the [OK] button when you complete the "Email/SMS message/Push/Voice" dialog. The dialog closes and the "Notifications" tab of the "Create action group" dialog displays with the Notification type filled in, as shown in Fig. 12.
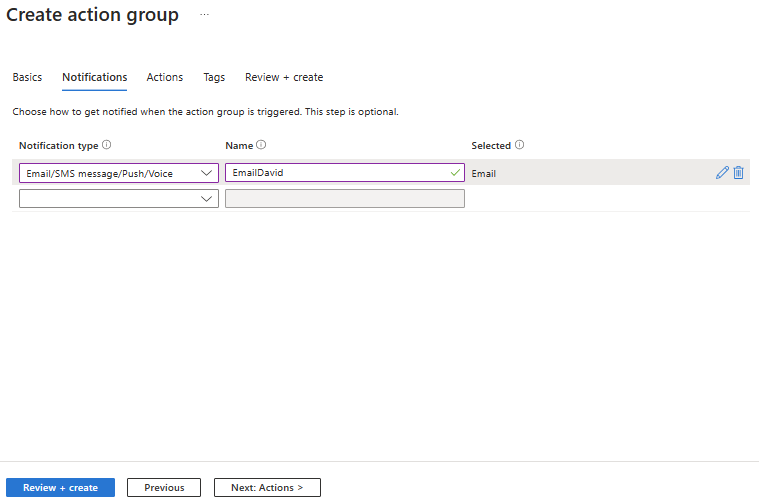
Fig. 12
Enter a name for this notification type.
Select the "Actions" tab, as shown in Fig. 13.
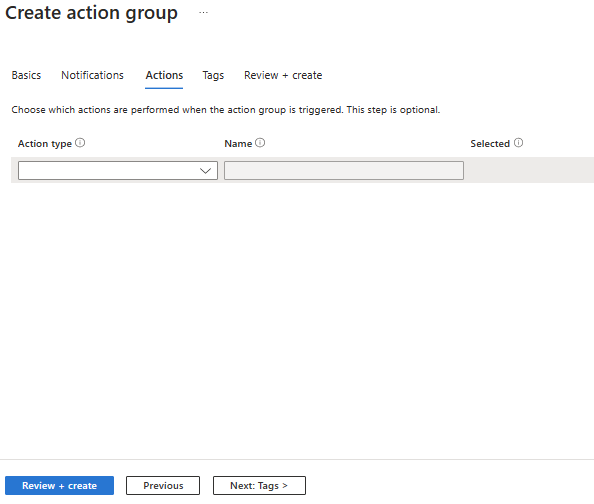
Fig. 13
On this tab, you can configure other actions triggered by the Alert. Actions selected here will send data to another application or service. At the "Action type" dropdown (Fig. 14), select the action you wish the Alert to trigger.
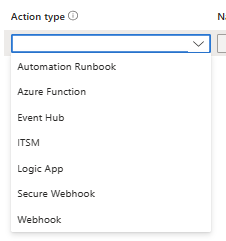
Fig. 14
When you select an Action Type, a dialog displays prompting you for more information. The information required depends on which Action type you selected. Fig. 15 shows the "Azure Function" dialog.
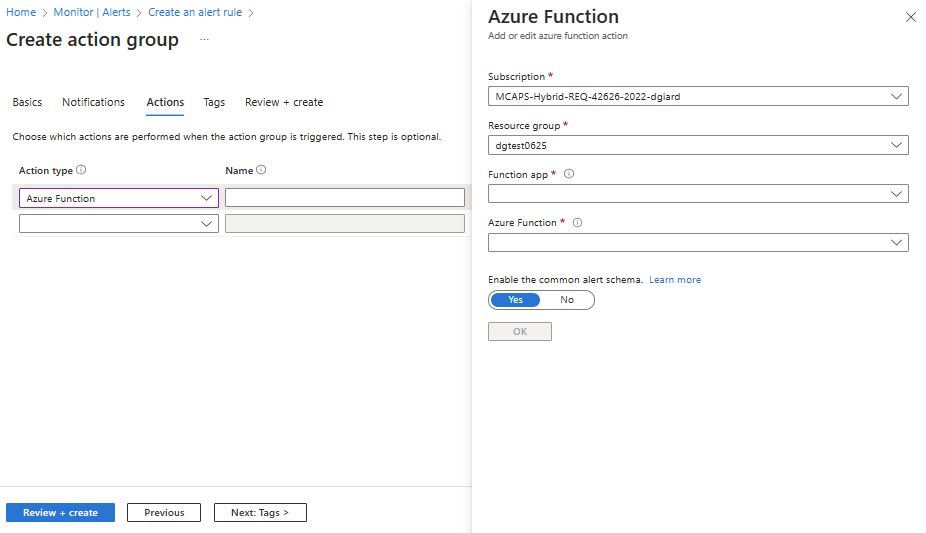
Fig. 15
Complete the required information and click the [OK] button to save it and close the dialog.
Select the "Tags" tab, as shown in Fig. 16.
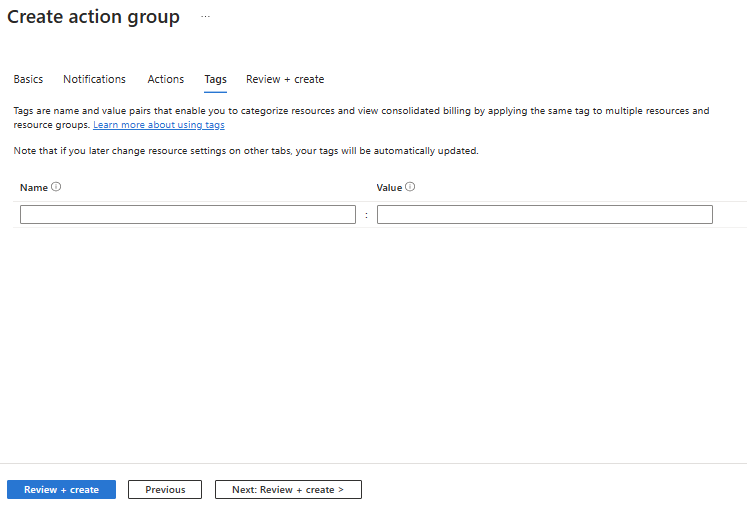
Fig. 16
Here you can enter name/value pairs that act as metadata associated with the Action Group. While not required, this metadata is useful in reporting, as it allows you to group, sort, and filter on these fields.
Select the "Review + create" tab, as shown in Fig. 17.
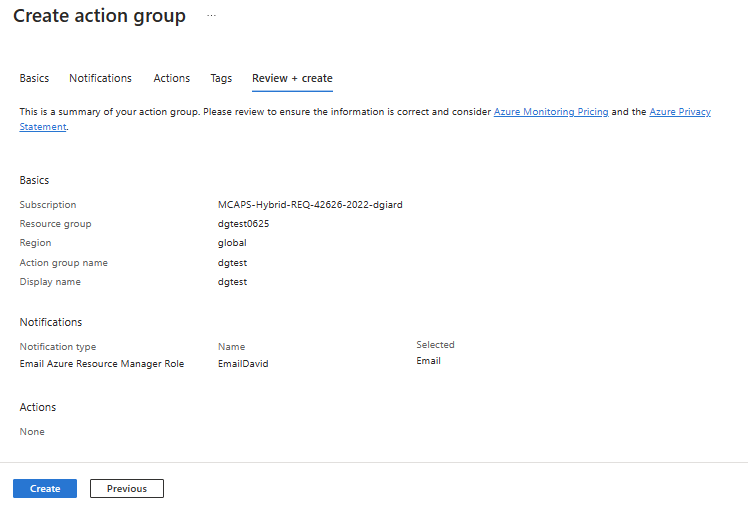
Fig. 17
If you omitted any required information or entered anything incorrectly, an error message displays on this tab. Correct any errors before proceeding. When all information is correct, click the [Create] button to create the Action Group.
After the Action Group is created, it will be listed in the "Action Groups" tab of the "Alerts" blade, as shown in Fig. 18.

Fig. 18
Click the [Refresh] button (Fig. 19) if you do not see your new Action Group listed.

Fig. 19
You can now use this Action Group when creating a new Alert.
Conclusion
In this article, you learned how to create a custom Action Group for Azure Alerts.