Creating a virtual machine (VM) may be the simplest thing to do in Azure. Azure VMs are very similar to on-premises VMs; in fact, they are built using the same technology - Microsoft Hyper-V.
You can create an Azure VM with just about any operating system, software, and data that you want. Hundreds of templates are available, pre-installed with a variety of configurations.
Azure supports Windows machines and Linux machines. (Did you know that about a third of the VMs in Azure are running Linux?)
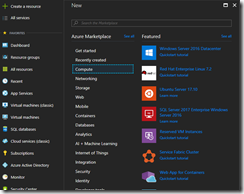
The first step in creating an Azure VM is the same step when we create any Azure resource - Navigate to the Azure Portal, log in, and click the [Create a resource] button (Fig. 1) at the top left of the portal.
From the list of resource categories, select the "Compute" category; then select the template on which you want to base your VM, as shown in Fig. 2.
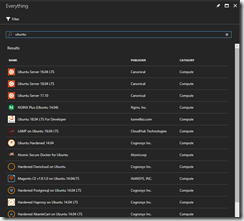
If you don't see the VM you want, you can search for it by typing a partial description in the search box. This will display matching templates from which you can select, as shown in Fig. 3.
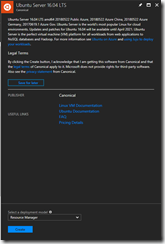
After selecting a template, a blade with a brief description displays. Fig. 4 shows the blade for an Ubuntu server. Click the [Create] button at the bottom of this blade.
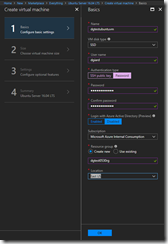
The "Create virtual machine" dialog displays with the first tab - "Configure basic settings" - active, as shown in Fig. 5. Complete the forms on this tab.
- At the name field, enter a unique name for your VM. Choose one that will make it easy for you to identify it when you return to the portal to manage this VM.
- At the "VM disk type" dropdown, select "SSD" for a Solid State Drive or "HDD" for a standard hard drive.
- At the "User name" field, enter a name for the local administrator account on this VM.
- At "Authentication type", select either "SSH public key" or "Password" to specify how you want to log into this VM. I have selected "Password", which causes the "Password" fields to appear, requiring me to enter a password twice. Passwords must meet complexity requirements, including a length of at least of at least 12 characters and inclusion of numbers, alpha characters, and special characters.
- If you have an Azure AD configured, you can configure your VM to use this for authentication by selecting "Enabled" under "Login with Azure Directory".
- You will likely have only one Azure subscription; but if you have more than one, you can select the subscription with which to associate this VM.
- At the "Resource group" fields, select an existing resource group or create a new one. Resource groups are a logical grouping of resources that you want to manage together. If there are existing Azure resources that will interact with this VM, you may want to place them all in the same Resource Group.
- At the "Location" dropdown, select the region in which you want to create this VM. Location considerations include proximity to the people managing this VM; proximity to people using this VM; and proximity to any other resources that will interact with this VM.
When the tab is complete, click the [OK] button at the bottom.
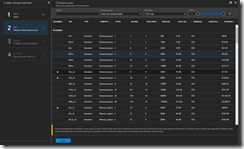
The second tab - "Size" - will display, as shown in Fig. 6.
On the "Size" tab, select the size machine you want to create. This is a long list, but you can filter or search to make it more manageable. Note that not every size is available in every region.
After highlighting the desired size, click the [Select] button at the bottom of the tab.
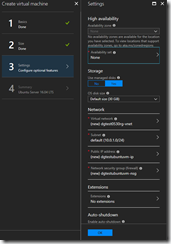
The "Settings" tab will display as shown in Fig. 7.
Azure provides default values for every setting on this tab, so it is not necessary to change anything. However, you can configure your VM to connect to a specific virtual network or subnet or assign a specific IP address or change any of the settings you like.
When you are satisfied with the settings, click the [OK] button at the bottom of the tab.
The "Summary" tab displays what you have configured, in case you want to change anything at the last minute. It also validates that all your selections are complete and consistent. If the validation lists any problems, you should go back and correct these.
After validation passes and you are satisfied with your selection, click the [Create] button at the bottom of the blade.
After a few minutes, Azure will create and deploy the VM based on your configuration.
Once it is created, it is your VM and you can connect to it as you would any local VM. Use Remote Desktop to connect to a Windows VM or use SSH to connect to a Linux VM.

