Data Dude tutorial 2 - Using Schema Compare tool to update a database project
August 12, 2008 12:40 Comments [0]Microsoft Visual Studio Team System 2008 Database Edition (aka “Data Dude”) provides tools for managing and deploying SQL Server databases.
In our last tutorial, we described how to create a new database project based on an existing SQL Server database. As the source database changes, you will want to update the database project to reflect those changes. This article describes how to use the Schema Compare tool to import database schema changes into your database project. The steps in this article are typically performed by a database administrator (DBA) or database developer who is charged with creating tables, views, functions and stored procedures.
The Schema Compare tool can be used to display and manage differences between two databases, between two database projects, or between a database and a database project. Most of the time, I use it to compare a database with a database project.
After making a change to a database schema (for example, adding a new table or adding a new column to a table), use the Schema Compare tool as described below to update an existing database project with these changes.
1. Launch Visual Studio and open your Database Project. (For info on how to create a database project from a SQL Server database see: /2008/08/11/DataDudeTutorial1CreatingADatabaseProject.aspx )
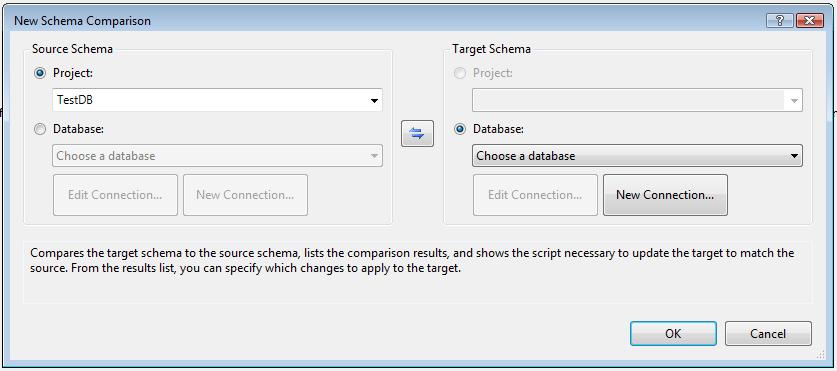
2. From the Visual Studio menu, select Data | Schema Compare | New Schema Compare. The New Schema Compare dialog displays.
Figure 1
3. Under Source Schema, select the Database radio button and select the connection to your database from dropdown list.
4. Under Target Schema, select the Project radio button and select your database project from the dropdown list.
5. Click the OK button to display the Schema Compare window.
Figure 2
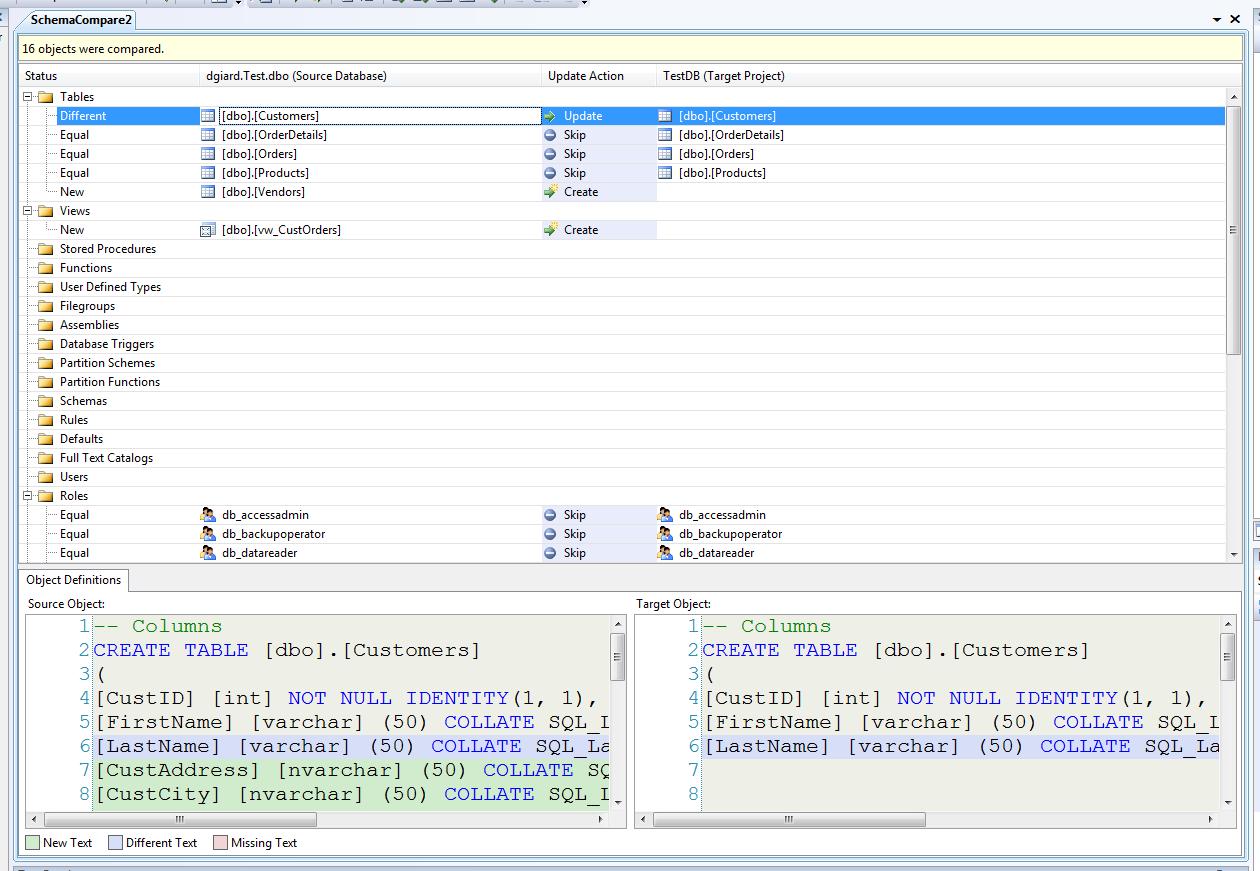
6. The Schema Compare window lists every object that exists in either the database or the database project. The objects are grouped in folders by object type (Tables, views, stored procedures, etc.) You can expand or collapse a folder to view or hide objects of that type. The important column is “Update Action” which describes what will happen if you write the updates to the target.
a. Objects that exist in the source (the database) but not in the target (the project) were likely added to the database after the last synchronization. By default, the Update Action will be “Create” meaning the object will be created in the database project.
b. Objects that exist in both the source and the target will have an Update Action of “Update” if they have been modified in the database since the last synchronization or “Skip” if they have not.
c. Objects that exist in the destination (the project) but not in the source (the database) were likely dropped from the database after the last synchronization. By default, the Update Action will be “Drop” meaning the object will be removed from the database project.
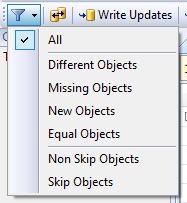
7. If you are updating your database project frequently, most of the objects will be unchanged and marked “Skip”. On a database with many objects, it is useful to view only the objects that have changed since the last synchronization. To do this, click the Filter toolbar button and select Non Skip Objects. 
Figure 3
8. At this point, you can view differences and you may wish to modify the Update Action of some objects.
a. If you click on an object row in the Schema Compare window, the SQL definition code of both the source and destination version appears in the Object Definition window. Any differences between the two versions will be highlighted (changed lines in darker blue; new lines in darker green).
b. If you like, you can modify the Update Action any object by selecting the dropdown in the “Update Action” column. Some actions are grayed out because Data Dude will not allow you to perform any action that would violate referential integrity rules. If several developers are sharing the same development database, you may wish to skip those objects on which you are not working. You may also decide that some objects are ready to share with the rest of the team and others are not fully tested and should be skipped. It is possible to change the Update Action of every object of a given type by right-clicking the type folder and selecting the desired action to apply to all objects of that type.
9. After you have set the “Update Action” of every object appropriately, you can migrate your changes to the database project by clicking the Write Updates toolbar button. Click Yes at the confirmation to write the updates to the database project.
Figure 4
10. If you are using a source control repository, such as TFS, you will want to check in your changes.
In the next article, we will discuss how to use the Schema Compare tool to write changes to a new database environment.