Azure Databricks is a web-based platform built on top of Apache Spark and deployed to Microsoft's Azure cloud platform.
Databricks provides a web-based interface that makes it simple for users to create and scale clusters of Spark servers and deploy jobs and Notebooks to those clusters. Spark provides a general-purpose compute engine ideal for working with big data, thanks to its built-in parallelization engine.
Apache Spark is open source and Databricks is owned by the Databricks company; but, Microsoft adds value by providing the hardware and fabric on which these tools are deployed, including providing capacity on which to scale and built-in fault tolerance.
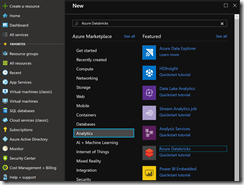
To create an Azure Databricks environment, navigate to the Azure Portal, log in, and click the [Create Resource] button (Fig. 1).
From the menu, select Analytics | Azure Databricks, as shown in Fig. 2.
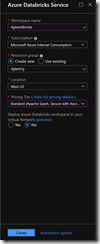
The "Azure Databricks service" blade displays, as shown in Fig. 3.
At the "Workspace name" field, enter a unique name for the Databricks workspace you will create.
At the "Subscription" field, select the subscription associated with this workspace. Most of you will have only one subscription.
At the "Resource group" field, click the "Use existing" radio button and select an existing Resource Group from the dropdown below; or click the "Create new" button and enter the name and region of a new Resource Group when prompted.
At the "Location" field, select the location in which to store your workspace. Considerations include the location of the data on which you will be working and the location of developers and users who will access this workspace.
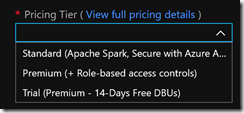
At the "Pricing Tier" dropdown, select the desired pricing tier. The Pricing Tier options are shown in Fig. 4.
If you wish to deploy this workspace to a particular virtual network, select "Yes" radio button at this question.
When completed, the blade should look similar to Fig. 5.
Click the [Create] button to create the new Databricks service. This may take a few minutes.
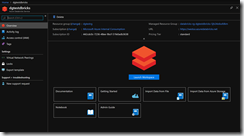
Navigate to the Databricks service, as shown in Fig. 6.
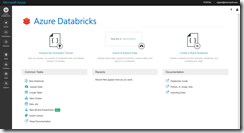
Click the [Launch Workspace] button (Fig. 7) to open the Azure Databricks page, as shown in Fig. 8.
In this article, I showed you how to create a new Azure Databricks service. In future articles, I will show how to create clusters, notebooks, and otherwise make use of your Databricks service.

