Azure Databricks is a web-based platform built on top of Apache Spark and deployed to Microsoft's Azure cloud platform that provides a web-based interface that makes it simple for users to create and scale clusters of Spark servers and deploy jobs and Notebooks to those clusters. Spark provides a general-purpose compute engine ideal for working with big data, thanks to its built-in parallelization engine.
In the last article in this series, I showed how to create a new Databricks service in Microsoft Azure.
A cluster is a set of compute nodes that can work together. All Databricks jobs run in a cluster, so you will need to create one if you want to do anything with your Databricks service.
In this article, I will show how to create a cluster in that service.
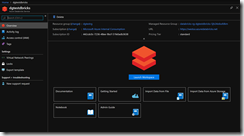
Navigate to the Databricks service, as shown in Fig. 1.
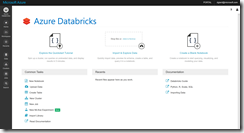
Click the [Launch Workspace] button (Fig. 2) to open the Azure Databricks page, as shown in Fig. 3.
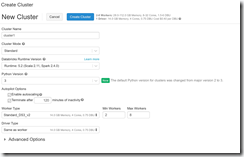
Click the "New Cluster" link to open the "Create Cluster" dialog, as shown in Fig. 4.
At the "Cluster Name" field, enter a descriptive name for your cluster.
At the "Cluster Mode" dropdown, select "Standard" or "High Concurrency". The "High Concurrency" option can run multiple jobs concurrently.
At the "Databricks Runtime Version" dropdown, select the runtime version you wish to support on this cluster. I recommend selecting the latest non-beta version.
At the "Python Version" dropdown, select the version of Python you wish to support. New code will likely be written in version 3, but you may be running old notebooks written in version 2.
I recommend checking the "Enable autoscaling" checkbox. This allows the cluster to automatically spin up the number of nodes required for a job, effectively balancing cost and performance.
I recommend checking the "Terminate after ___ minutes" checkbox and including a reasonable amount of time (I usually set this to 60 minutes) of inactivity to shut down your clusters. Running a cluster is an expensive operation, so you will save a lot of money if you shut them down when not in use. Because it takes a long time to spin up a cluster, consider how frequently a new job is required before setting this value too low. You may need to experiment with this value to get it right for your situation.
At the "Worker Type" node, select the size of machines to include in your cluster. If you enabled autoscaling, you can set the minimum and maximum worker nodes as well. If you did not enable autoscaling, you can only set the number of worker nodes. My experience is that more nodes and smaller machines tends to be more cost-effective than fewer nodes and more powerful machines; but you may want to experiment with your jobs to find the optimum setting for your organization.
At the "Driver Type" dropdown, select "Same as worker".
You can expand the "Advanced Options" section to pass specific data to your cluster, but this is usually not necessary.
Click the [Create Cluster] button to create this cluster. It will take a few minutes to create and start a new cluster.
When the cluster is created, you will see it listed, as shown in Fig. 5, with a state of "Running".
You are now ready to create jobs and run them on this cluster. I will cover this in a future article.
In this article, you learned how to create a cluster in an existing Azure Databricks workspace.


