Azure Databricks is a web-based platform built on top of Apache Spark and deployed to Microsoft's Azure cloud platform that provides a web-based interface that makes it simple for users to create and scale clusters of Spark servers and deploy jobs and Notebooks to those clusters. Spark provides a general-purpose compute engine ideal for working with big data, thanks to its built-in parallelization engine.
In the last article in this series, I showed how to create a new Databricks Cluster in a Microsoft Azure Databricks Workspace.
In this article, I will show how to create a notebook and run it on that cluster.
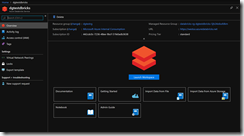
Navigate to the Databricks service, as shown in Fig. 1.
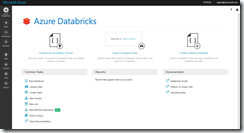
Click the [Launch Workspace] button (Fig. 2) to open the Azure Databricks page, as shown in Fig. 3.
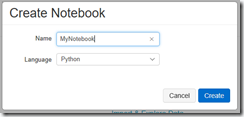
Click the "New Notebook" link under "Common Tasks" to open the "Create Notebook" dialog, as shown in Fig. 4.
At the "Name" field, enter a name for your notebook. The name must be unique within this workspace.
At the "Language" dropdown, select the default language for your notebook. Current options are Python, Scala, SQL, and R. Selecting a language does not limit you to only using that language within this notebook. You can override the language in a given cell.
Click the [Create] button to create the new notebook. A blank notebook displays, as shown in Fig. 5.
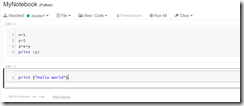
Fig. 6 shows a notebook with some simple code added to the first 2 cells.
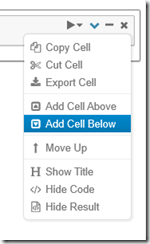
You can add, move, or manipulate cells by clicking the cell menu at the top right of an existing cell, as shown in Fig. 7.
In order to run your notebook, you will need to attach it to an existing, running cluster. Click the "Attach to" dropdown and select from the clusters in the current workspace, as shown in Fig. 8. See this article for information on how to create a cluster.
You can run all the cells in a notebook by clicking the "Run all" button in the toolbar, as shown in Fig. 9.
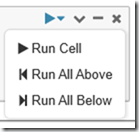
Use the "Run" menu in the top right of a cell to run only that cell or the cells above or below it, as shown in Fig. 10.
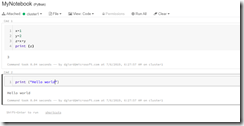
Fig. 11 shows a notebook after all cells have been run. Note the output displayed below each cell.
In this article, I showed how to create, run, and manage a notebook in an Azure Databricks workspace.
