Overview
You can use Visual Studio Code to create applications in a number of languages. Many of those applications can run in Microsoft Azure App Services. This article will show you how to deploy a web application from Visual Code to an Azure App Service.
## Install VS Code Azure App Service Extension
Before you begin deployment, you must install the Azure App Service Extension. Click the Extensions icon (Fig. 1) in the left sidebar and search for the Azure App Service extension from Microsoft, as shown in Fig. 2.
If this extension is not yet installed, a [Publish] button will display. Click this button to install it.
Create a Web App
You can create a web app using ASP.NET, ASP.NET Core, Java, Ruby, Node.js, PHP, or Python. Visual Studio Code has extensions to support each of these. The language and framework are not relevant to this article, as the steps are the same.
Create a New Azure App Service
Before you deploy your code, you will need to Create a New Azure App Service to Host your Web App.
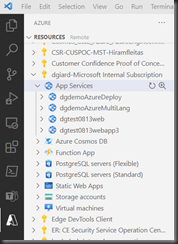
With your web application code open, click the Azure icon (Fig. 3) in the left sidebar and expand the Azure subscription to which you want to deploy and the "App Services" group within that subscription, as shown in Fig. 4.
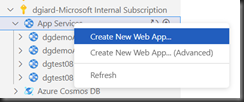
You will need an Azure Web App to host your code. If you have not yet created a Web App, you can create one now by right-clicking the "App Services" node and selecting "Create New Web App.." from the context menu, as shown in Fig. 5.
Enter a globally unique name for this Web App, as shown in Fig. 6, and press ENTER.
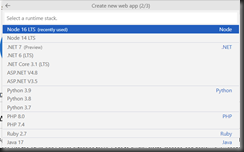
Select the runtime stack from the list of supported stacks and press ENTER. In Fig. 7, I selected Node 16 LTS because I wrote my application in Node. The language in which you wrote your app will determine your selection.
At the "Select a pricing tier" prompt, select the tier to which you want to deploy your Web App, as shown in Fig. 8. More powerful tiers will be more robust and reliable, but more expensive.
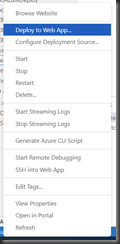
After a few minutes, an Empty Web App is created. You can now deploy your application to this Web App by clicking the [Deploy] button on the confirmation dialog, as shown in Fig. 9.
Deploy App to Azure App Service
You can now deploy your application to this Web App by clicking the [Deploy] button on the confirmation dialog, as shown in Fig. 9.
The prompt in Fig. 10 displays.
Select the folder containing your application's code from the list or click browse to find it on your computer.
After you select the code location, the warning in Fig. 11 displays.
Click the [Deploy] button to begin deploying your code to the Azure App Service.
You will receive the confirmation message shown in Fig. 12 when the deployment succeeds.
You can now browse your web site or manage the App Service in the Azure Portal.
Conclusion
In this article, I showed how to deploy a web application quickly and easily from Visual Studio Code.


