In the last article, I showed you how to add Assets to an Azure Media Services (AMS) account. An Asset can point to an audio or video file, but you will want to encode that file to allow others to consume it. There are many encoding options. By encoding an audio or video, we can convert it into a format that can be consumed by others.
Those who are consuming your media are not all using the same systems. They may have different devices, different clients, different connection speeds, and different software installed. You will want to consider the capabilities and configurations of your users when you decide how to encode your media. Fortunately, Azure Media Services gives you many options.
We use an AMS Job to encode media. A job accepts an input Asset and produces an output Asset. That output Asset may consist of one or more files stored in a single Azure Storage Blob Container.
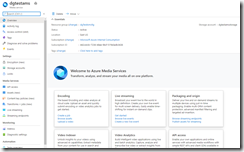
To begin, encoding, navigate to the Azure Portal and open an Azure Media Service, as shown in Fig. 1.
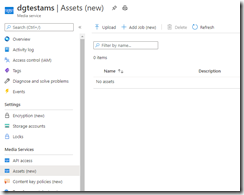
Then, select "Assets" from the left menu to open the "Assets" blade, as shown in Fig. 2.
See the following articles if you need help creating an AMS account or an AMS Asset.
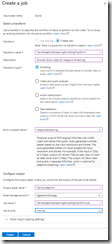
Click the [Add job] button (Fig. 3) to display the "Create a job" dialog, as shown in Fig. 4.
The first thing you need to do is create or select a Transform. A Transform is a recipe for doing something, like encoding a video. It is used by a Job, which tells Azure to execute the steps in a Transform. I will assume this is your first time doing this and do not have any Transforms created, so you will need to create a new one; but in the future, you may choose to re-use an existing Transform on a new Job.
At the "Transform" radio button, select "Create new".
At the "Transform name" textbox, enter a name to help you identify this Transform.
At the "Description" field, you may optionally enter some text to describe what this transform will do.
At the "Transform type" field, select the "Encoding" radio button.
At the "Built-in preset name" dropdown, you can select a desired encoding output appropriate for your audience. For this demo, select "Adaptive Streaming". This will create files in multiple formats that can be consumed by a variety of clients.
Next, we configure the settings for the output asset.
At the "Output asset name", enter a name to help you identify the output Asset that will be created. Azure will supply a default name, but I prefer to use something more readable, such as the Input Asset name, followed by the type of Transform.
At the "Asset storage account" dropdown, select the storage account in which to save the container and files associated with this asset.
At the "Job name" field, enter a name for this job to help you identify it later.
At the "Job priority" dropdown, select "Normal", "High", or "Low" priority, depending on whether you want this job to take precedence over other jobs. Unless I have a compelling reason, I leave this as the default "Normal".
Click the [Create] button to create and queue up the job.
You can check the progress of the job by selectin "Transforms + jobs" in the left menu to display the "Transforms + jobs" blade, as shown in Fig. 5.
Find the row with your Transform name (This why it is important to give it an easily identifiable name). Expand to see Jobs using this Transform, as shown in Fig. 6.
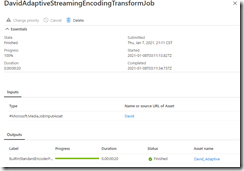
The state column tells you whether the job is queued, running, or finished.
From the "Transform + jobs" blade, you can click the name of the Transform to display more details about the Transform, as shown in Fig. 7 or click the name of the Job to display details about the job, as shown in Fig. 8.
After the job finishes, when you return to the "Assets" blade, you will see the new output Asset listed, as shown in Fig. 9.
Click on the link in the "Storage link" column to view the files in Blob storage, as shown in Fig. 10.
Note that there are multiple MP4 files, each with a different resolution. The names of the file indicate the resolution of the video. This allows users with smaller screens or slower bandwidth to select the optimum resolution for viewing.
The container also contains a thumbnail image and several text files with information describing the videos that client players can use.
In this article, you learned how to use Azure Media Services to encode a video. In the next article, I will show you how to share that video with others.


