In a previous article, I showed you how to use Azure Media Services to encode a video.
In this article, I will show you how to generate a URL, allowing others to view your encoded video online.
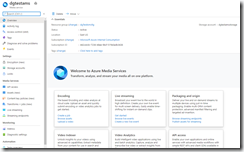
Navigate to the Azure Portal and to your Azure Media Services account, as shown in Fig. 1
Then, select "Assets" from the left menu to open the "Assets" blade, as shown in Fig. 2.
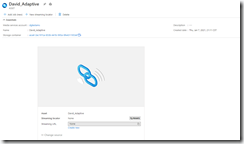
Select the Output Asset created by encoding your input video Asset to display the Asset details page, as shown in Fig. 3.
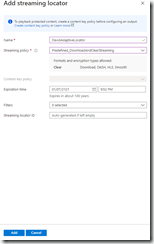
Click the [New streaming locator] button (Fig. 4) to display the "Add streaming locator" dialog, as shown in Fig. 5.
At the "Name" field, enter a descriptive name for this locator.
At the "Streaming policy" dropdown, select a desired Streaming Policy. A Streaming Policy define streaming protocols and encryption options. There are options to allow for streaming online or downloading and for adding encryption and Digital Rights Management. For this demo, I have selected "Predefined_DownloadAndClearStreaming". This allows users to view the video online and to download it; and it adds no encryption or DRM.
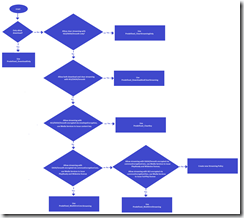
The flowchart in Fig. 7 is from the Microsoft Azure Documentation and will help you decide which Streaming policy is right for you.
The Streaming Endpoint will not last forever. You must include an expiration date and time. By default, this is set to 100 years in the future. Change this if you want your video to be accessible for a shorter period of time.
Click the [Add] button to add the Streaming Locator.
The dialog will close and return you to the output Assets details page with the Streaming URL filled in, as shown in Fig. 7.
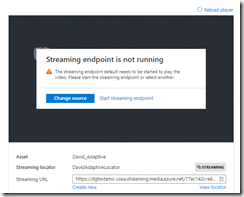
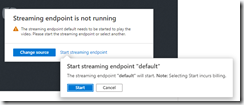
The URL is still not accessible until you start the streaming endpoint. Click the [Start streaming endpoint] button and the [Start] button in the popup dialog to enable the endpoint URL, as shown in Fig. 8.
After doing this, the Streaming locator will show as "STREAMING" on the output Asset details page, as shown in Fig. 9. When the Streaming endpoint is started, you can preview the video from within the Asset details page.
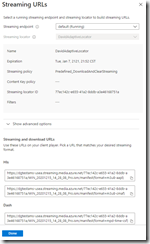
Click the "View locator" link to display the "Streaming URLs" dialog. Select the "Streaming endpoint" from the dropdown, as shown in Fig. 10.
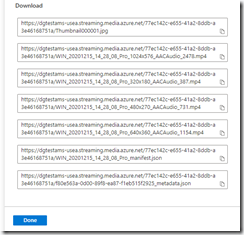
Many URLs are displayed in this dialog. For the encoding I selected, the "Download" section contains a JPG URL and several MP4 URLs, as shown in Fig. 11.
You can paste the JPG URL into a browser to view a thumbnail image from the video. You can paste any of the MP4 URLs into a browser to view or download the full video. The MP4 URLs may differ by their resolution and encoding. Clues about which is which can be found in the name of each MP4. The JSON URLs provide metadata about the video and can be used in applications. For example,
https://dgtestams-usea.streaming.media.azure.net/77ec142c-e655-41a2-8ddb-a3e46168751a/WIN_20201215_14_28_08_Pro_1024x576_AACAudio_2478.mp4
contains a video that is 1024 pixels wide by 576 pixels high and was encoded with Advanced Audio Coding (AAC).
Try each of these in your browser to see the differences.
Note that you are charged extra when the Streaming Locator is running, so it is important to stop the Locator if you do not need it.
In this article, you learned how to create and start a Streaming Locator to make your Azure Media Services video available online.
