Data Lake storage is a type of Azure Storage that supports a hierarchical structure.
There are no pre-defined schemas in a Data Lake, so you have a lot of flexibility on the type of data you want to store. You can store structured data or unstructured data or both. In fact, you can store data of different data types and structures in the same Data Lake.
Typically a Data Lake is used for ingesting raw data in order to preserve that data in its original format. The low cost, lack of schema enforcement, and optimization for inserts make it ideal for this. From the Microsoft docs: "The idea with a data lake is to store everything in its original, untransformed state."
After saving the raw data, you can then use ETL tools, such as SSIS or Azure Data Factory to copy and/or transform this data in a more usable format in another location.
Like most solutions in Azure, it is inherently highly scalable and highly reliable.
Data in Azure Data Lake is stored in a Data Lake Store.
Under the hood, a Data Lake Store is simply an Azure Storage account with some specific properties set.
To create a new Data Lake storage account, navigate to the Azure Portal, log in, and click the [Create a Resource] button (Fig.1).
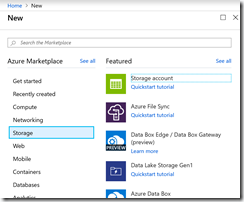
From the menu, select Storage | Storage Account, as shown in Fig. 2.
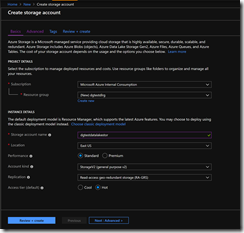
The "Create Storage Account" dialog with the "Basic" tab selected displays, as shown in Fig. 3.
At the “Subscription” dropdown, select the subscription with which you want to associate this account. Most of you will have only one subscription.
At the "Resource group" field, select a resource group in which to store your service or click "Create new" to store it in a newly-created resource group. A resource group is a logical container for Azure resources.
At the "Storage account name" field, enter a unique name for the storage account.
At the "Location" field, select the Azure Region in which to store this service. Consider where the users of this service will be, so you can reduce latency.
At the "Performance" field, select the "Standard" radio button. You can select the "Premium" performance button to achieve faster reads; however, there may be better ways to store your data if performance is your primary objective.
At the "Account kind" field, select "Storage V2"
At the "Replication" dropdown, select your preferred replication. Replication is explained here.
At the "Access tier" field, select the "Hot" radio button.
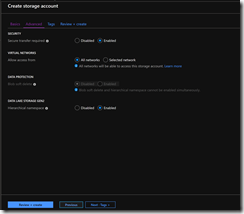
Click the [Next: Advanced>] button to advance to the "Advanced" tab, as shown in Fig. 4.
The important field on this tab is "Hierarchical namespace". Select the "Enabled" radio button at this field.
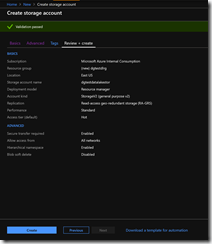
Click the [Review + Create] button to advance to the "Review + Create" tab, as shown in Fig. 5.
Verify all the information on this tab; then click the [Create] button to begin creating the Data Lake Store.
After a minute or so, a storage account is created. Navigate to this storage account and click the [Data Lake Gen2 file systems] button, as shown in Fig. 6.
The "File Systems" blade displays, as shown in Fig. 7.
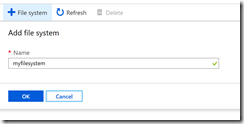
Data Lake data is partitioned into file systems, so you must create at least one file system. Click the [+ File System] button and enter a name for the file system you wish to create, as shown in Fig. 8.
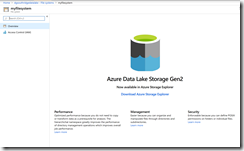
Click the [OK] to add this file system and close the dialog. The newly-created file system displays, as shown in Fig. 9.
If you double-click the file system in the list, a page displays where you can set access control and read about how to manage the files in this Data Lake Storage, as shown in Fig. 10
In this article, you learned how to create a Data Lake Storage and a file system within it.

