Source control is an important part of software development - from collaborating with other developers to enabling continuous integration and continuous deployment to providing the ability to roll back changes.
Azure Data Factory (ADF) provides the ability to integrate with source control systems GitHub or Azure DevOps.
I will walk you through doing this, using GitHub.
Before you get started, you must have the following:
A GitHub account (Free at https://github.com)
A GitHub repository created in your account, with at least one file in it. You can easily add a "readme.md" file to a repository from within the GitHub portal.
Create an ADF service, as described in this article.
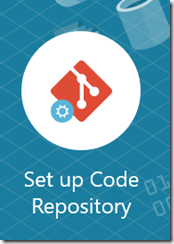
Open the "Author & Monitor" page (Fig. 1) and click the "Set up Code Repository" button (Fig. 2)
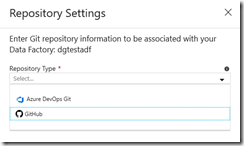
The "Repository Settings" blade displays, as shown in Fig. 3.
At the "Repository Type", dropdown, select the type of source control you are using. The current options are "Azure DevOps Git" and "GitHub". For this demo, I have selected "GitHub".
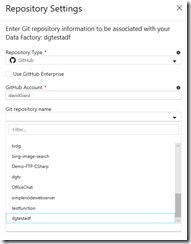
When you select a Repository type, the rest of the dialog expands with prompts relevant to that type. Fig. 4 shows the prompts when you select "GitHub".
I don't have a GitHub Enterprise account, so I left this checkbox unchecked.
At the "GitHub Account" field, enter the name of your GitHub account. You don't need the full URL - just the name. For example, my GitHub account name is "davidgiard", which you can find online at https://github.com/davidgiard; so, I entered "davidgiard" into the "GitHub Account" field.
The first time you enter this account, you may be prompted to sign in and to authorize Azure to access your GitHub account.
Once you enter a valid GitHub account, the "Git repository name" dropdown is populated with a list of your repositories. Select the repository you created to hold your ADF assets.
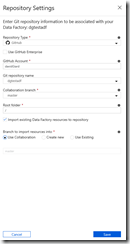
After you select a repository, you are prompted for more specific information, as shown in Fig. 5
At the "Collaboration branch", select "master". If you are working in a team environment or with multiple releases, it might make sense to check into a different branch in order control when changes are merged. To do this, you will need to create a new branch in GitHub.
At the "Root folder", select a folder of the repository in which to store your ADF assets. I typically leave this at "/" to store everything in the root folder; but, if you are storing multiple ADF services in a single repository, it might make sense to organize them into separate folders.
Check the "Import existing Data Factory resources to repository" checkbox. This causes any current assets in this ADF asset to be added to the repository as soon as you save. If you have not yet created any pipelines, this setting is irrelevant.
At the "Branch to import resources into" radio buttons, select "Use Collaboration".
Click the [Save] button to save your changes and push any current assets into the GitHub repository.
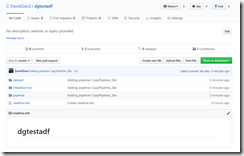
Within seconds, any pipelines, linked services, or datasets in this ADF service will be pushed into GitHub. You can refresh the repository, as shown in Fig. 6.
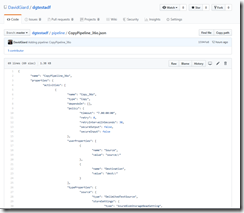
Fig. 7 shows a pipeline asset. Notice that it is saved as JSON, which can easily be deployed to another server.
In this article, you learned how to connect your ADF service to a GitHub repository, storing and versioning all ADF assets in source control.

