MVC Tutorial 3: Using an ID to specify an individual model object
August 27, 2008 12:26 Comments [0]Microsoft recently released the ASP.Net Model View Controller framework (MVC). It is currently available as Preview 3 and can be downloaded at http://www.microsoft.com/downloads/details.aspx?FamilyId=92F2A8F0-9243-4697-8F9A-FCF6BC9F66AB&displaylang=en
A new MVC project contains a couple sample views and controllers so you can get an idea of the proper syntax to use.
This article builds on the application created in my last ASP.Net MVC tutorial. If you have not already done so, please follow the brief states in the previous MVC tutorial before beginning this tutorial
In the last tutorial, we added a model, view and controller to display a list of customers that one can navigate to using a URL formatted as controller/action. In this article, we will add a new view and controller to an existing MVC project and display details of a single customer using a URL formatted as controller/action/id. The id is passed automatically to the action method and allows us to filter to a single customer.
1. Open Visual Studio 2008 and open the TestMVC solution created in MVC Tutorial 2.
2. Open the Solution Explorer (View | Solution Explorer) and select the Controllers\CustomerController.cs. Double-click CustomerController to open it in the code editor.
a. In the CustomerController class, we will create a new action to get the details of a single customer.
i. Add the following private GetCustomer method to the CustomerController class. In the last tutorial, we wrote methods to retrieve customer 1 and customer 2. For simplicity, we will get Customer 1 if ID 1 is passed in to our method and Customer 2 if any other ID is passed. private Customer GetCustomer(int custID) { if (custID == 1) { return GetCustomer1(); } else { return GetCustomer2(); } }
ii. Add an Action method to the CustomerController class to get the details of a customer. Paste the following code into CustomerController.cs. public ActionResult Details(int id) { Customer cust = GetCustomer(id); return View("Details", cust); }
iii. In the GetCustomer method, we get details of a single customer and return a view. Unlike the generated code, we explicitly specify which view to return (“Details”) and we pass in some extra data (cust) that the view will consume.
3. Add a view to the project.
a. In the Solution Explorer, right-click the Views\Customer folder and select Add | New Item. The Add New Item dialog displays.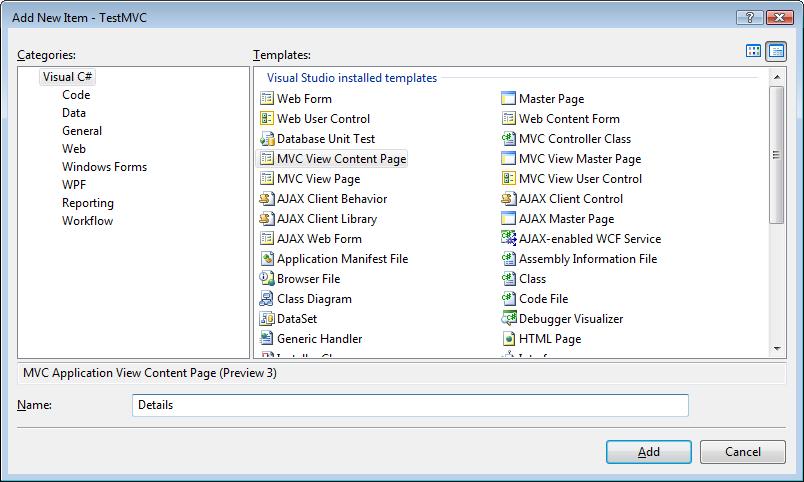
Figure 1
i. Under Categories, select Visual C#\Web\MVC.
ii. Under Templates, select MVC View Content Page.
iii. In the Name textbox, enter “Details”.
iv. The Select a Master Page dialog displays. 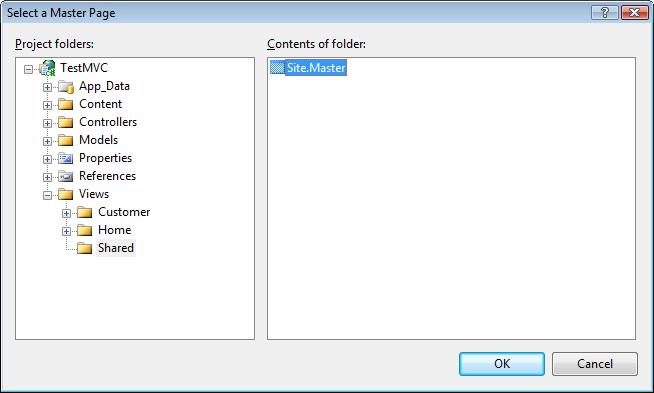
Figure 2
1. Navigate to the Views\Shared folder and select Site.Master.
2. Click the OK button to add this view content page to the project.
b. Add visual elements to the View
i. If it is not already open, open the Details view by double-clicking List.aspx in the Solution Explorer. Click the Source tab at the bottom of the editor.
ii. Replace the code in Details.aspx with the following <%@ Page Title="" Language="C#" MasterPageFile="~/Views/Shared/Site.Master" AutoEventWireup="true" CodeBehind="Details.aspx.cs" Inherits="TestMVC.Views.Customers.Details" %> <%@ Import Namespace="TestMVC.Views.Customers"%> <%@ Import Namespace="TestMVC.Models" %> <asp:Content ID="Content1" ContentPlaceHolderID="MainContent" runat="server"> <div> CustID: <%=((Customer)ViewData.Model).CustID %><br /> Name: <%=((Customer)ViewData.Model).FirstName %> <%=((Customer)ViewData.Model).LastName %> <br /> Address: <%=((Customer)ViewData.Model).StreetAddress%><br /> City: <%=((Customer)ViewData.Model).City %><br /> State: <%=((Customer)ViewData.Model).State %><br /> ZIP: <%=((Customer)ViewData.Model).PostalCode%><br /> div> asp:Content>
The above code displays details of a single Customer model object.
4. Modify the List view
a. Open Views\Customers\List.aspx by double-clicking it in Solution Explorer.
b. Find the
|
<td> <%=Html.ActionLink("Details", "Details", new { ID=cust.CustID})%> td> |
5. Test the application
a. Save and compile the solution (Build | Build Solution). Correct any errors you find.
b. Run the solution (Debug | Start Debugging). Depending on the port number used by Casini, it should display in your browser with a URL such as
http://localhost:4152/Home
c. Navigate to the List page by changing the URL to
http://localhost:4152/Customers/List
(Replace the port number if necessary)
d. You should see a list of 2 customers in your browser. Each customer should have a hyperlink labeled “Details”. 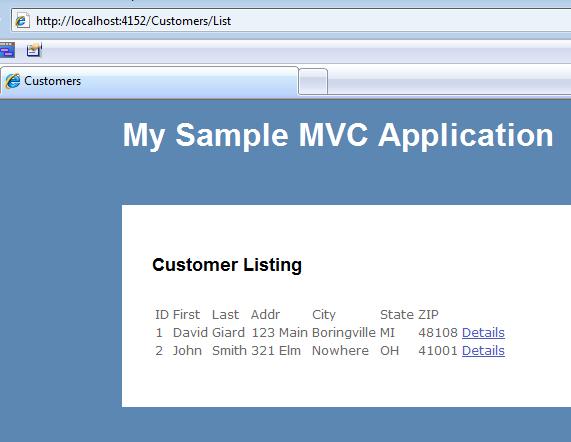
Figure 3
e. Click the hyperlink next to customer 1. The URL should change to
http://localhost:4152/Customers/Details/1
and the details of the first customer should display on screen.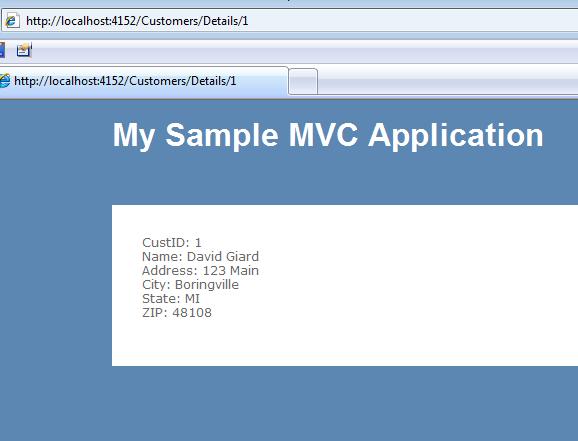
Figure 4
f. Set a breakpoint in the Details method of CustomerController.cs and refresh the page to step through the code as it executes.
In this article, we added a view and controller to our application and used these to retrieve and display customer details by the Customer ID.