An Azure storage account gives you the ability to create, store, and manage tables, queues, blobs, and files.
Azure Storage Services
Available Azure storage services are:
Blobs
A blob is any unstructured or semi-structured object that you want to store. Examples include videos, images, and text files. Blob storage is flexible for storing an object without the system having to know much about the object.
Files
Azure Files allow you to store files to Azure and access them as a file share using the standard SMB protocol. Files are built on top of Azure Blob Storage.
Tables
Azure Table Storage provides a simple NoSQL database for your application. Data in an Azure Table is stored as rows. Each row contains a key and one or more properties. You do not need to pre-define these properties beforehand and you can define different properties for different rows in the same table.
Queues
A queue is a popular mechanism for designing asynchronous applications. One application can drop a message onto a queue and another application can pick up that message later and process it. This decoupling allows for scalability, flexibility, and faster response times.
Creating an Azure Storage Account
To create a new Azure Storage Account, navigate to the https://portal.azure.com.
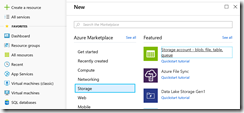
Click the [Create a resource] button; then select Storage | Storage account - blob, file, table, queue from the menu, as shown in Fig. 1
The New Storage Account blade displays, as shown in Fig. 2.
At the "name" field, enter a unique name for your storage account. You will be able to access this account through a REST API by sending requests to
https://accountname.core.windows.net
where accountname is the name you enter for your account.
At the "Deployment model" radio button, select "Resource manager".
At the "Account kind" dropdown, select "Storage (general purpose)"
At the "Location" dropdown, select a location in which to create your account. To minimize latency, you should create an account either near you or near the users and applications that will access the data in this account.
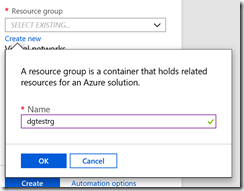
At the "Resource Group" field, click the "Create new" link to display the "Create Resource Group" dialog, as shown in Fig. 3.
Enter a unique name for your new resource group and click the [OK] button to close the dialog and return to the previous blade.
Review your Storage Account settings and click the [Create] button to create your new storage account.
After a few seconds, you will be able to access the properties of your Storage Account, manage the account, and connect to the account.
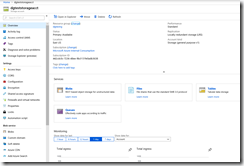
The "Overview" tab (Fig. 4) displays information about the account, along with links to create and manage Blobs, Files, Tables, and Queues.
Click the "Blobs" link in the "Services" section of the "Overview" tab to create and manage blobs and containers, as shown in Fig. 5.
Click the "Files" link in the "Services" section of the "Overview" tab to create and manage files, as shown in Fig. 6.
Click the "Tables" link in the "Services" section of the "Overview" tab to create and manage tables , as shown in Fig. 7.
Click the "Queues" link in the "Services" section of the "Overview" tab to create and manage queues, as shown in Fig. 8.
Azure Storage gives you many option for storing data in the cloud.


