The Bing Spell Check API allows you to call a simple web service to perform spell checking on your text.
Before you get started, you must log into a Microsoft Azure account and create a new Bing Spell Check Service. Here are the steps to do this:
In the Azure Portal, click the [Create a resource] button (Fig. 1); then, search for and select "Bing Spell Check", as shown in Fig. 2.
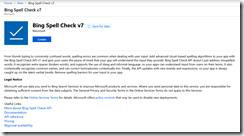
The "Bing Spell Check" (currently on version 7) page displays, which describes the service and provides links to documentation and information about the service, as shown in Fig. 3
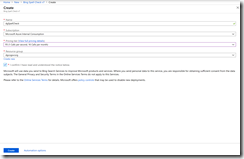
Click the [Create] button to open the "Create" blade, as shown in Fig. 4.
At the "Name" field, enter a unique name for your service.
At the "Subscription" dropdown, select the subscription in which to create the service. Most of you will have only one subscription.
At the "Pricing Tier" dropdown, select the free or paid tier, as shown in Fig. 5.
The number of calls are severely limited for the free tier, so this is most useful for testing and learning the service. You may only create one free Spell Check service per subscription.
At the "Resource Group" field, select a resource group to associate with this service or click the "Create new" link to associate it with a newly-created resource group. A resource group provides a way to group together related service, making it easier to manage them together.
Click the [Create] button to begin creating the service. This process takes only a few seconds.
Open the service and select the "Keys" blade, as shown in Fig. 6.
Either one of the keys listed on this page must be passed in the header of your web service call.
Save a copy of one of these keys. You will need it when I show you how to call the Bing Spell Check Service in tomorrow’s article.


