Overview
You may want to add a new user to an Azure Active Directory to onboard a new employee, to allow an external person access to the directory or to provide an account under which a service will run.
Creating a new user in Azure Active Directory is a straightforward process and can be done within the Azure Portal.
The Steps
Log into the Azure Portal as an Administrator and search for Azure Active Directory, as shown in Fig. 1 to display the Azure Active Directory "Overview" blade, as shown in Fig. 2.
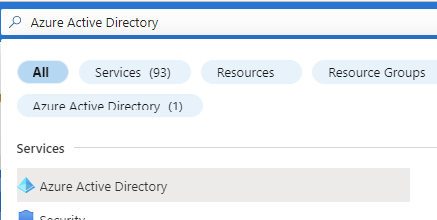
Fig. 1
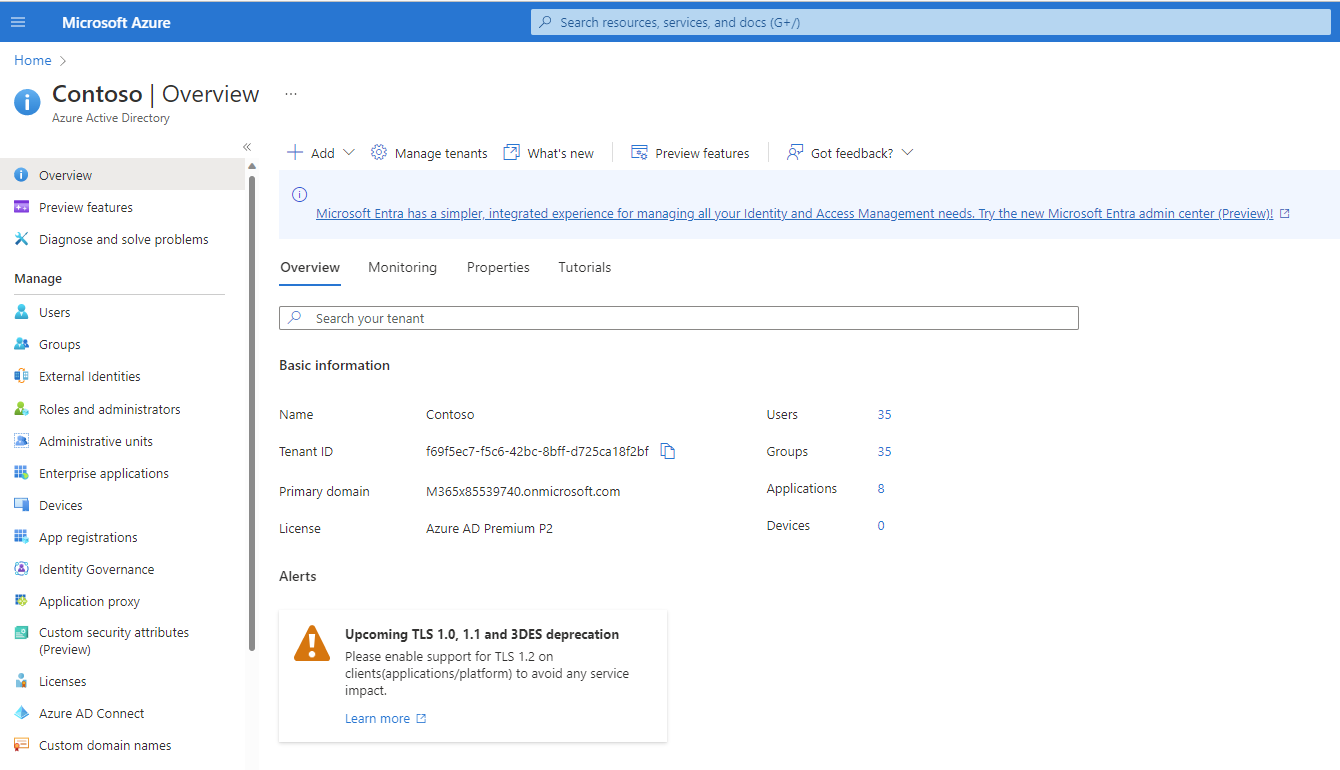
Fig. 2
Click the [User] button (Fig. 3) in the left menu to display the "Users" blade, as shown in Fig. 4

Fig. 3
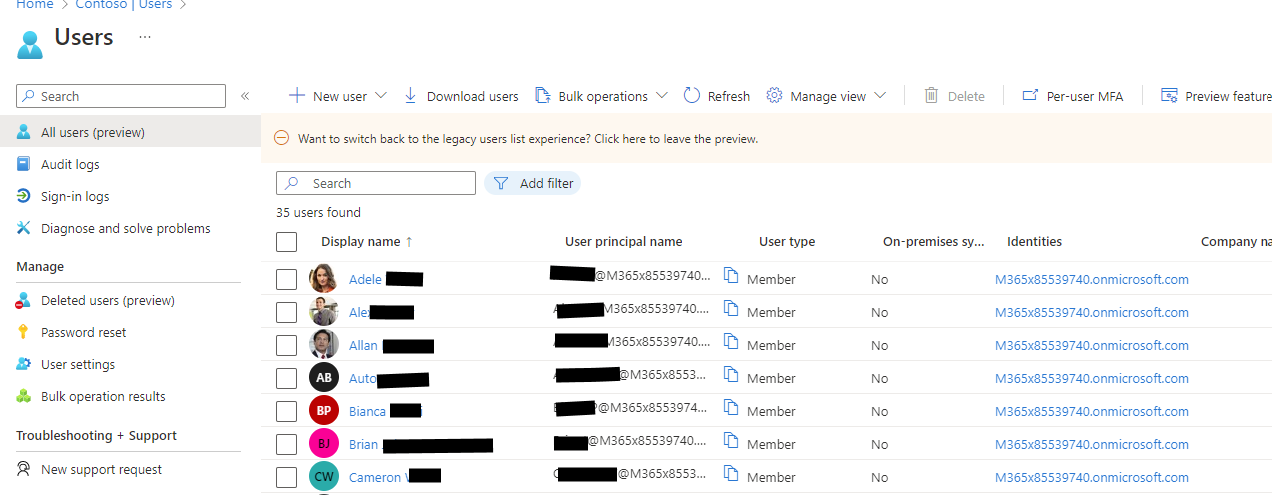
Fig. 4
Click the [New User] button and select "Create new user" from the dropdown, as shown in Fig. 5.
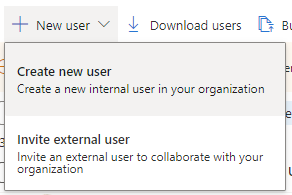
Fig. 5
The "New user" dialog displays, as shown in Fig. 6.
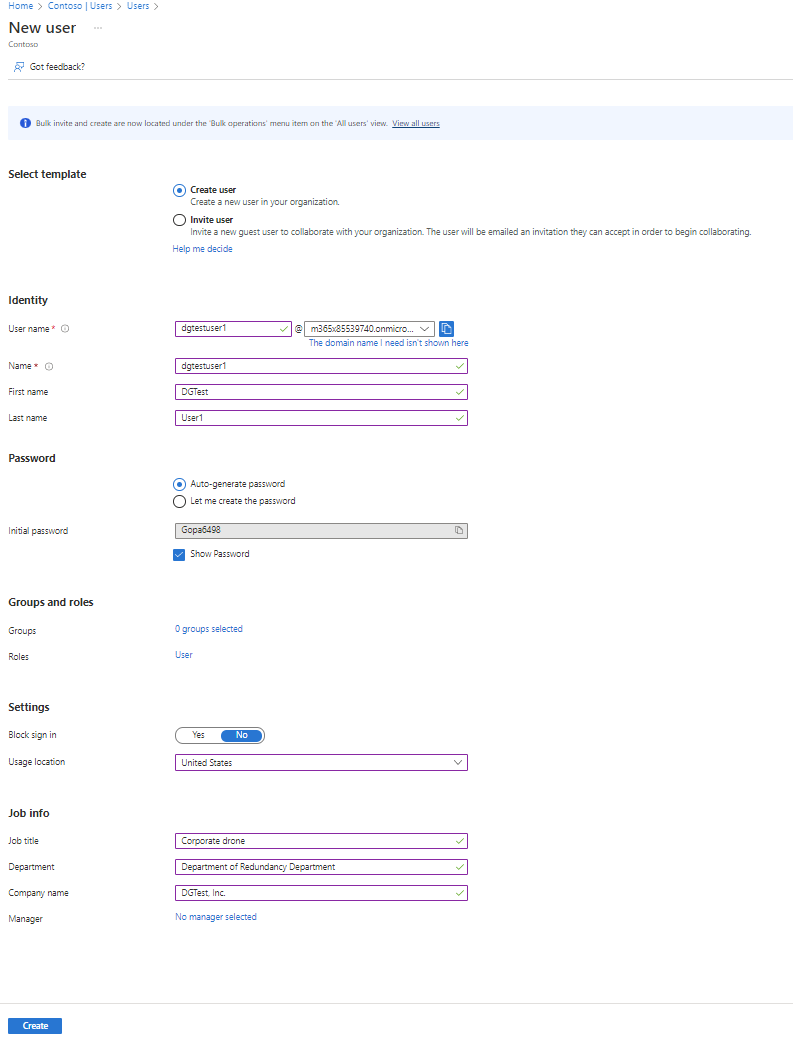
Fig. 6
At the "User name" field, enter a unique name for this user. This will be displayed in user lists and will be used to sign in and potentially as an email address.
At the "Name" field, enter the full name of the user.
At the "First name" field, enter the user's first name
At the "Last name" field, enter the user's last name
At the "Groups and roles" field, select any AD Groups or Roles to which you wish to assign the user.
At the "Block sign in" toggle, select "Yes" if you want to wait to make the user active; otherwise select "No" (the default).
At the "Usage Location" field, select the user's primary country of residence.
At the "Job title" field, enter the user's title.
At the "Department" field, enter the user's department.
At the "Company name" field, enter the name of the company for which the user works.
At the "Manager" field, you may select the user's manager.
"User Name" and "Name" are the only required fields in this dialog. Almost all of these settings can be added or changed later.
Click the [Create] button to create this user.
You will return to the "Users" blade, where you can use the search box to find the user you just added, as shown inf Fig. 7.

Fig. 7
Click the Display name link to display details about the user, as shown in Fig. 8.
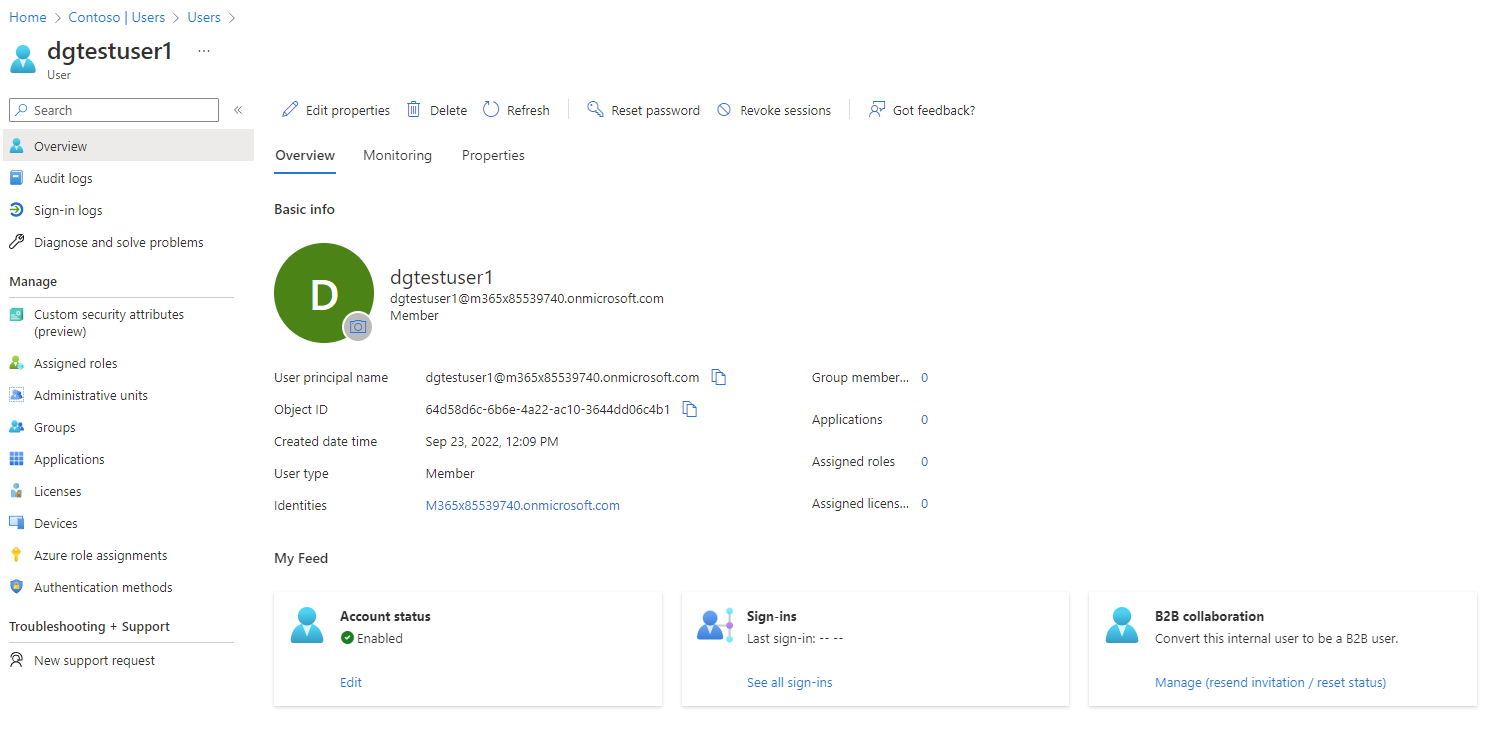
Fig. 8
Modifying a User
To modify information about the user, click the [Edit properties] (Fig. 9) button to display the Properties dialog, as shown in Fig. 10.

Fig. 9
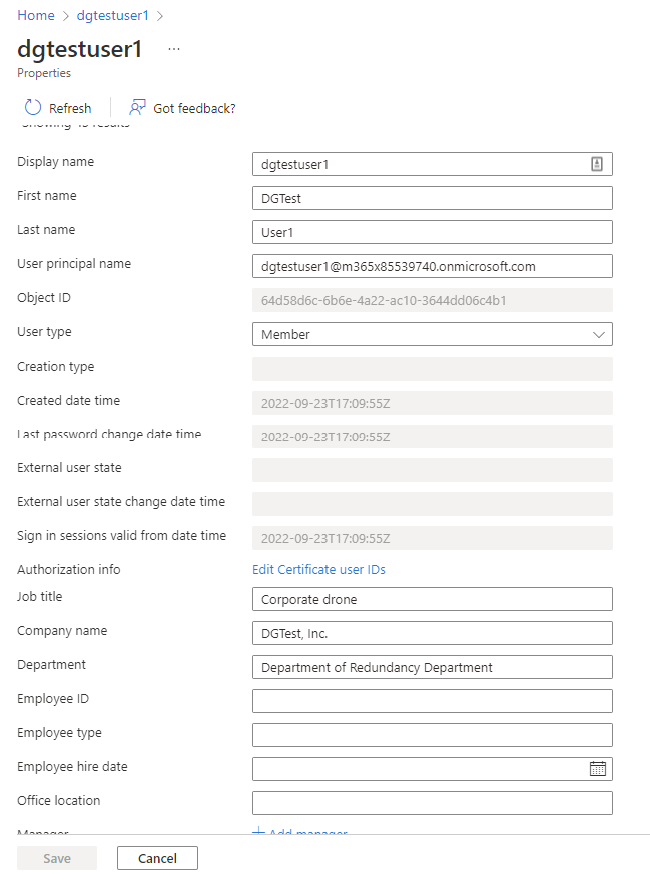
Fig. 10
To delete a user, click the [Delete] button (Fig. 11); then click the [Delete] button in the confirmation dialog shown in Fig. 12.

Fig. 11
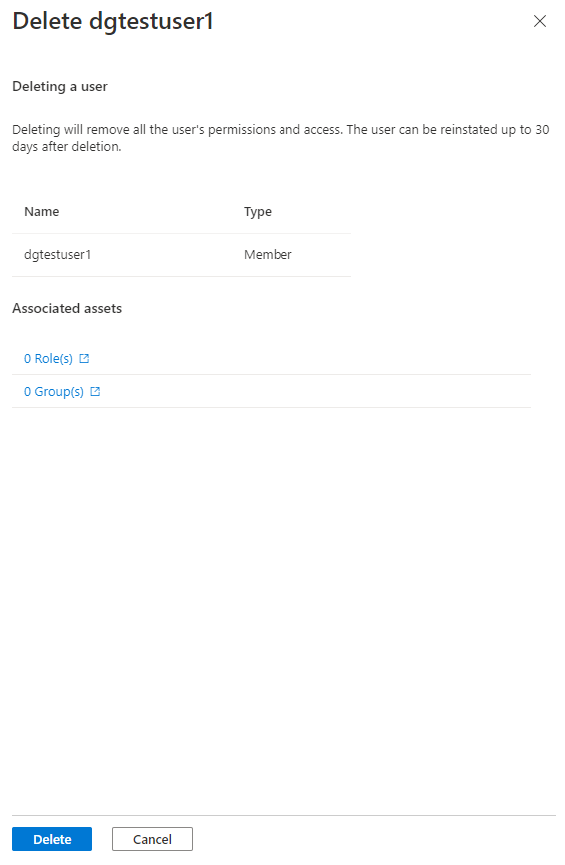
Fig. 12
As you can see, there are far more user properties to edit than were available when you created the user. Make any desired changes and click the [Save] button to commit these changes to the User record.
Conclusion
In this article, I showed you how to create and manage a User in Azure Active Directory.