Azure Data Explorer (ADX) is a scalable service that allows you to manage large data sets in near-real time.
The first step in working with ADX is to create an ADX Cluster. A cluster is a collection of servers that work together to ensure scalability and redundancy in data storage and processing.
This document walks you through the process of creating an ADX Cluster.
Navigate to the Azure Portal and sign in.
Click the [Create a resource] button (Fig. 1); then, search for and select "Azure Data Explorer", as shown in Fig. 2.

Fig. 1
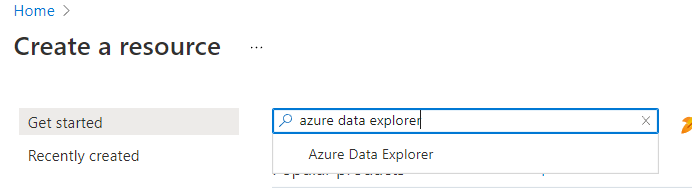
Fig. 2
The "Azure Data Explorer" summary page displays, as shown in Fig. 3. This page contains information about ADX as well as links to help you learn more.
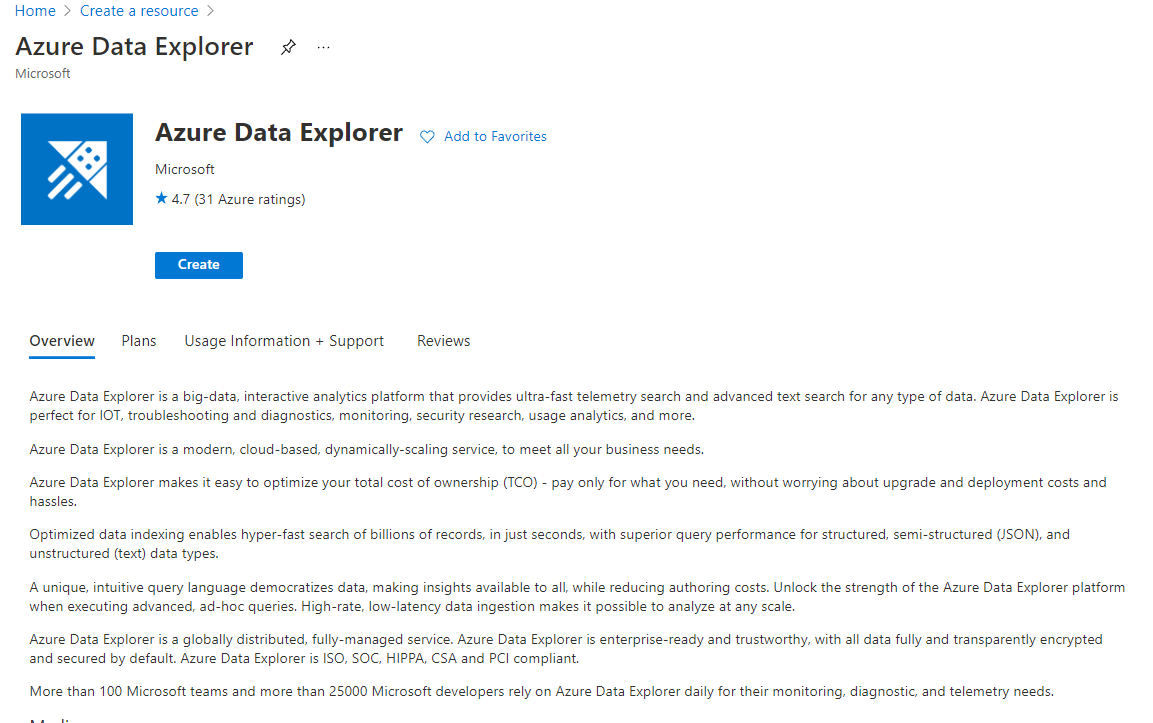
Fig. 3
Click the [Create] button to open the "Create an Azure Data Explorer Cluster" blade, as shown in Fig. 4.
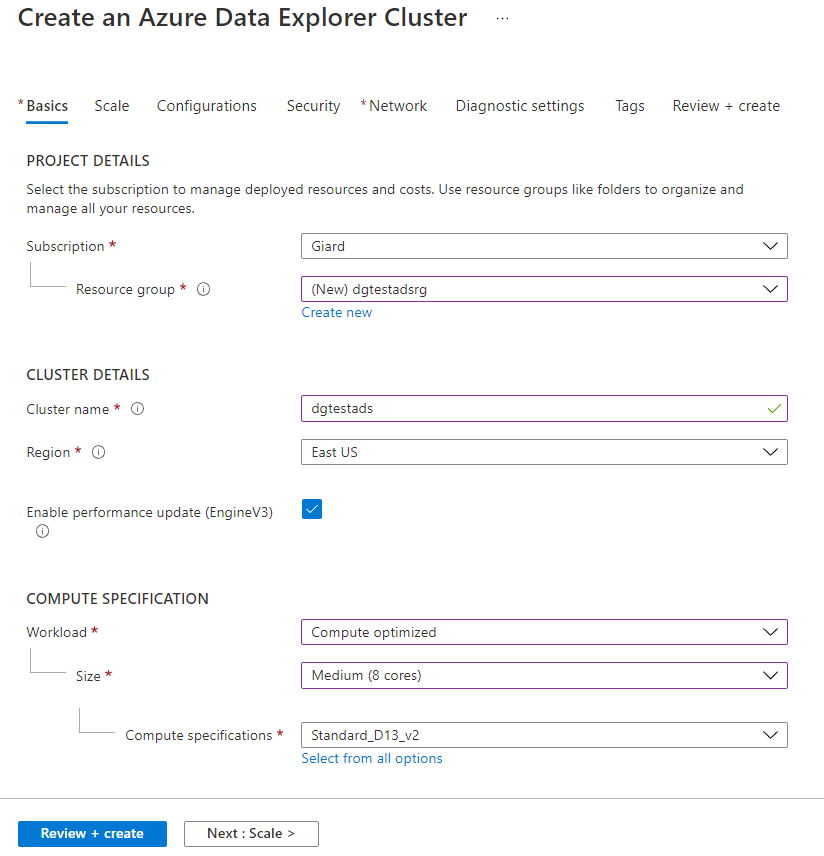
Fig. 4
At the "Subscription" dropdown, select the subscription that should contain this cluster.
At the "Resource group" field, select or create a resource group for this cluster.
At the "Cluster name" field, enter a unique name for this cluster.
At the "Region" field, select a region in which to create the cluster. Consider the location of users and any external data you may need to access when deciding on a region.
The "Workload" dropdown displays a list of the types of workloads you may want to run, as shown in Fig. 5.
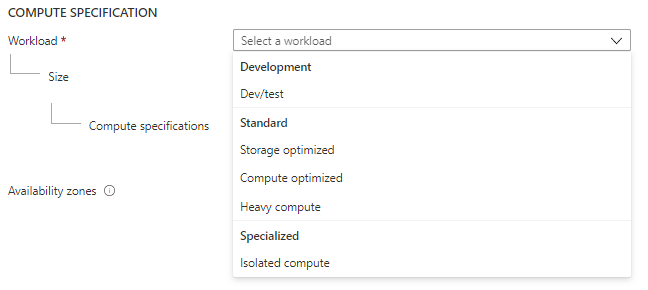
Fig. 5
This list is divided into 3 categories: Development, Standard, and Specialized.
Development contains only one option ("Dev/Test") which creates a cluster with only one node. This will not be very scalable, so it is likely not appropriate for a production environment. However, it is an inexpensive way for you to learn the features of ADX.
Standard contains three options: "Storage optimized", "Compute optimized", and "Heavy compute". Select "Storage optimized" if you don't plan to do a lot of computational work on your data. Select one of the other two if you expect to perform many calculations on your data. The "Heavy compute" option provides the most computer power.
After you select the "Workload", select the appropriate size of the machines in your cluster, as shown in Fig. 6.
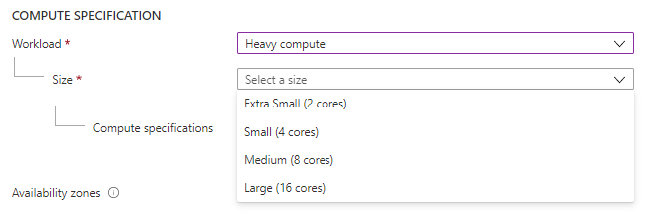
Fig. 6
Machines with more cores are more powerful, but cost more. Options in this dropdown are dependent on the workload you select.
The "Compute specifications" dropdown (Fig. 7) will suggest a specific VM that is appropriate for your chosen workload and size. You can accept this or choose a different machine.
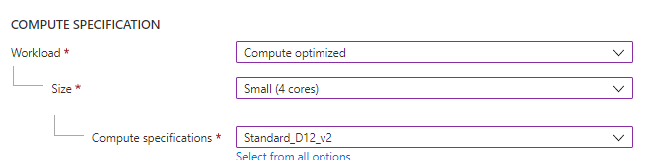
Fig. 7
At the "Availability zones" dropdown (Fig. 8), you have the option to deploy your cluster to multiple availability zones. Availability zones are data centers within the same region that are separated geographically and do not have a single point of failure between them. This option costs extra and is not required.
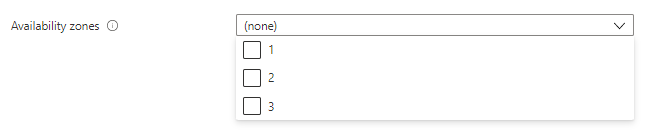
Fig. 8
Click the [Review + create] button (Fig. 9) to display the "Review+Create" tab, as shown in Fig. 10.

Fig. 9

Fig. 10
This tab displays the options you selected for your cluster and lists any problems, such as missing required fields.
Click the [Create] button to begin creating this cluster. This process will take several minutes. When the cluster is created, a message displays, as shown in Fig. 11.
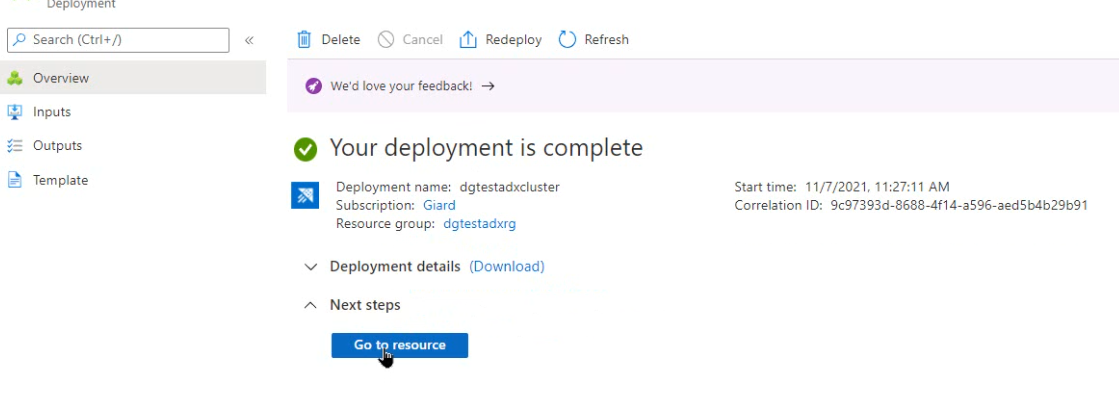
Fig. 11
Click the [Go to resource] button to navigate to the Azure Data Explorer Cluster "Overview" blade, as shown in Fig. 12.
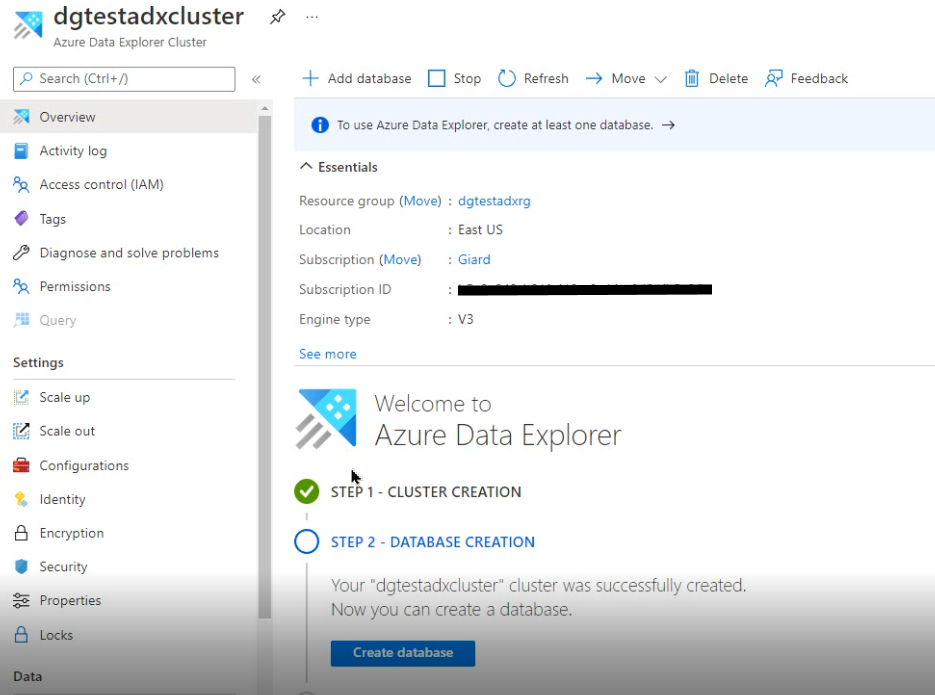
Fig. 12
From here, you can add and manage data in your cluster.
In this article, you learned how to create a new ADX cluster. In the next article, I will show you how to add a database to the cluster.