Overview
An Azure Monitor Alert Rule is an Action taken when a system meets a predetermined condition. These are useful to notify us when a system has a problem or a potential problem. You can read more here.
We can create Alert Rules in Azure Monitor.
Creating an Azure Alert Rule
To begin, log into the Azure Portal and navigate to the "Azure Monitor", as shown in Fig. 1.
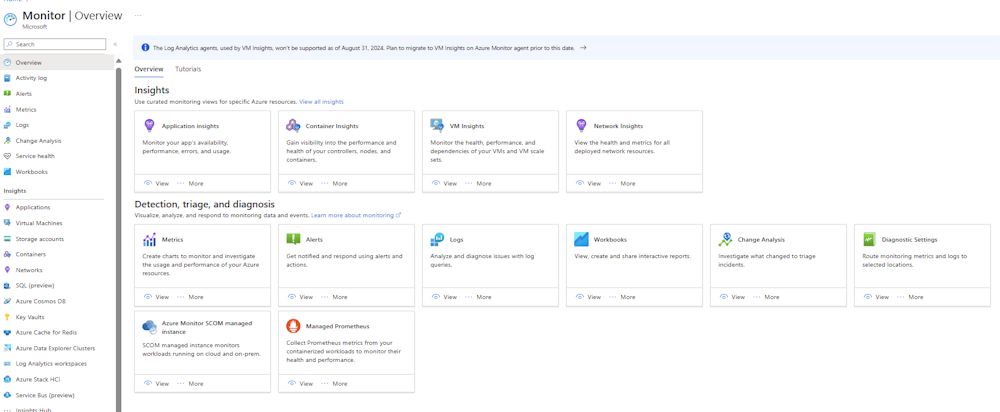
Fig. 1
In the left menu, select the [Alerts] button (Fig. 2) to display the "Alerts" blade, as shown in Fig. 3

Fig. 2

Fig. 3
Expand the [Create] menu button and click the [Action group] button (Fig. 4) to display the "Create an alert rule" dialog, as shown in Fig. 5.
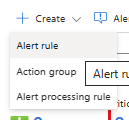
Fig. 4
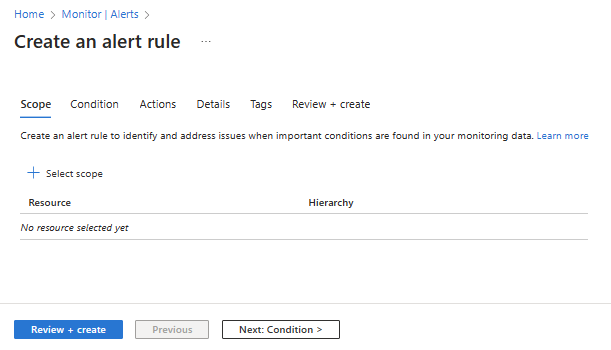
Fig. 5
The "Create an alert rule" dialog has multiple tabs: "Scoope", "Condition", "Actions", "Details", "Tags", and "Review + create". The "Scope" tab displays initially.
A Scope defines the Azure resources that will trigger an Alert.
Click the [Select scope] button (Fig. 6) to display the "Select resource" dialog, as shown in Fig. 7.

Fig. 6
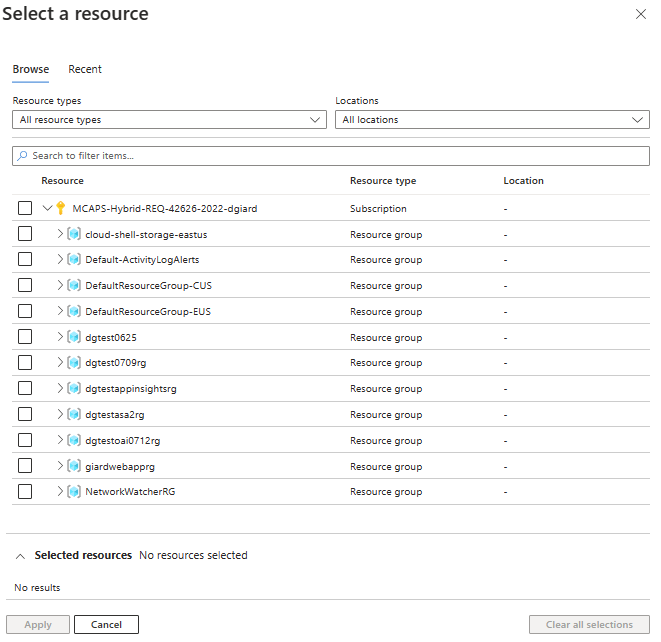
Fig. 7
This dialog lists all the resource groups in the current subscription. Expand a resource group to reveal the Azure resources within that resource group, as shown in Fig. 8.
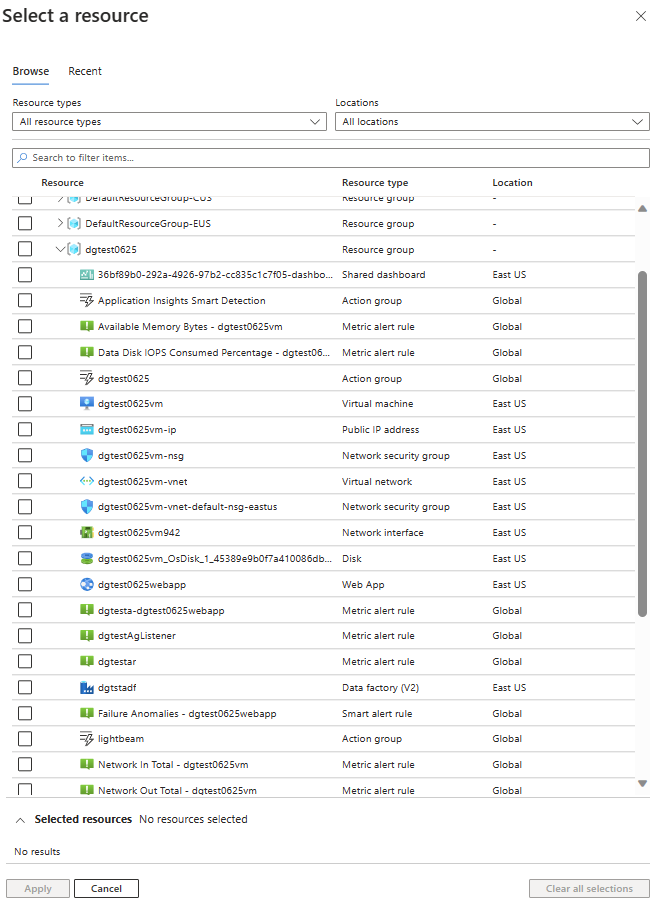
Fig. 8
Select the resource that will trigger the Alert and click the [Apply] button to close the dialog and return to the "Scope" tab of the "Create an alert rule" dialog, as shown in Fig. 9.

Fig. 9
The scope will now list in this tab.
Note that you can only select one scope per Alert Rule. Click the [Select scope] button again if you wish to change the scope.
Select the "Condition" tab, as shown in Fig. 10.
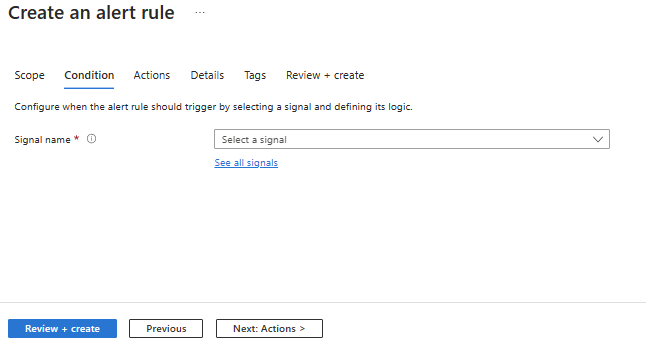
Fig. 10
On this tab, you can configure the condition that must be met to trigger the alert actions.
At the "Signal name" dropdown, select the metric on which you will base the condition, as shown in Fig. 11.
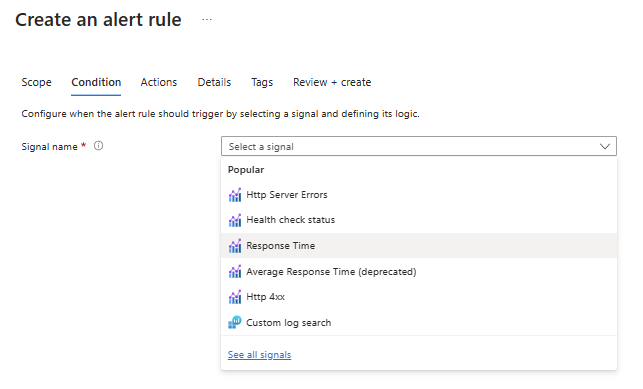
Fig. 11
The list displayed depends on the type of resource selected in the Scope. Popular signals are listed, but you can see more by clicking the "See all signals" link.
After you select a signal, a dialog similar to Fig. 12 displays.
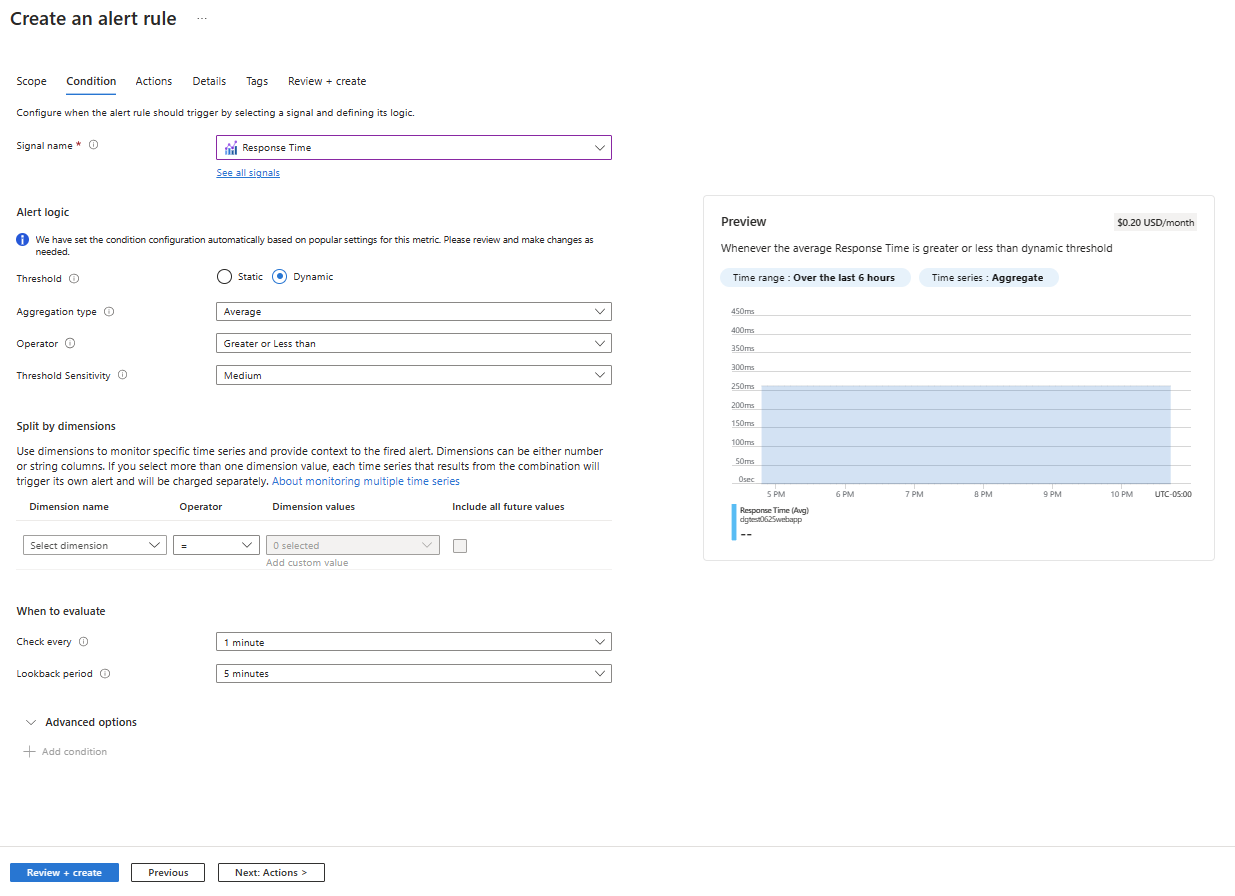
Fig. 12
Here you can specify the details of the condition, such as how often to check and the threshold involved. For thresholds, you have the option of entering a static value or allowing machine learning to determine what constitutes a low, medium, or high value based on historical data of your application. This is useful if you want Azure to notify you when the system deviates from its normal operation.
Select the "Actions" tab, as shown in Fig. 13.

Fig. 13
On this tab, you can configure the actions that occur when the condition is met. An action can be a notification sent to someone via email, text, phone call, or mobile application push. It can also be a message sent to another application or service, such as an Azure Function or Event Hub.
Click the [Select action group] button (Fig. 14) to display the "Select action groups" dialog, as shown in Fig. 15.

Fig. 14
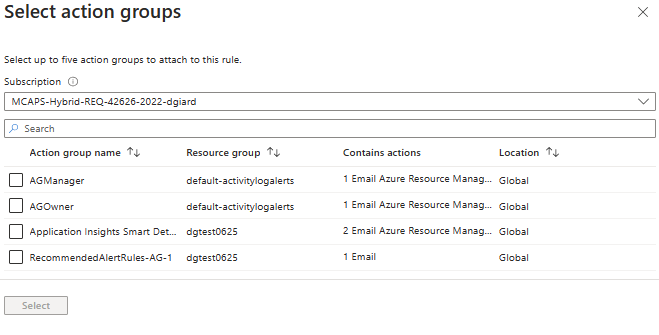
Fig. 15
Azure creates a few Action Groups that send notifications to those assigned to Azure roles. Select the action group you want to notify.
If none of the built-in Action Groups meet your needs, you can create a custom Action Group, as described here.
Select the "Details" tab, as shown in Fig. 16.
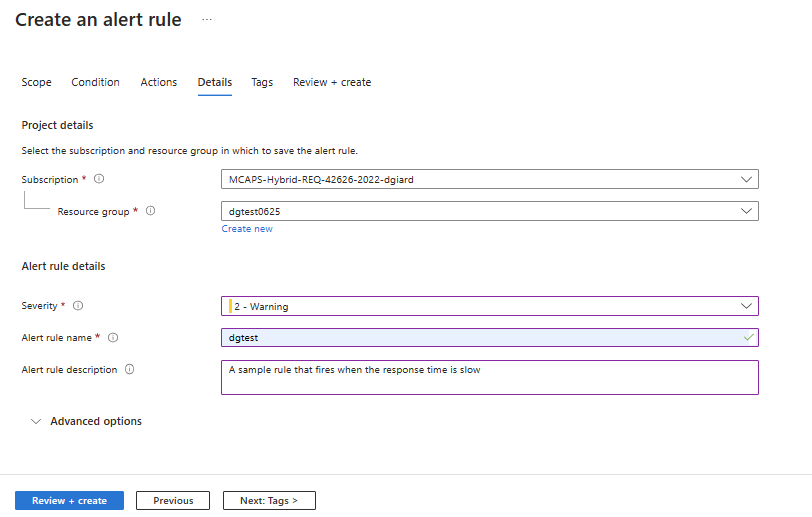
Fig. 16
On this tab, you can configure miscellaneous details of the Alert Rule, including a name and description to easily identify it later.
At the "Severity" dropdown, select the severity of the issue when the condition is met. Values range from Critical to Informational / Verbose, as shown in Fig. 17.

Fig. 17
The Severity should be an indication of the priority of the incident that triggered the alert, which is based on the issue's impact (how many people or systems are affected) and its urgency (how soon we need to fix it). The matrix in Fig. 18 will help in determining this.

Fig. 18
Select the "Tags" tab, as shown in Fig. 19.

Fig. 19
Here you can enter name/value pairs that act as metadata associated with the Action Group. While not required, this metadata is useful in reporting, as it allows you to group, sort, and filter on these fields.
Select the "Review + create" tab, as shown in Fig. 20.
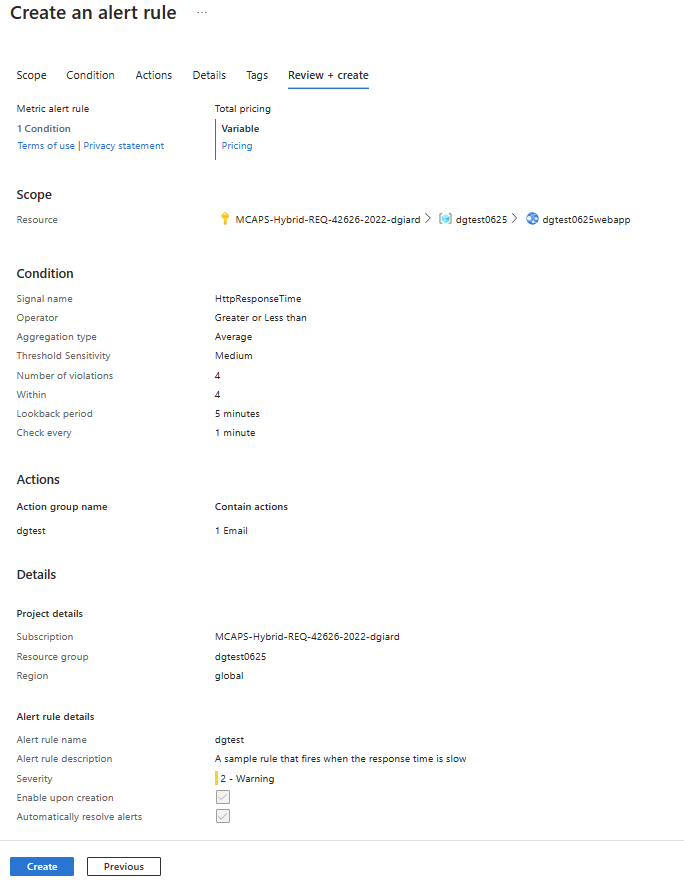
Fig. 20
If you omitted any required information or entered anything incorrectly, an error message displays on this tab. Correct any errors before proceeding. When all information is correct, click the [Create] button to create the Action Rule.
Conclusion
In this article, you learned how to create an Azure Monitor Alert Rule.