Registering an application in Azure Active Directory (AAD) allows the Microsoft Identity Platform to manage access to that application. Registration establishes trust between the application and the client.
To register an application, navigate to the Azure Portal, log in, and select the [Azure Active Directory] button (Fig. 1) in the left menu (or search for Azure Active Directory in the search box at the top of the portal.
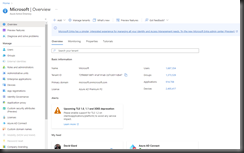
The Azure Active Directory "Overview" blade displays, as shown in Fig. 2.
Click the [App registrations] button (Fig. 3) in the left menu to display the "App registrations" blade, as shown in Fig. 4.
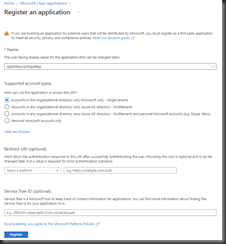
Click the [New registration] button (Fig. 5) to display the "Register an application" dialogue, as shown in Fig. 6.
At the "Name" field, enter a name for this registration. If I am registering one application, I like to include the name of that application, followed by "AppReg". Whatever you choose, it should be easily identifiable, so you can pick it out of a list of app registrations.
At the "Supported account types" prompt, select the appropriate radio button depending on where the login accounts of the client reside. You can accept logins from only the current Azure Active Directory, from this and other Active Directories, from Active Directories plus non-AAD Microsoft accounts, and only from non-AAD Microsoft accounts.
The "Redirect URI" section is optional. It is most useful in web applications to indicate to which page the system redirects a user after a successful authentication. If you are unsure, you can leave this empty and configure it later.
The "Service Tree ID" field is only relevant if you are using the Microsoft Service Tree service, which allows you to relate multiple apps and services, making them more easily searchable by your users.
If you have a Service Tree account, enter the ID in this field.
After completing the dialogue, click the [Register] button to register the application. It typically takes less than a minute to register an application.
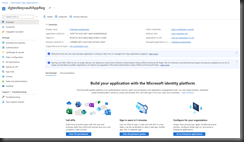
After the registration is complete, the app registration page displays, as shown in Fig. 7.
The next steps depend on the type of application you are registering. I will cover some scenarios in future articles; but you can get a head start by clicking the appropriate link under "Build your application with the Microsoft identity platform".


