Azure Media Services can analyze an audio or video file and transcribe speech into text. You can then take the generated files and provide synchronized captioning for your video.
Microsoft Identity Platform is a set of authentication service, open-source libraries, and application management tools. Christos Matskas describes these tools and how to use them to make your application more secure.
Fragile Things is a collection of 25 short stories and 7 poems written by Neil Gaiman.
Most of the stories have dark - even macabre - themes. One tells how demons are created in Hell; in another, a man discovers that he has been living his entire life in a computer simulation; still another involves a boy's sexual enslavement by an ultra-rich man.
Some are more fully fleshed out than others, as if Gaiman began a longer novel before giving up; but these are worth including because Gaiman has such a gift for language and knows how to tell a story, even if it is a partial story.
Each story is independent of the others, but some exist in the same universe. For example, the wealthy Mr. Alice and his employee Mr. Smith appear in two different stories.
A couple satires or homages to the writings of other authors - C.S. Lewis's The Chronicles of Narnia and Arthur Conan Doyle's Sherlock Holmes; and a few are inspired by art and music heard by Gaiman.
My favourite entry was the longest and final story in the collection - The Monarch of the Glen, which featured Shadow of American Gods and takes place a couple years after that novel.
Nearly everything in this book has appeared elsewhere and I had already read a few of the stories, but I enjoyed them again this time around.
Learn how to use Azure Media Services to apply Artificial Intelligence and Machine Learning to a video, analyzing such things as face detection, speech-to-text, object detection, and optical character recognition
Richard Taylor is working on a system to process revenue received by tech giant Microsoft. He discusses the challenge in building and maintaining a large system like this and in migrating it to Azure.
Tommy James and the Shondells turned out hit after hit in the 1960s. But James saw very little of the royalties generated by sales of his records. That money was controlled by crime boss Morris Levy, who signed a teenage James to a deal with his Roulette Records in 1966. The band went on to release two #1 records and a dozen Top 40 singles over the next 5 years.
But Levy was notorious for non-payment of debts including tens of millions of royalties owed to James. James was forced to earn his money through constant touring and profited very little off the sale of his records.
Despite this betrayal, James and Levy maintained a close relationship throughout much of their lives. Levy was excellent at promoting James's music and James enjoyed a great deal of artistic freedom as Roulette's biggest star. James's career also benefited from Levy's strong-arm tactics: He would often bully songwriters into saving their best work for his artists.
Me, the Mob, and the Music: One Helluva Ride with Tommy James and the Shondells is Tommy James's story of life in the spotlight. It contains the usual anecdotes about women and booze and drugs that seem to be part of every rocker's life. But these stories are secondary to his interactions with Roulette and Levy.
The story climaxes in a gang war that sees Levy fleeing the country and James fearing for his life.
One wonders why James continued his relationship with Levy when he was treated so unfairly. Did he feel it was unsafe for him to leave? Was he a victim of Stockholm Syndrome? Did the career advantages of associating with Roulette outweighed the financial disadvantages?
One wonders if the corruption at Roulette was a microcosm of the corruption in the entire music industry in the 1960s; and if that corruption continues today.
One wonders if Tommy James ever received all the royalties he was due.
Despite the unanswered questions, this book was an enjoyable read about an unlikely hitmaker and his adventures with the underbelly of the industry.
An overprotective mother left him straddled with guilt and an Oedipal complex. His childhood memories are dominated by unpleasant bodily functions - his father complaining of persistent constipation; his mother accidentally spilling a drop of menstrual blood on the kitchen floor; his own inability to wipe himself completely or to control his masturbation.
Portnoy was raised by Jewish parents, grew up in a Jewish neighborhood, attended a Jewish school, and all his friends were Jewish. As an adult, he became obsessed with seducing attractive non-Jewish women ("shikses", as he calls them). But Portnoy has no interest in a real relationship. When referring to his past lovers, he is more likely to call them by a nickname than to use their real name. He calls his latest lover "The Monkey" after a past sexual incident she confessed to him. This is just one way in which he dehumanizes women, treating them only as sex objects. The Monkey is absurdly ignorant, but Portnoy stays with her because she is beautiful and good in bed; Portnoy is overtly misogynistic, but The Monkey stays with him because she hopes that he will marry her.
Portnoy's Complaint by Philip Roth is a satirical confession of a 33-year-old sex addict, who recognizes his self-destructive behavior and feels extreme guilt over it; but is powerless to correct these flaws. Despite his numerous faults and our very different upbringings, I was able to relate to his life.
The story is humorous, but crude. It is crude, but humorous.
In previous articles, I showed how to use Azure Media Services (AMS) to work with video that you upload. In this article, I will show how to broadcast a live event using AMS.
Before you get started, you will need some streaming software. For the demo in this article, I used Wirecast from Telestream. Telestream offers a free version, which is good for learning and demos but not for production, as it places a watermark on all streaming videos.
You will need to create an Azure Media Services account, as described in this article.
After the Media Service is created, navigate to the Azure Portal and to your Azure Media Services account, as shown in Fig. 1.
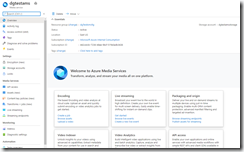
Fig. 1
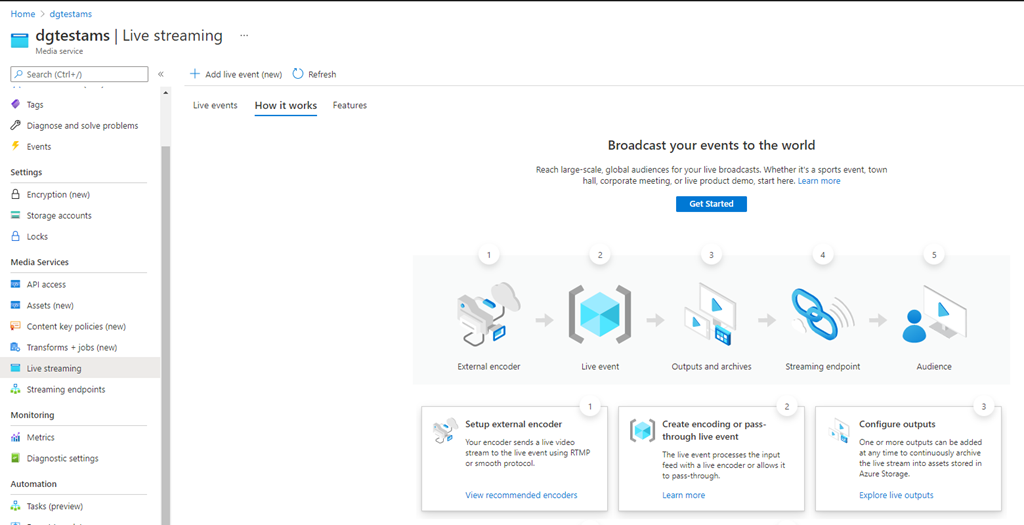
Then, select "Live streaming" from the left menu to open the "Live streaming" blade, as shown in Fig. 2.
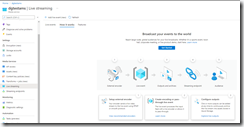
Fig. 2
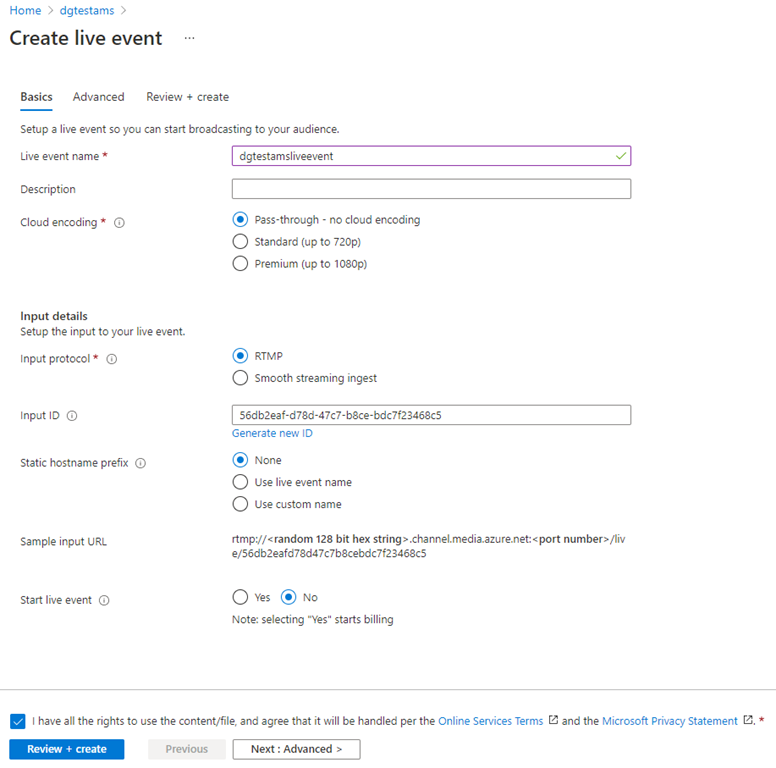
Click the [Add live event] button (Fig. 3) to open the "Create live event dialog", as shown in Fig. 4.
Fig. 3
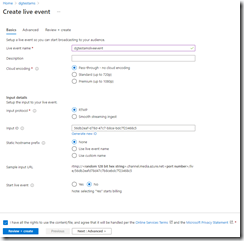
Fig. 4
At the "Live event name" field, enter a name for your event.
You may optionally enter a description and change the Encoding, Input protocol, Input ID, or Static hostname prefix.
Check the "I have all the rights..." checkbox to indicate you are not streaming content owned by anyone other than yourself.
Click the [Review + create] button to display the summary page, as shown in Fig. 5.
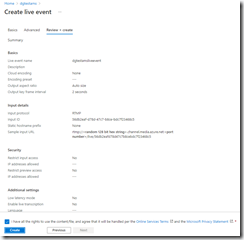
Fig. 5
If any validation errors display, return to the "Basics" page, and correct them.
Click the [Create] button to create the live event.
When the event is created, you will return to the "Live streaming" blade with your event listed, as shown in Fig. 6.
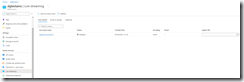
Fig. 6
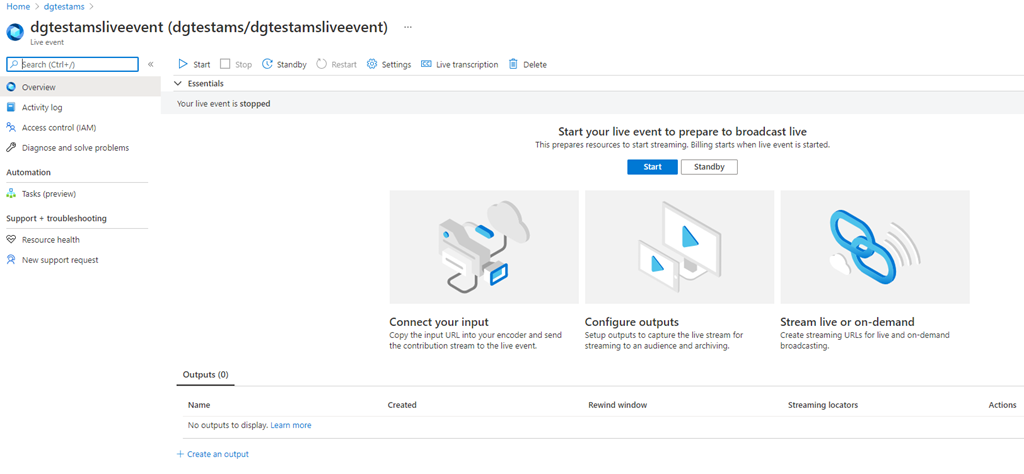
Click the event name link to display the event details, as shown in Fig. 7.
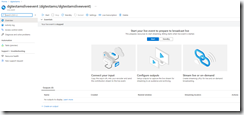
Fig. 7
Click the [Start] button (Fig. 8) and click [Start] on the confirmation popup (Fig. 9) to start the event.
Fig. 8

Fig. 9
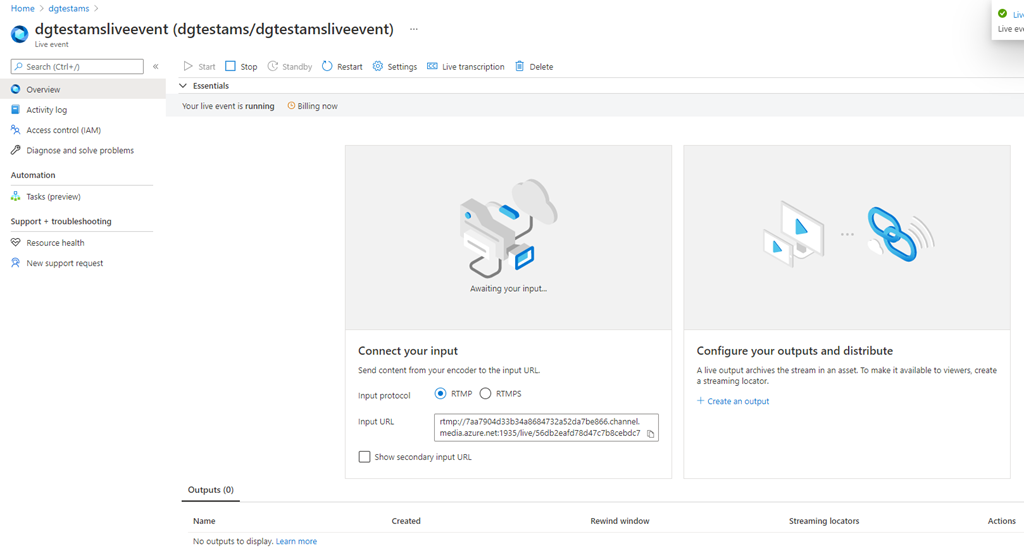
When the event is started, the event details page will show information about the input, as shown in Fig. 10.
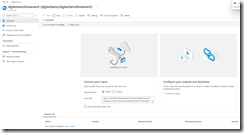
Fig. 10
The "Input URL" textbox (Fig 11) displays a URL that you will need in your streaming software. Copy this URL and save it somewhere. You will need it in your streaming software.

Fig. 11
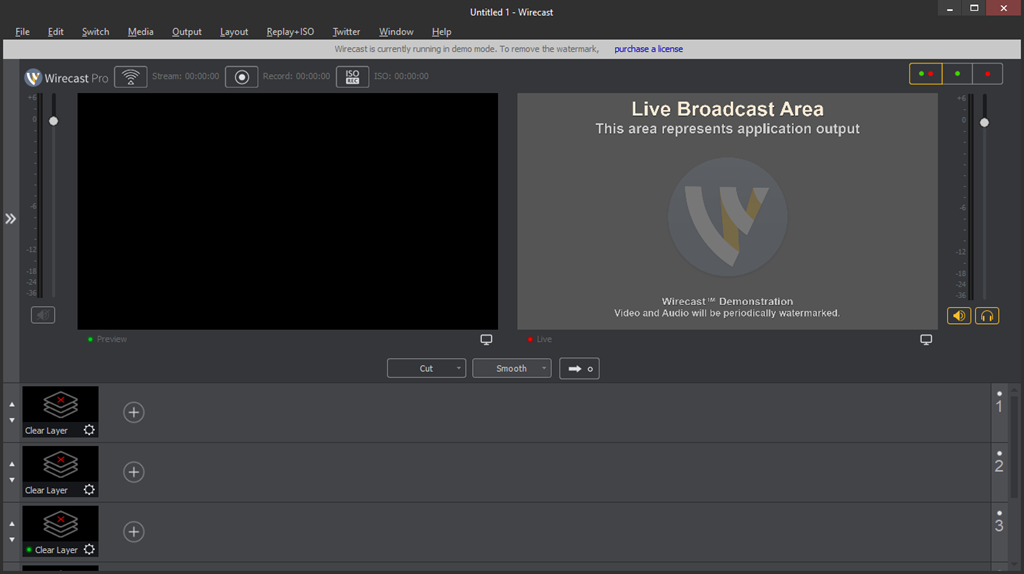
For the next part, you will need some streaming software. I used Wirecast from Telestream. The user interface of the free demo version is shown in Fig. 12.
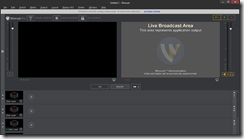
Fig. 12
The following steps are specific to Wirecast, but other streaming software will have similar steps.
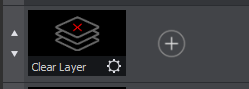
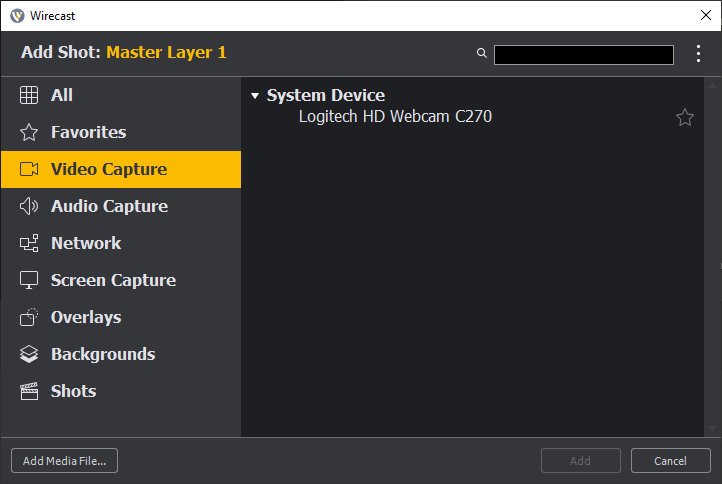
Click the [+] button on the first layer (Fig. 13) to open the "Add Shot" dialog, as shown in Fig. 14.
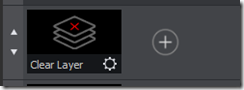
Fig. 13
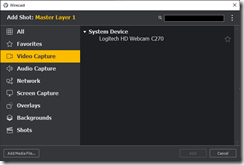
Fig. 14
I chose to share the image captured by my webcam, but you can share screen captures or videos, if you like. The image you are capturing will be set as a "preview". Make this same layer broadcast live by clicking the "Live" button (Fig. 15).
Fig. 15
Now, configure your streaming software to send its live video to your AMS Live Streaming event. Select Output | Output Settings... from the menu to open the Output dialog, as shown in Fig. 16.
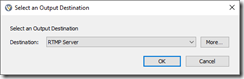
Fig. 16
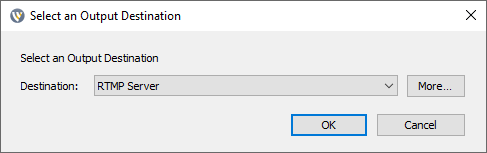
Select "RTMP Server" from the "Destination" dropdown and click the [OK] button to open the "Output settings" dialog, as shown in Fig. 17.
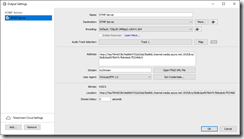
Fig. 17
In the "Address" text box, paste the Input URL that you copied from the AMS Live Stream event. Click the [OK] button to close the dialog.
Your UI should look similar to the following.
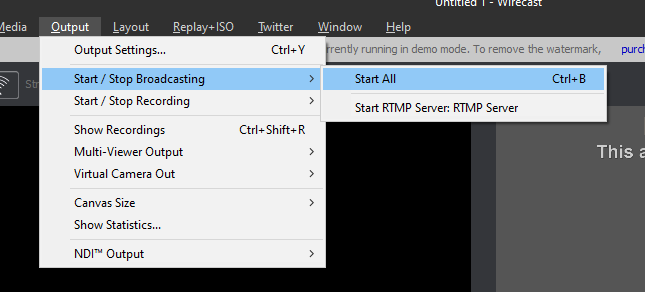
To begin streaming, select Output | Start / Stop Broadcasting | Start All from the menu, as shown in Fig. 18.
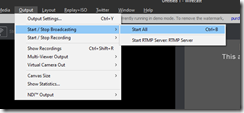
Fig. 18
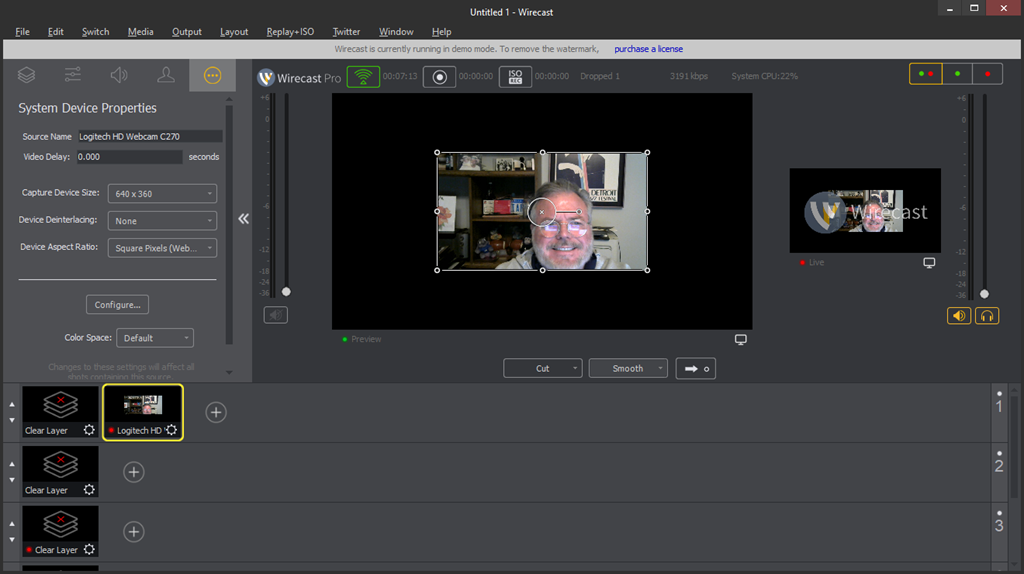
Your UI should look similar to Fig. 19.
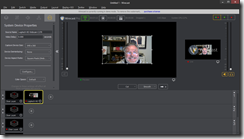
Fig. 19
Return to the Azure Media Services live event. You should see a preview of what you are broadcasting from your streaming software, as shown in Fig. 20. Refresh the page if you do not see it. There may be a few seconds delay between what is captured and what is displayed.
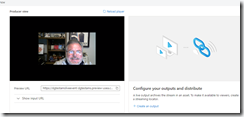
Fig. 20
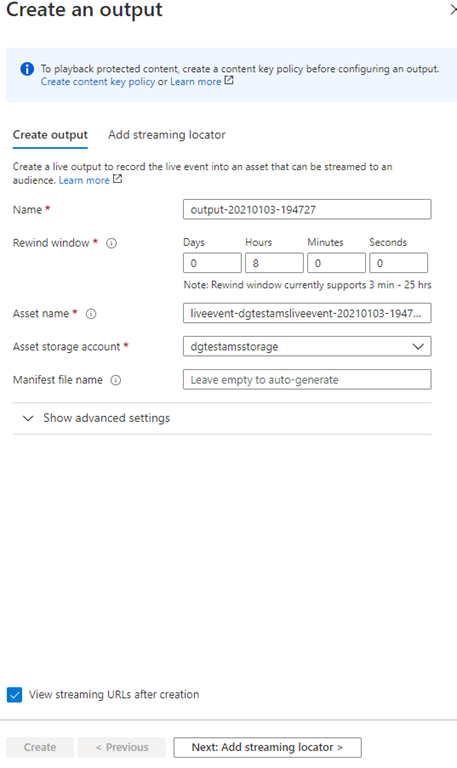
Click the [+ Create an output] button (Fig. 21) to open the "Create an output" dialog with the "Create output" tab selected, as shown in Fig. 22.
Fig. 21
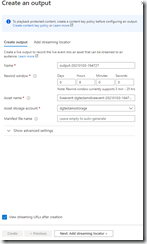
Fig. 22
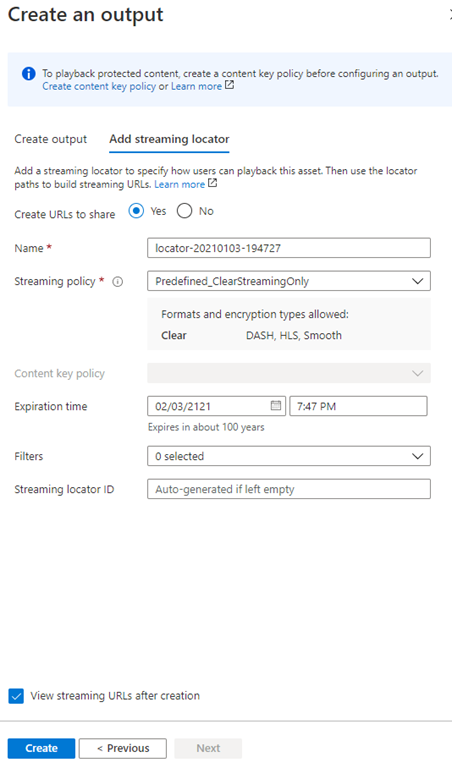
Verify the information on this tab; then, click the [Next: Add streaming locator] button to advance to the "Add streaming locator" tab, as shown in Fig. 23.
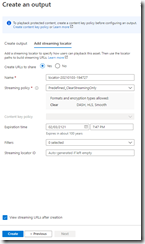
Fig. 23
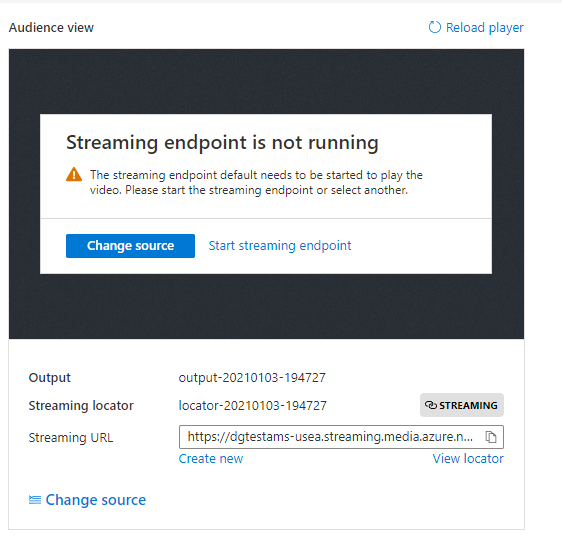
Verify the information on this tab; then, click the [Create] button to create a streaming locator and endpoint. You will return to the live event blades, as shown in Fig. 24.
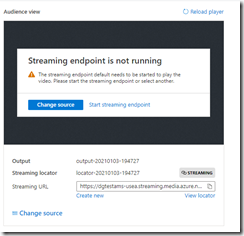
Fig. 24
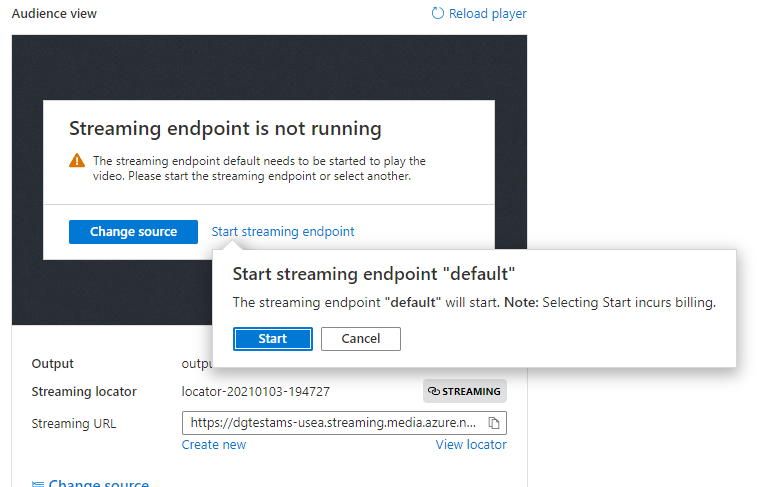
Click the [Start streaming endpoint] button, then click the confirmation [Start] button, as shown in Fig. 25.
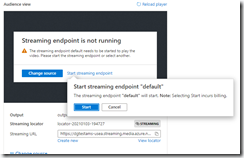
Fig. 25
After the streaming endpoint is started, copy the "Streaming URL" textbox contents (Fig. 26). You will need this to create an output page for viewers to watch your live event.

Fig. 26
Create and launch a web page with the HTML in Listing 1.
Listing 1:
lang="en">Azure Media Services Demo
href="https://amp.azure.net/libs/amp/2.3.6/skins/amp-default/azuremediaplayer.min.css"rel="stylesheet">Video
where STREAMING_URL is the Streaming URL you copied from the live event textbox above.
Listing 2 shows an example with the URL filled in.
Listing 2:
lang="en">Azure Media Services Demo
href="https://amp.azure.net/libs/amp/2.3.6/skins/amp-default/azuremediaplayer.min.css"rel="stylesheet">Video
With the live event running, your web page should display something similar to Fig. 27.
Fig. 27
If this is published on the web, viewers will be able to watch your live stream from just about anywhere.
Be sure to stop your live event when you finish broadcasting in order to avoid unnecessary charges.
In this article, I showed you how to create a live streaming event using Azure Media Services.
Kevin Pilch describes gRPC - an open source system for making remote calls across processes and/or machines - and the .NET Core implementation of this system.
2/7 Today I am grateful for the imagination of Jon Favreau.
2/6 Today I am grateful to learn from my teammates.
2/5 Today I am grateful to watch yesterday's snowstorm from my warm safe home.
2/4 Today I am grateful for a productive day yesterday.
2/3 Today I am grateful for: -a chance to catch up with J for the first time in months -Christina, who answered my questions about Photoshop and Lightroom
2/2 Today I am grateful for 3 years in my current home.
2/1 Today I am grateful to go to the gym yesterday for the first time in months.
1/31 Today I am grateful for online Mass.
1/30 Today I am grateful for home-cooked meals.
1/29 Today I am grateful to deliver my first presentation of the year last night.
1/28 Today I am grateful for technical support from co-workers.
1/27 Today I am grateful to be a guest yesterday on the Visual Studio Toolbox show.
1/26 Today I am grateful for all the interviews with interesting people I've scheduled for #TechnologyAndFriends
1/25 Today I am grateful for a visit to the Indianapolis Art Museum yesterday.
1/24 Today I am grateful for a walk around Zionsville and Carmel yesterday.
1/23 Today I am grateful for an upgraded hotel room.
1/22 Today I am grateful for funny memes.
1/21 Today I am grateful to see so much hope and optimism expressed by so many people about yesterday's historic events.
1/20 Today I am grateful for a call from my cousin Kevin last night.
1/19 Today I am grateful for my new drone.
1/18 Today I am grateful for the legacy of Rev. Dr. Martin Luther King, Jr, who understood that non-violence was not a weakness.
1/17 Today I am grateful for a much-needed mid-afternoon nap yesterday.
1/16 Today I am grateful to everyone who shared photos of their dogs yesterday.
1/15 Today I am grateful for dogs.
1/14 Today I am grateful to spend the past few evenings sorting through photographs and papers of my late mother.
1/13 Today I am grateful for lots of advice yesterday on how to cook pasta.
1/12 Today I am grateful to restaurants who have worked to make outdoor dining safer in Chicago winter.
1/11 Today I am grateful for my new cabinet/end table.
1/10 Today I am grateful for Indian food.
1/9 Today I am grateful for good health.
1/8 Today I am grateful for my new laptop.
1/7 Today I am grateful for dinner with Tim and Natale last night before they drive to Austin tomorrow.
1/6 Today I am grateful for a virtual lunch with Annie yesterday.
1/5 Today I am grateful for a regular exercise routine.
1/4 Today I am grateful to return to work after an extended vacation.
Learn the capabilities of Azure Media Services, how to create an Azure Media Services account, and how to add audio and video files as Assets in that account.
In a previous article, I showed how to embed into a web page a video encoded with Azure Media Services (AMS).
In this article, I will show you how to add captions to that video.
In my last article, I showed you how to perform audio transcription with Azure Media Services using an Audio Transcription Job. Among other things, this generates a transcript.vtt file with speech-to-text data, listing anything spoken in the video, along with the time at which the words were spoken.
You can also generate this data by using the "Video and Audio Analyzer" job, as described in this article.
For this work, the transcript.vtt file must be in the same folder as the video(s) playing on your web page. A simple way to do this is to download the file from its current container and upload it into the Encoded Video container.
Navigate to the Azure Portal and to your Azure Media Services account, as shown in Fig. 1.
Fig. 1
Then, select "Assets" from the left menu to open the "Assets" blade, as shown in Fig. 2.
Fig. 2
Select the Output Asset containing Audio Transcription or Analyzer data to display the Asset details page, as shown in Fig. 3.
Fig. 3
Click the link next to the "Storage container" label (Fig. 4) to open the Storage Blob container associated with this asset, as shown in Fig. 5. This container should open in a new browser tab.
Fig. 4
Fig. 5
Click the "transcript.vtt" row to open the blob blade showing details of the transcript.vtt blob, as shown in Fig. 6.
Fig. 6
Click the download button (Fig. 7) in the top toolbar and save the transcript.vtt file on your local disc. Note where you save this file.
Fig. 7
Listing 1 shows a sample VTT file.
Listing 1
WEBVTT
NOTE duration:"00:00:11.0290000"
NOTE language:en-us
NOTE Confidence: 0.90088177
00:00:00.000 --> 00:00:04.956
This video is about Azure Media Services
NOTE Confidence: 0.90088177
00:00:04.956 --> 00:00:11.029
and Azure Media Services are. Awesome.
Navigate again to the "Assets" blade, as shown in Fig. 8.
Fig. 8
In the row of the Analyzer or Audio Transcription asset, click the link in the "Storage link" column to open the container associated with this asset, as shown in Fig. 9.
Fig. 9
Click the upload button (Fig. 10) to open the "Upload blob" dialog, as shown in Fig. 11.
Fig. 10
Fig. 11
Click the "Select a file" field to open a file navigation dialog. Navigate to the older where you stored transcript.vtt and select this file. Then, click the [Upload]
When the dialog closes, you should return to the Container blade and transcript.vtt should now be listed, as shown in Fig. 12.
Fig. 12
Click to open the asset containing the video(s) used to generate the VTT file, as shown in Fig. 13.
Fig. 13
Start the Streaming Locator, if it is not already started. If you have not yet created a Streaming Locator, this article walks you through it.
Copy the Streaming URL and save it somewhere. It should begin with "https://" and end with "manifest".
As a reminder, Listing 2 shows the HTML to embed an AMS video in a web page. This is the code shown in this article.
where VTT_URL is replaced with a URL consisting of the same domain and folder as in the src attribute of the source tag, but with "transcript.vtt" as the file name.
Listing 4shows an example using an Azure Media Services account that I have since deleted.
Listing 4:
lang="en">Azure Media Services Demo
href="https://amp.azure.net/libs/amp/2.3.6/skins/amp-default/azuremediaplayer.min.css"rel="stylesheet">Video
Add this HTML file to any web server and navigate to its URL using a web browser. You should see a page with your video embedded and with captions displaying at the bottom of the video, as shown in Fig. 14.
Fig. 14
In this article, I showed you how to include captions in an Azure Media Services video embedded in a web page.
In a previous article, I showed you how to use Azure Media Services (AMS) to analyze a video. Among other things, this analysis performs audio transcription to perform text to speech on your video. This outputs 2 files with the spoken text in the audio track of your video.
You may want to only do audio transcription. If you are not interested in the other analysis output, it does not make sense to spend the time or compute on analyzing a video for the other features. AMS allows you to perform only Audio Transcription and eschew the other analysis.
Navigate to the Azure Portal and to your Azure Media Services account, as shown in Fig. 1.
Fig. 1
Then, select "Assets" from the left menu to open the "Assets" blade, as shown in Fig. 2.
Fig. 2
Select the Input Asset you uploaded to display the Asset details page, as shown in Fig. 3.
Fig. 3
Click the [Add job] button (Fig. 4) to display the "Create a job" dialog, as shown in Fig. 5.
Fig. 4
Fig. 5
At the "Transform" field, select the "Create new" radio button.
At the "Transform name" textbox, enter a name to help you identify this Transform.
At the "Description" field, you may optionally enter some text to describe what this transform will do.
At the "Transform type" field, select the "Audio transcription" radio button.
At the "Analysis type" field, select the "Video and audio" radio button.
The "Automatic language detection" section allows you to either specify the audio language or allow AMS to figure this out. If you know the language, select the "No" radio button and select the language from the dropdown list. If you are unsure of the language, select the "Yes" radio button to allow AMS to infer it.
The "Configure Output" section allows you to specify where the generated output assets will be stored.
At the "Output asset name" field, enter a descriptive name for the output asset. AMS will suggest a name, but I prefer the name of the Input Asset, followed by "_AudioTranscription" or something more descriptive.
At the "Asset storage account" dropdown, select the Azure Storage Account in which to save a container and the blob files associated with the output asset.
At the job name, enter a descriptive name for this job. A descriptive name is helpful if you have many jobs running and want to identify this one.
At the "Job priority" dropdown, select the priority in which this job should run. The options are "High", "Low", and "Normal". I generally leave this as "Normal" unless I have a reason to change it. A High priority job will run before a Normal priority job, which will run before a Low priority job.
Click the [Create] button to create the job and queue it to be run.
You can check the status of the job by selecting "Transforms + jobs" from the left menu to open the "Transforms + jobs" blade (Fig. 6) and expanding the job you just created (Fig. 7).
Fig. 6
Fig. 7
The state column tells you whether the job is queued, running, or finished.
Click the name of the job to display details about the job, as shown in Fig. 8.
Fig. 8
After the job finishes, when you return to the "Assets" blade, you will see the new output Asset listed, as shown in Fig. 9.
Fig. 9
Click the name of the asset you just created to display the Asset Details blade, as shown in Fig. 10.
Fig. 10
Click the link to the left of "Storage container" to view the files in Blob storage, as shown in Fig. 11.
Fig. 11
The speech-to-text output can be found in the files transcript.ttml and transcript.vtt. These two files contain the same information - words spoken in the video and times they were spoken - but they are in different standard formats.
Listing 1 shows a sample TTML file for a short video, while Listing 2 shows a VTT file for the same video.
Listing 1:
xml:lang="en-US"xmlns="http://www.w3.org/ns/ttml"xmlns:tts="http://www.w3.org/ns/ttml#styling"xmlns:ttm="http://www.w3.org/ns/ttml#metadata">Copyright (c) 2013 Microsoft Corporation. All rights reserved.